HP LaserJet 5si HP LaserJet 5Si user guide - Page 130
Optional 2000-Sheet Input Tray Tray 4
 |
View all HP LaserJet 5si manuals
Add to My Manuals
Save this manual to your list of manuals |
Page 130 highlights
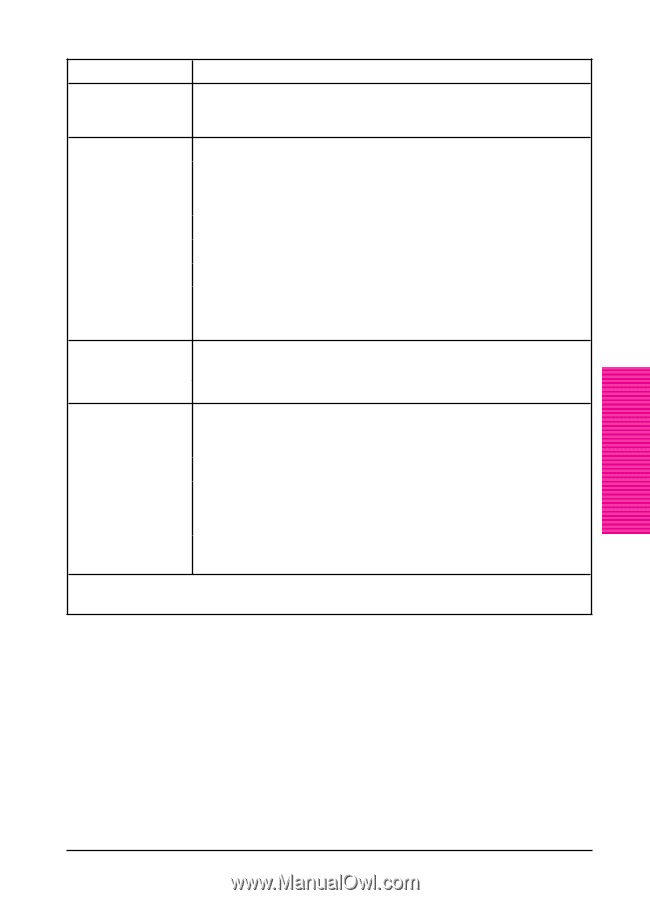
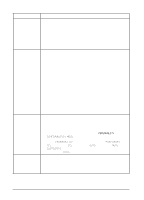
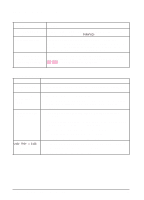
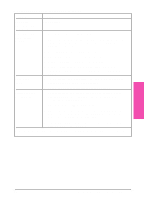
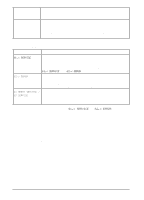
Optional 2000-Sheet Input Tray (Tray 4) Situation Solution Media size adjustment and installation See Chapter 5. Paper jams and paper feeding problems 1. See "Paper Jams" later in this chapter. 2. Ensure that the paper weight is within recommended range. See Chapter 5 for media specifications (Table 5-1) and media use guidelines (Table 5-2). 3. Don't pull a paper tray out while printing. 4. Check cables and connectors between units. 5. Make sure media is fully and correctly loaded. 6. Make sure the paper guides are adjusted properly, and not skewed. See Chapter 5 for more information on adjusting the guides. Cannot access Tray 4. 1. Ensure that the paper tray guides are adjusted correctly for the paper size you are using. (See Chapter 5.) 2. Check Tray Menu for correct type of paper in Tray 4. Printer does not recognize Tray 4. 1. Ensure the 2000-Sheet Input Tray has been installed in your printer driver. Refer to Chapter 3 for more information on accessing the printer driver. 2. Switch the printer OFF then ON again. 3. Ensure that the cable from the Tray 4 base is plugged into the printer. If not, turn the power OFF and plug the cable into the printer, then switch the printer ON again. 4. If the printer still does not recognize Tray 4, contact your dealer or authorized HP service provider. Refer also to "Tray 2 and Tray 3" earlier in this section. The problems listed may occur in Tray 4, also. Maintenance & 7 Troubleshooting EN Maintenance and Troubleshooting 7-17
-
 1
1 -
2
-
3
-
4
-
5
-
6
-
7
-
8
-
9
-
10
-
11
-
12
-
13
-
14
-
15
-
16
-
17
-
18
-
19
-
20
-
21
-
22
-
23
-
24
-
25
-
26
-
27
-
28
-
29
-
30
-
31
-
32
-
33
-
34
-
35
-
36
-
37
-
38
-
39
-
40
-
41
-
42
-
43
-
44
-
45
-
46
-
47
-
48
-
49
-
50
-
51
-
52
-
53
-
54
-
55
-
56
-
57
-
58
-
59
-
60
-
61
-
62
-
63
-
64
-
65
-
66
-
67
-
68
-
69
-
70
-
71
-
72
-
73
-
74
-
75
-
76
-
77
-
78
-
79
-
80
-
81
-
82
-
83
-
84
-
85
-
86
-
87
-
88
-
89
-
90
-
91
-
92
-
93
-
94
-
95
-
96
-
97
-
98
-
99
-
100
-
101
-
102
-
103
-
104
-
105
-
106
-
107
-
108
-
109
-
110
-
111
-
112
-
113
-
114
-
115
-
116
-
117
-
118
-
119
-
120
-
121
-
122
-
123
-
124
-
 125
125 -
 126
126 -
 127
127 -
 128
128 -
 129
129 -
 130
130 -
 131
131 -
 132
132 -
 133
133 -
 134
134 -
 135
135 -
136
-
137
-
138
-
139
-
140
-
141
-
142
-
143
-
144
-
145
-
146
-
147
-
148
-
149
-
150
-
151
-
152
-
153
-
154
-
155
-
156
-
157
-
158
-
159
-
160
-
161
-
162
-
163
-
164
-
165
-
166
-
167
-
168
-
169
-
170
-
171
-
172
-
173
-
174
-
175
-
176
-
177
-
178
-
179
-
180
-
181
-
182
-
183
-
184
-
185
-
186
-
187
-
188
-
189
-
190
-
191
-
192
-
193
-
194
-
195
-
196
-
197
-
198
-
199
-
200
-
201
-
202
-
203
 |
 |