HP LaserJet 5si HP LaserJet 5Si user guide - Page 138
Jam Recovery=on - cleaning
 |
View all HP LaserJet 5si manuals
Add to My Manuals
Save this manual to your list of manuals |
Page 138 highlights
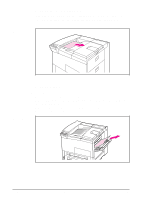
Note Open and close all printer covers to clear the paper jam message. After removing a sheet of paper you may need to check other areas to ensure that all paper has been removed. Whenever a sheet of jammed paper becomes badly shredded it is a good idea to carefully piece all parts together to be sure you haven't overlooked some small part. All portions of a jammed piece of paper must be removed or you may run into repeated jams. If after you clear a paper jam (by following the procedures on the next few pages) the printer still jams, there are a few things you can do: • Use the JAM RECOVERY=ON menu item under the PostScript Menu. The printer will attempt to automatically recover from paper jams. • Execute a formfeed from the computer or the printer control panel (a menu item under the Job Control Menu). A formfeed may flush any paper or envelopes left in the printer. • Check to make sure you have located and removed all scraps of paper from inside the printer. • Use the Error Log Page and Error Codes to aid you in isolating where the errors are occurring. (See Chapter 4 "Error Log Page," and the "Printer Messages" table at the end of this chapter.) • Ensure the area under the registration in not jammed. Remove the toner cartridge and lift the two green tabs located below the toner cartridge area. Also refer to "Repeated Paper Jams" later in this chapter. Paper jams occur most often when: • Paper trays are not correctly loaded (see Chapter 5, "Print Tasks"). • Your print media does not meet the specifications listed in Chapter 5. • The media is in poor condition. • The printer needs cleaning. Maintenance & 7 Troubleshooting EN Maintenance and Troubleshooting 7-25
-
 1
1 -
2
-
3
-
4
-
5
-
6
-
7
-
8
-
9
-
10
-
11
-
12
-
13
-
14
-
15
-
16
-
17
-
18
-
19
-
20
-
21
-
22
-
23
-
24
-
25
-
26
-
27
-
28
-
29
-
30
-
31
-
32
-
33
-
34
-
35
-
36
-
37
-
38
-
39
-
40
-
41
-
42
-
43
-
44
-
45
-
46
-
47
-
48
-
49
-
50
-
51
-
52
-
53
-
54
-
55
-
56
-
57
-
58
-
59
-
60
-
61
-
62
-
63
-
64
-
65
-
66
-
67
-
68
-
69
-
70
-
71
-
72
-
73
-
74
-
75
-
76
-
77
-
78
-
79
-
80
-
81
-
82
-
83
-
84
-
85
-
86
-
87
-
88
-
89
-
90
-
91
-
92
-
93
-
94
-
95
-
96
-
97
-
98
-
99
-
100
-
101
-
102
-
103
-
104
-
105
-
106
-
107
-
108
-
109
-
110
-
111
-
112
-
113
-
114
-
115
-
116
-
117
-
118
-
119
-
120
-
121
-
122
-
123
-
124
-
125
-
126
-
127
-
128
-
129
-
130
-
131
-
132
-
 133
133 -
 134
134 -
 135
135 -
 136
136 -
 137
137 -
 138
138 -
 139
139 -
 140
140 -
 141
141 -
 142
142 -
 143
143 -
144
-
145
-
146
-
147
-
148
-
149
-
150
-
151
-
152
-
153
-
154
-
155
-
156
-
157
-
158
-
159
-
160
-
161
-
162
-
163
-
164
-
165
-
166
-
167
-
168
-
169
-
170
-
171
-
172
-
173
-
174
-
175
-
176
-
177
-
178
-
179
-
180
-
181
-
182
-
183
-
184
-
185
-
186
-
187
-
188
-
189
-
190
-
191
-
192
-
193
-
194
-
195
-
196
-
197
-
198
-
199
-
200
-
201
-
202
-
203
 |
 |