HP LaserJet 5si HP LaserJet 5Si user guide - Page 110
Toner Smear, Background Gray Toner Shading, Repetitive Defects - fuser roller
 |
View all HP LaserJet 5si manuals
Add to My Manuals
Save this manual to your list of manuals |
Page 110 highlights
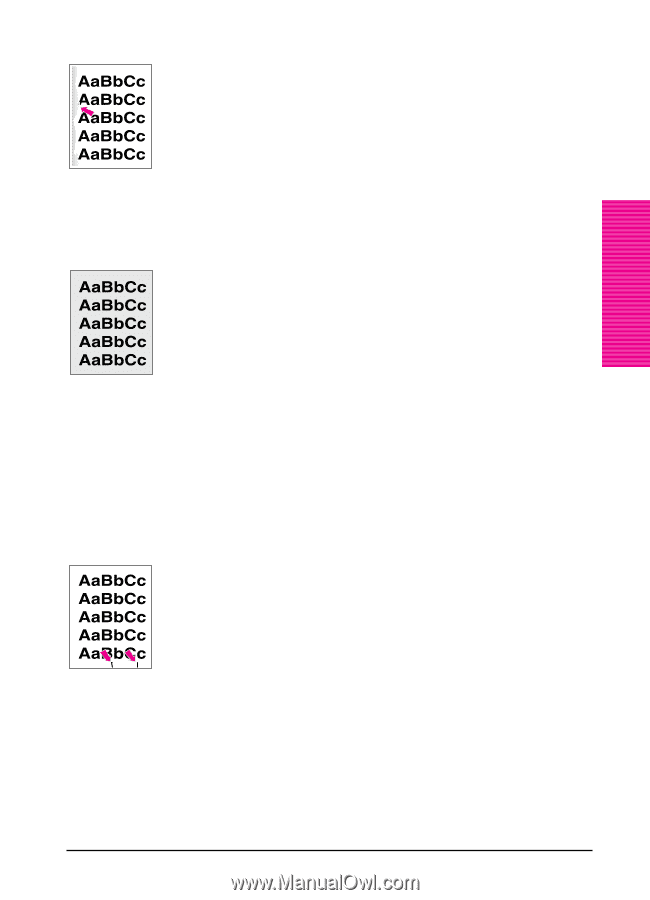
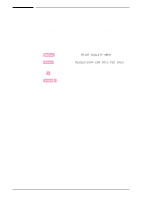
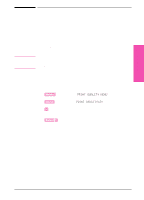
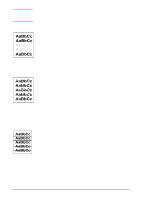
Toner Smear If toner smears appear on the leading edge (as it passes through the printer) of the paper, the paper guides are dirty. Clean the printer as described in Chapter 7. If toner on the paper is loose or can be wiped off easily, your fuser may be damaged. Contact your authorized HP dealer or your HP service representative. 6 Print Quality Background Gray Toner Shading If the amount of background toner shading becomes unacceptable: • Lower the density setting. (See "Print Density" earlier in this chapter.) This decreases the amount of background shading. • Replace the toner cartridge. • Change the paper to a lighter basis weight. • Check the printer's environment; very dry (low humidity) conditions can increase the amount of background shading. If these procedures do not fix the problem, the transfer roller may need to be replaced. Contact your authorized HP dealer or your HP service representative. Repetitive Defects If any of the following marks appear repeatedly on the printed side of the page, replace the toner cartridge: • If a repetitive mark occurs every 3 3/4 inches (94 mm) in the direction the paper passes through the printer, the toner cartridge drum is damaged. • If a repetitive mark occurs every 2 inches (51 mm) in the direction the paper passes through the printer, the developer roller is damaged. • If black lines occur every 1 1/2 inches (38 mm) on the back of the page, the charger roller is damaged. If defects occur every 2 3/8 inches (61 mm) on the back of the page, the transfer roller has toner on it. This problem will likely correct itself after a few pages. EN Print Quality 6-7
-
 1
1 -
2
-
3
-
4
-
5
-
6
-
7
-
8
-
9
-
10
-
11
-
12
-
13
-
14
-
15
-
16
-
17
-
18
-
19
-
20
-
21
-
22
-
23
-
24
-
25
-
26
-
27
-
28
-
29
-
30
-
31
-
32
-
33
-
34
-
35
-
36
-
37
-
38
-
39
-
40
-
41
-
42
-
43
-
44
-
45
-
46
-
47
-
48
-
49
-
50
-
51
-
52
-
53
-
54
-
55
-
56
-
57
-
58
-
59
-
60
-
61
-
62
-
63
-
64
-
65
-
66
-
67
-
68
-
69
-
70
-
71
-
72
-
73
-
74
-
75
-
76
-
77
-
78
-
79
-
80
-
81
-
82
-
83
-
84
-
85
-
86
-
87
-
88
-
89
-
90
-
91
-
92
-
93
-
94
-
95
-
96
-
97
-
98
-
99
-
100
-
101
-
102
-
103
-
104
-
 105
105 -
 106
106 -
 107
107 -
 108
108 -
 109
109 -
 110
110 -
 111
111 -
 112
112 -
 113
113 -
 114
114 -
 115
115 -
116
-
117
-
118
-
119
-
120
-
121
-
122
-
123
-
124
-
125
-
126
-
127
-
128
-
129
-
130
-
131
-
132
-
133
-
134
-
135
-
136
-
137
-
138
-
139
-
140
-
141
-
142
-
143
-
144
-
145
-
146
-
147
-
148
-
149
-
150
-
151
-
152
-
153
-
154
-
155
-
156
-
157
-
158
-
159
-
160
-
161
-
162
-
163
-
164
-
165
-
166
-
167
-
168
-
169
-
170
-
171
-
172
-
173
-
174
-
175
-
176
-
177
-
178
-
179
-
180
-
181
-
182
-
183
-
184
-
185
-
186
-
187
-
188
-
189
-
190
-
191
-
192
-
193
-
194
-
195
-
196
-
197
-
198
-
199
-
200
-
201
-
202
-
203
 |
 |