IBM 2170275 Reference Guide - Page 103
Adding and removing drives, Installing or removing a drive in a minitower system, system
 |
View all IBM 2170275 manuals
Add to My Manuals
Save this manual to your list of manuals |
Page 103 highlights
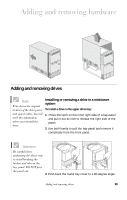
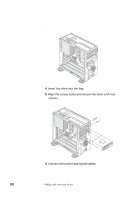
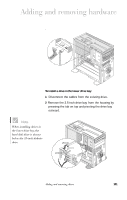
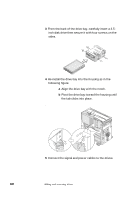
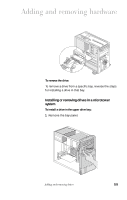
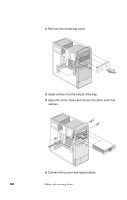
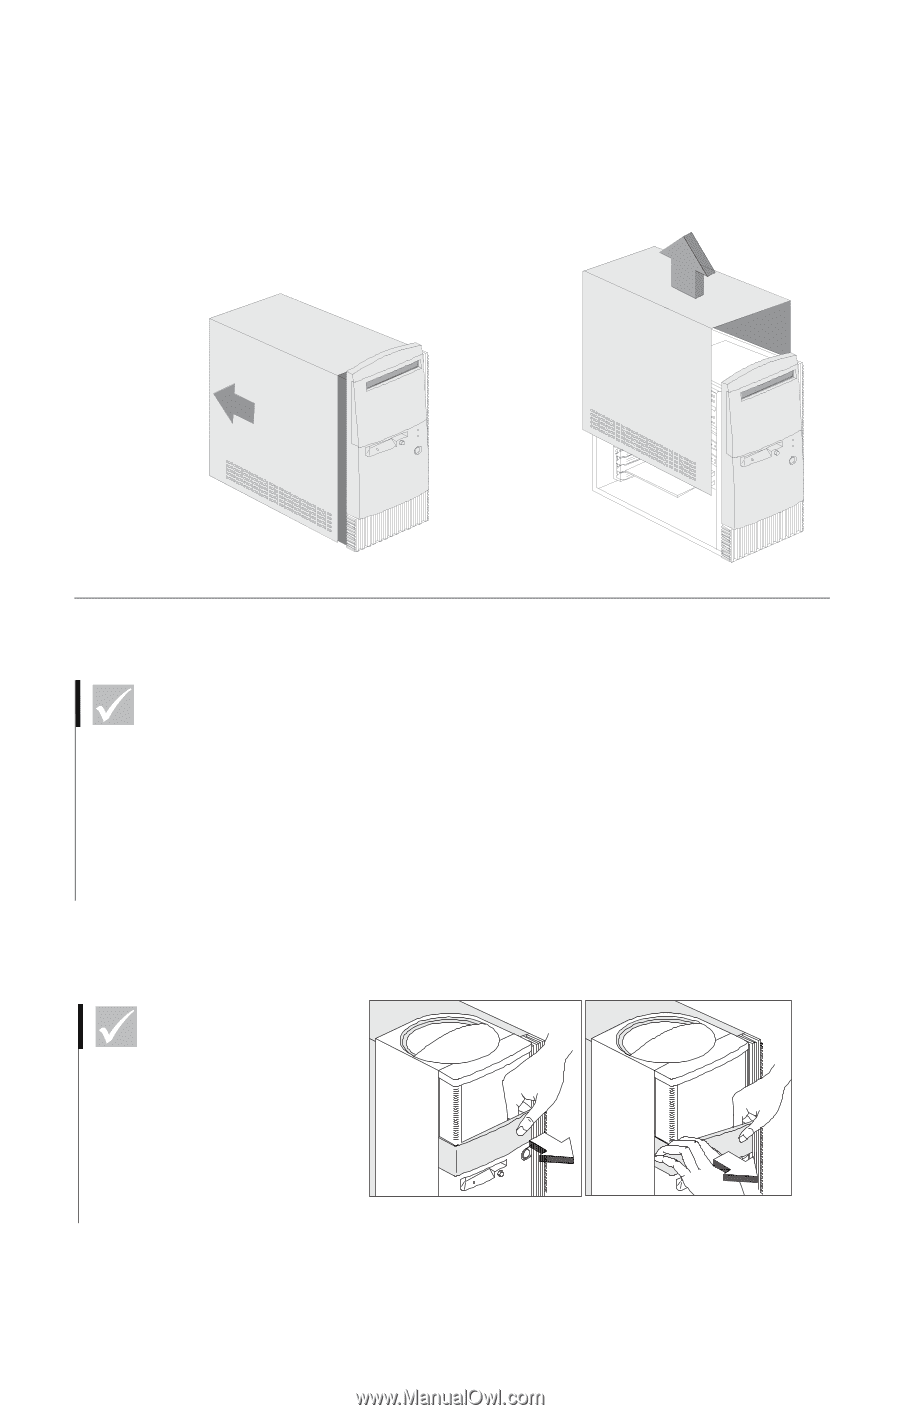
Adding and removing hardware Adding and removing drives Note Write down the original location of the drive power and signal cables. You will need this information when you reinstall the drive. Installing or removing a drive in a minitower system To install a drive in the upper drive bay: 1 Press the latch on the inner right side of a bay panel and pull it out an inch to release the right side of the panel. 2 Use both hands to pull the bay panel and remove it completely from the front panel. Attention Be careful when performing the above step to avoid breaking the latches and tabs on the bay panel. DO NOT force the panel out. 3 Push back the metal bay cover to a 90-degree angle. Adding and removing drives 99
-
 1
1 -
2
-
3
-
4
-
5
-
6
-
7
-
8
-
9
-
10
-
11
-
12
-
13
-
14
-
15
-
16
-
17
-
18
-
19
-
20
-
21
-
22
-
23
-
24
-
25
-
26
-
27
-
28
-
29
-
30
-
31
-
32
-
33
-
34
-
35
-
36
-
37
-
38
-
39
-
40
-
41
-
42
-
43
-
44
-
45
-
46
-
47
-
48
-
49
-
50
-
51
-
52
-
53
-
54
-
55
-
56
-
57
-
58
-
59
-
60
-
61
-
62
-
63
-
64
-
65
-
66
-
67
-
68
-
69
-
70
-
71
-
72
-
73
-
74
-
75
-
76
-
77
-
78
-
79
-
80
-
81
-
82
-
83
-
84
-
85
-
86
-
87
-
88
-
89
-
90
-
91
-
92
-
93
-
94
-
95
-
96
-
97
-
 98
98 -
 99
99 -
 100
100 -
 101
101 -
 102
102 -
 103
103 -
 104
104 -
 105
105 -
 106
106 -
 107
107 -
 108
108 -
109
-
110
-
111
-
112
-
113
-
114
-
115
-
116
-
117
-
118
-
119
-
120
-
121
 |
 |
Adding and removing drives
99
Adding and removing hardware
Adding and removing drives
Installing or removing a drive in a minitower
system
To install a drive in the upper drive bay:
1
Press the latch on the inner right side of a bay panel
and pull it out an inch to release the right side of the
panel.
2
Use both hands to pull the bay panel and remove it
completely from the front panel.
3
Push back the metal bay cover to a 90-degree angle.
Note
Write down the original
location of the drive power
and signal cables. You will
need this information
when you reinstall the
drive.
Attention
Be careful when
performing the above step
to avoid breaking the
latches and tabs on the
bay panel. DO NOT force
the panel out.