IBM 2170275 Reference Guide - Page 109
Remove the 3.5-inch drive bay from the housing by, pressing the tab on top and pivoting the drive bay
 |
View all IBM 2170275 manuals
Add to My Manuals
Save this manual to your list of manuals |
Page 109 highlights
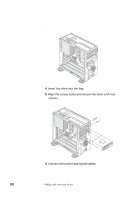
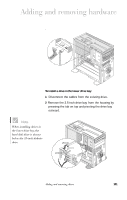
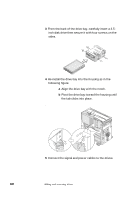
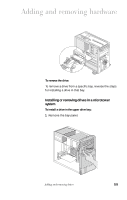
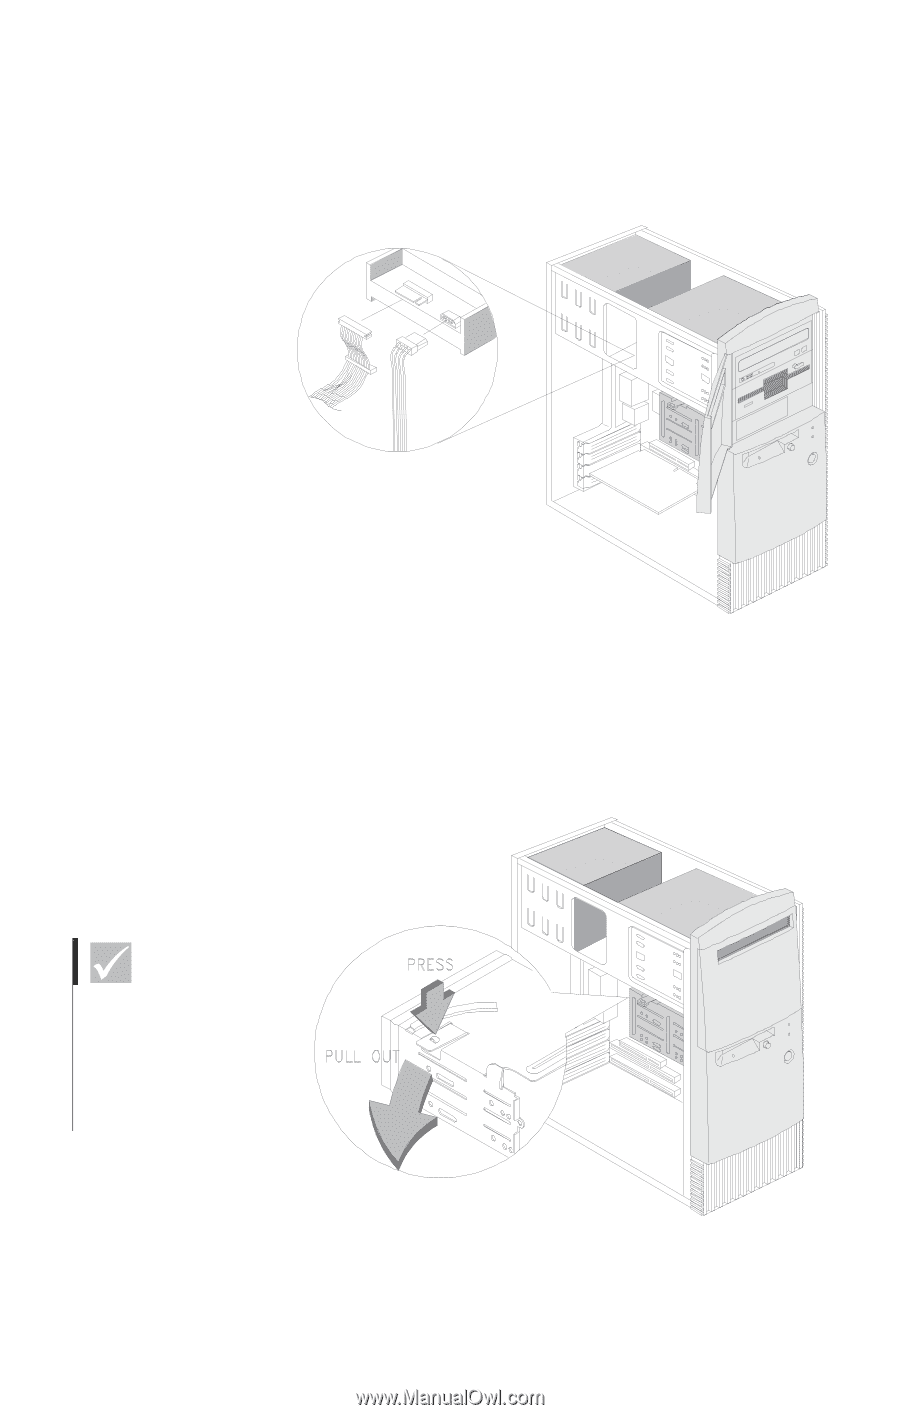
Adding and removing hardware To install a drive in the lower drive bay: 1 1 Remove the 3.5-inch drive bay from the housing by pressing the tab on top and pivoting the drive bay outward. Note When installing drives in the lower drive bay, the hard disk is always on top of the 3.5-inch diskette drive. Adding and removing drives 105
-
 1
1 -
2
-
3
-
4
-
5
-
6
-
7
-
8
-
9
-
10
-
11
-
12
-
13
-
14
-
15
-
16
-
17
-
18
-
19
-
20
-
21
-
22
-
23
-
24
-
25
-
26
-
27
-
28
-
29
-
30
-
31
-
32
-
33
-
34
-
35
-
36
-
37
-
38
-
39
-
40
-
41
-
42
-
43
-
44
-
45
-
46
-
47
-
48
-
49
-
50
-
51
-
52
-
53
-
54
-
55
-
56
-
57
-
58
-
59
-
60
-
61
-
62
-
63
-
64
-
65
-
66
-
67
-
68
-
69
-
70
-
71
-
72
-
73
-
74
-
75
-
76
-
77
-
78
-
79
-
80
-
81
-
82
-
83
-
84
-
85
-
86
-
87
-
88
-
89
-
90
-
91
-
92
-
93
-
94
-
95
-
96
-
97
-
98
-
99
-
100
-
101
-
102
-
103
-
 104
104 -
 105
105 -
 106
106 -
 107
107 -
 108
108 -
 109
109 -
 110
110 -
 111
111 -
 112
112 -
 113
113 -
 114
114 -
115
-
116
-
117
-
118
-
119
-
120
-
121
 |
 |
Adding and removing drives
105
Adding and removing hardware
To install a drive in the lower drive bay:
1
1
Remove the 3.5-inch drive bay from the housing by
pressing the tab on top and pivoting the drive bay
outward.
Note
When installing drives in
the lower drive bay, the
hard disk is always on top
of the 3.5-inch diskette
drive.