Samsung SGH-T759 User Manual (user Manual) (ver.f4) (English) - Page 118
Camera and Camcorder Options
 |
View all Samsung SGH-T759 manuals
Add to My Manuals
Save this manual to your list of manuals |
Page 118 highlights
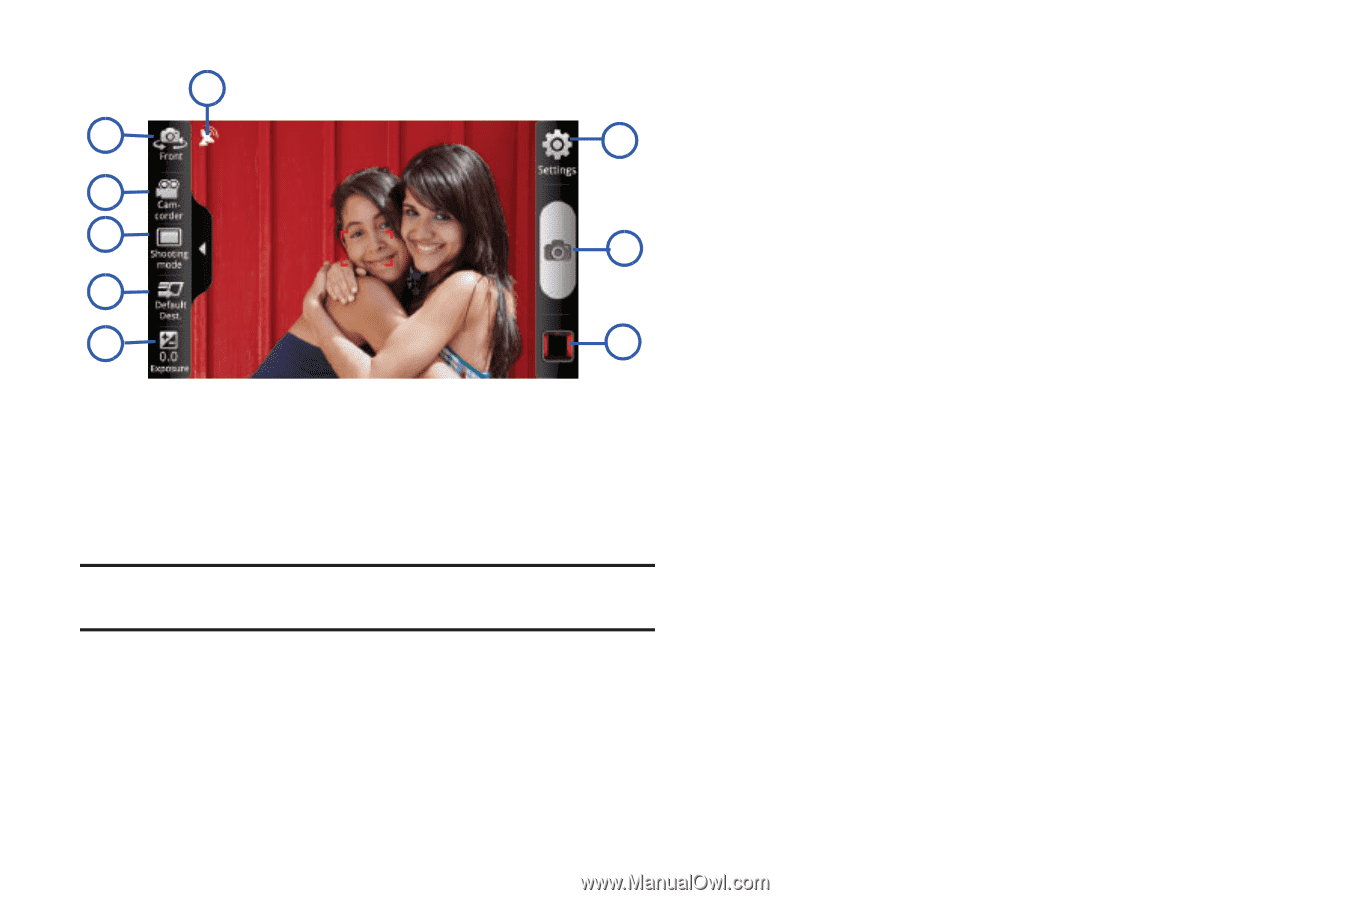
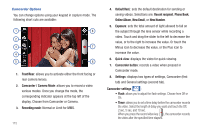
1 2 9 3 4 8 5 6 7 Camera and Camcorder Options You can change options using your keypad in capture mode. Camera Options The following short cuts are available for the camera: Note: The options disappear after a few seconds. Touch the screen to display the tab, then touch the tab to view these options. 1. GPS: allows you to "geo-tag" your current location information onto the current picture. 2. Front/Rear: allows you to activate either the front facing or rear camera lenses. 113 3. Camera / Camcorder Mode: allows you to take a photo in various modes. Once you change the mode, the corresponding indicator appears at the top left of the display. Choose from Camera or Camcorder. 4. Shooting mode: allows you to set the following options: • Single shot: takes a single photo and view it before returning to the shooting mode. • Panorama: takes a landscape photo by taking an initial photo and then adding additional images to itself. The guide box lets you view the area where the second part of the panoramic picture should fall within. • Continuous: takes a succession of consecutive photos by pressing and holding the Camera key. 5. Default Dest.: sets the default destination for sending or saving pictures. Selections are: Recent recipient, Phone Book, Online Album, New Email, or New Number. 6. Exposure: sets the total amount of light allowed to fall on the subject through the lens sensor while taking a picture.Touch and drag the slider to the left (to decrease the value), to the right (to increase the value). You can also touch the Minus icon (to decrease the value) or the Plus icon (to increase the value).
-
 1
1 -
2
-
3
-
4
-
5
-
6
-
7
-
8
-
9
-
10
-
11
-
12
-
13
-
14
-
15
-
16
-
17
-
18
-
19
-
20
-
21
-
22
-
23
-
24
-
25
-
26
-
27
-
28
-
29
-
30
-
31
-
32
-
33
-
34
-
35
-
36
-
37
-
38
-
39
-
40
-
41
-
42
-
43
-
44
-
45
-
46
-
47
-
48
-
49
-
50
-
51
-
52
-
53
-
54
-
55
-
56
-
57
-
58
-
59
-
60
-
61
-
62
-
63
-
64
-
65
-
66
-
67
-
68
-
69
-
70
-
71
-
72
-
73
-
74
-
75
-
76
-
77
-
78
-
79
-
80
-
81
-
82
-
83
-
84
-
85
-
86
-
87
-
88
-
89
-
90
-
91
-
92
-
93
-
94
-
95
-
96
-
97
-
98
-
99
-
100
-
101
-
102
-
103
-
104
-
105
-
106
-
107
-
108
-
109
-
110
-
111
-
112
-
 113
113 -
 114
114 -
 115
115 -
 116
116 -
 117
117 -
 118
118 -
 119
119 -
 120
120 -
 121
121 -
 122
122 -
 123
123 -
124
-
125
-
126
-
127
-
128
-
129
-
130
-
131
-
132
-
133
-
134
-
135
-
136
-
137
-
138
-
139
-
140
-
141
-
142
-
143
-
144
-
145
-
146
-
147
-
148
-
149
-
150
-
151
-
152
-
153
-
154
-
155
-
156
-
157
-
158
-
159
-
160
-
161
-
162
-
163
-
164
-
165
-
166
-
167
-
168
-
169
-
170
-
171
-
172
-
173
-
174
-
175
-
176
-
177
-
178
-
179
-
180
-
181
-
182
-
183
-
184
-
185
-
186
-
187
-
188
-
189
-
190
-
191
-
192
-
193
-
194
-
195
-
196
-
197
-
198
-
199
-
200
-
201
-
202
-
203
-
204
-
205
-
206
-
207
-
208
-
209
-
210
-
211
-
212
-
213
-
214
-
215
-
216
-
217
-
218
-
219
-
220
-
221
-
222
-
223
-
224
-
225
-
226
-
227
-
228
-
229
-
230
-
231
-
232
-
233
-
234
-
235
-
236
-
237
-
238
-
239
-
240
-
241
-
242
-
243
-
244
-
245
-
246
-
247
-
248
-
249
-
250
-
251
-
252
-
253
-
254
-
255
-
256
-
257
-
258
-
259
 |
 |