Samsung SGH-T759 User Manual (user Manual) (ver.f4) (English) - Page 54
Mount SD card, Mounting the SD Card
 |
View all Samsung SGH-T759 manuals
Add to My Manuals
Save this manual to your list of manuals |
Page 54 highlights
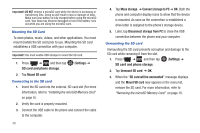
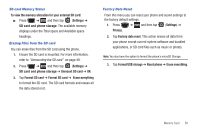
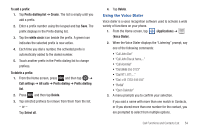
Important!: DO NOT remove a microSD card while the device is accessing or transferring files. Doing so will result in loss or damage of data. Make sure your battery is fully charged before using the microSD card. Your data may become damaged or lost if the battery runs out while you are using the microSD card. Mounting the SD Card To store photos, music, videos, and other applications. You must mount (install) the SD card prior to use. Mounting the SD card establishes a USB connection with your computer. Important!: You must enable USB storage to mount the SD card. 1. Press ➔ and then tap SD card and phone storage. (Settings) ➔ 2. Tap Mount SD card Connecting to the SD card 1. Insert the SD card into the external, SD card slot (For more information, refer to "Installing the microSD Memory Card" on page 9.) 2. Verify the card is properly mounted. 3. Connect the USB cable to the phone and connect the cable to the computer. 49 4. Tap Mass storage. ➔ Connect storage to PC ➔ OK. Both the phone and computer display icons to show that the device is mounted. As soon as the connection is established a drive letter is assigned to the phone's storage device. 5. Later, tap Disconnect storage from PC to close the USB connection between the phone and your computer. Unmounting the SD card Unmounting the SD card prevents corruption and damage to the SD card while removing it from the slot. 1. Press ➔ and then tap (Settings) ➔ SD card and phone storage. 2. Tap Unmount SD card ➔ OK. 3. When the "SD card will be unmounted" message displays and the Mount SD card now appears in the menu list, remove the SD card. For more information, refer to "Removing the microSD Memory Card" on page 10.
-
 1
1 -
2
-
3
-
4
-
5
-
6
-
7
-
8
-
9
-
10
-
11
-
12
-
13
-
14
-
15
-
16
-
17
-
18
-
19
-
20
-
21
-
22
-
23
-
24
-
25
-
26
-
27
-
28
-
29
-
30
-
31
-
32
-
33
-
34
-
35
-
36
-
37
-
38
-
39
-
40
-
41
-
42
-
43
-
44
-
45
-
46
-
47
-
48
-
 49
49 -
 50
50 -
 51
51 -
 52
52 -
 53
53 -
 54
54 -
 55
55 -
 56
56 -
 57
57 -
 58
58 -
 59
59 -
60
-
61
-
62
-
63
-
64
-
65
-
66
-
67
-
68
-
69
-
70
-
71
-
72
-
73
-
74
-
75
-
76
-
77
-
78
-
79
-
80
-
81
-
82
-
83
-
84
-
85
-
86
-
87
-
88
-
89
-
90
-
91
-
92
-
93
-
94
-
95
-
96
-
97
-
98
-
99
-
100
-
101
-
102
-
103
-
104
-
105
-
106
-
107
-
108
-
109
-
110
-
111
-
112
-
113
-
114
-
115
-
116
-
117
-
118
-
119
-
120
-
121
-
122
-
123
-
124
-
125
-
126
-
127
-
128
-
129
-
130
-
131
-
132
-
133
-
134
-
135
-
136
-
137
-
138
-
139
-
140
-
141
-
142
-
143
-
144
-
145
-
146
-
147
-
148
-
149
-
150
-
151
-
152
-
153
-
154
-
155
-
156
-
157
-
158
-
159
-
160
-
161
-
162
-
163
-
164
-
165
-
166
-
167
-
168
-
169
-
170
-
171
-
172
-
173
-
174
-
175
-
176
-
177
-
178
-
179
-
180
-
181
-
182
-
183
-
184
-
185
-
186
-
187
-
188
-
189
-
190
-
191
-
192
-
193
-
194
-
195
-
196
-
197
-
198
-
199
-
200
-
201
-
202
-
203
-
204
-
205
-
206
-
207
-
208
-
209
-
210
-
211
-
212
-
213
-
214
-
215
-
216
-
217
-
218
-
219
-
220
-
221
-
222
-
223
-
224
-
225
-
226
-
227
-
228
-
229
-
230
-
231
-
232
-
233
-
234
-
235
-
236
-
237
-
238
-
239
-
240
-
241
-
242
-
243
-
244
-
245
-
246
-
247
-
248
-
249
-
250
-
251
-
252
-
253
-
254
-
255
-
256
-
257
-
258
-
259
 |
 |