Cisco RV042 User Guide - Page 13
Advanced Configuration, Overview, How to Access the Web-Based Utility, System Summary - support
 |
UPC - 745883560530
View all Cisco RV042 manuals
Add to My Manuals
Save this manual to your list of manuals |
Page 13 highlights
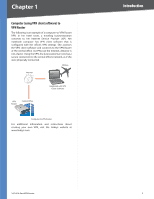
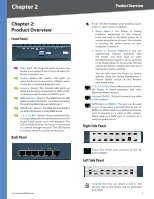
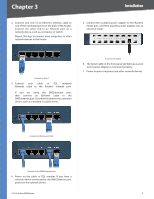
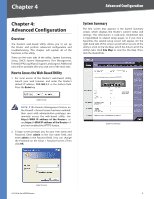
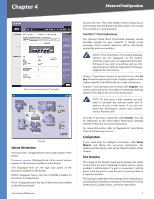
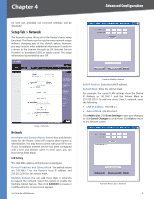
Chapter 4 Advanced Configuration Chapter 4: Advanced Configuration Overview The Router's web-based utility allows you to set up the Router and perform advanced configuration and troubleshooting. This chapter will explain all of the functions in this utility. These are the main tabs of the utility: System Summary, Setup, DHCP, System Management, Port Management, Firewall, VPN, Log, Wizard, Support, and Logout. Additional tabs will be available after you click one of the main tabs. How to Access the Web-Based Utility 1. For local access of the Router's web-based utility, launch your web browser, and enter the Router's default IP address, 192.168.1.1, in the Address field. Press the Enter key. Address Bar NOTE: If the Remote Management feature on the Firewall > General screen has been enabled, then users with administrative privileges can remotely access the web-based utility. Use http://, or use https:// if you have enabled the HTTPS feature. 2. A login screen prompts you for your User name and Password. Enter admin in the User name field, and enter admin in the Password field. (You can change the Password on the Setup > Password screen.) Then click OK. System Summary The first screen that appears is the System Summary screen, which displays the Router's current status and settings. This information is read-only. Underlined text is hyperlinked to related setup pages, so if you click a hyperlink, the related setup screen will appear. On the right-hand side of this screen and all other screens of the utility is a link to the Site Map, which has links to all of the utility's tabs. Click Site Map to view the Site Map. Then, click the desired tab. System Summary Login Screen 10/100 4-Port VPN Router 6
-
 1
1 -
2
-
3
-
4
-
5
-
6
-
7
-
 8
8 -
 9
9 -
 10
10 -
 11
11 -
 12
12 -
 13
13 -
 14
14 -
 15
15 -
 16
16 -
 17
17 -
 18
18 -
19
-
20
-
21
-
22
-
23
-
24
-
25
-
26
-
27
-
28
-
29
-
30
-
31
-
32
-
33
-
34
-
35
-
36
-
37
-
38
-
39
-
40
-
41
-
42
-
43
-
44
-
45
-
46
-
47
-
48
-
49
-
50
-
51
-
52
-
53
-
54
-
55
-
56
-
57
-
58
-
59
-
60
-
61
-
62
-
63
-
64
-
65
-
66
-
67
-
68
-
69
-
70
-
71
-
72
-
73
-
74
-
75
-
76
-
77
-
78
-
79
-
80
-
81
-
82
-
83
-
84
-
85
-
86
-
87
-
88
-
89
-
90
-
91
-
92
-
93
-
94
-
95
-
96
-
97
-
98
-
99
-
100
-
101
-
102
-
103
 |
 |