Cisco RV042 User Guide - Page 79
Appendix E: Bandwidth Management, Overview, Creation of New Services, Appendix E, Bandwidth Management - sip
 |
UPC - 745883560530
View all Cisco RV042 manuals
Add to My Manuals
Save this manual to your list of manuals |
Page 79 highlights
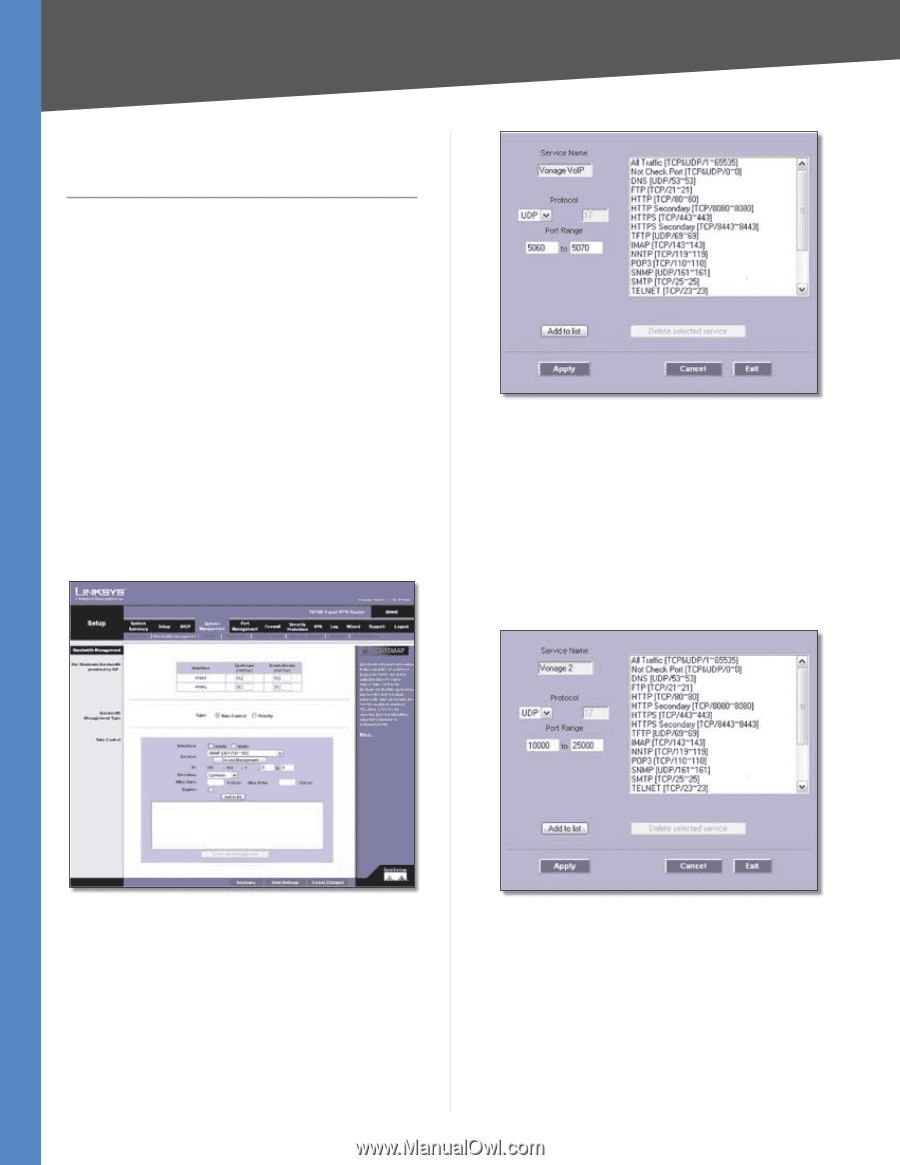
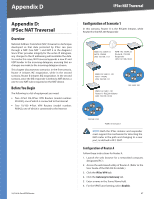
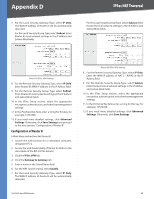
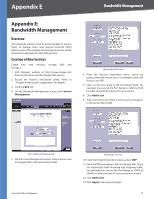
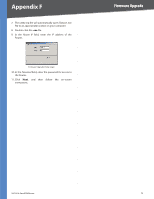
Appendix E Bandwidth Management Appendix E: Bandwidth Management Overview This appendix explains how to ensure Quality of Service (QoS) on Vonage Voice over Internet Protocol (VoIP) phone service. This example uses Vonage; however, similar instructions will apply to other VoIP services. Creation of New Services Create two new services, Vonage VoIP and Vonage 2. 1. Visit Vonage's website at http://www.vonage.com. Find out the ports used for Vonage VoIP service. 2. Access the Router's web-based utility. (Refer to "Chapter 4: Advanced Configuration" for details.) 3. Click the QoS tab. 4. On the Bandwidth Management screen, click Service Management. Add Vonage VoIP Service 6. From the Protocol drop-down menu, select the protocol the VoIP service uses. For example, some VoIP devices use UDP. 7. Enter its SIP port range in the Port Range fields. For example, you can set the Port Range to 5060 to 5070 to make sure that all active ports are covered. 8. Click Add to List. 9. Add a second service. Enter a name, such as Vonage 2, in the Service Name field. QoS > Bandwidth Management 5. On the Service Management screen, enter a name, such as Vonage VoIP, in the Service Name field. 4-Port SSL/IPSec VPN Router Add Vonage 2 Service 10. From the Protocol drop-down menu, select UDP. 11. Enter the RTP port range in the Port Range fields. These are required for both incoming and outgoing traffic. For example, you can set the Port Range to 10000 to 25000 to make sure that all active ports are covered. 12. Click Add to List. 13. Click Apply to save your changes. 72
-
 1
1 -
2
-
3
-
4
-
5
-
6
-
7
-
8
-
9
-
10
-
11
-
12
-
13
-
14
-
15
-
16
-
17
-
18
-
19
-
20
-
21
-
22
-
23
-
24
-
25
-
26
-
27
-
28
-
29
-
30
-
31
-
32
-
33
-
34
-
35
-
36
-
37
-
38
-
39
-
40
-
41
-
42
-
43
-
44
-
45
-
46
-
47
-
48
-
49
-
50
-
51
-
52
-
53
-
54
-
55
-
56
-
57
-
58
-
59
-
60
-
61
-
62
-
63
-
64
-
65
-
66
-
67
-
68
-
69
-
70
-
71
-
72
-
73
-
 74
74 -
 75
75 -
 76
76 -
 77
77 -
 78
78 -
 79
79 -
 80
80 -
 81
81 -
 82
82 -
 83
83 -
 84
84 -
85
-
86
-
87
-
88
-
89
-
90
-
91
-
92
-
93
-
94
-
95
-
96
-
97
-
98
-
99
-
100
-
101
-
102
-
103
 |
 |