Cisco RV042 User Guide - Page 60
PPPoE, Previous, Connect on demand, Keep alive - password
 |
UPC - 745883560530
View all Cisco RV042 manuals
Add to My Manuals
Save this manual to your list of manuals |
Page 60 highlights
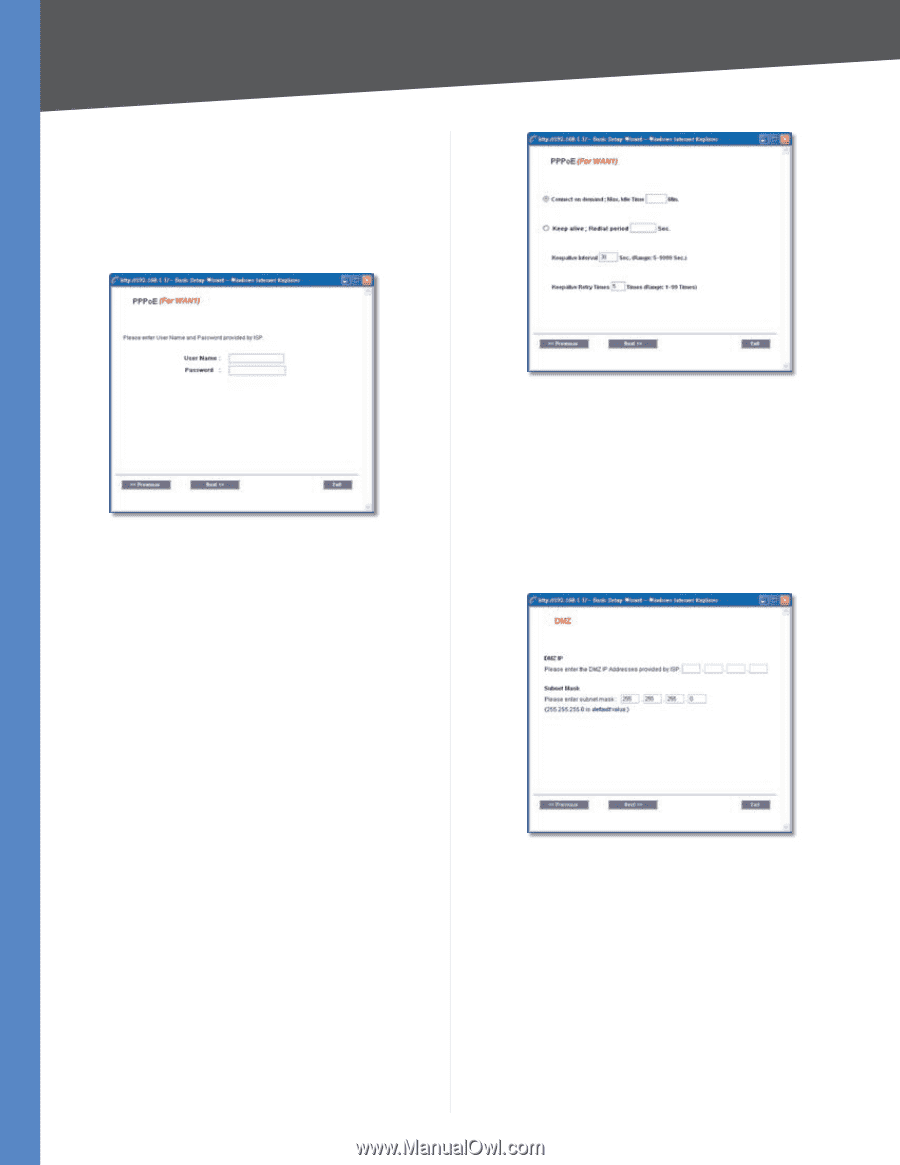
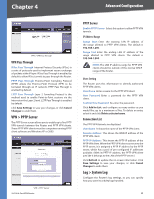
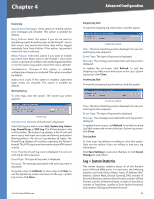
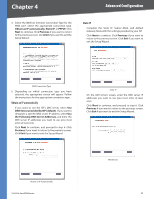
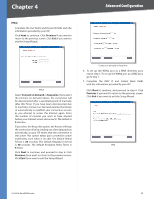
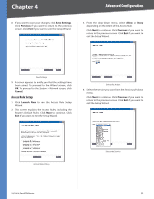
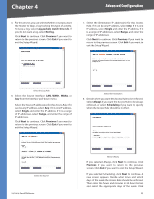
Chapter 4 PPPoE Complete the User Name and Password fields with the information provided by your ISP. Click Next to continue. Click Previous if you want to return to the previous screen. Click Exit if you want to exit the Setup Wizard. Advanced Configuration PPPoE Select Connect on demand or Keep alive. If you select the Connect on demand option, the connection will be disconnected after a specified period of inactivity (Max Idle Time). If you have been disconnected due to inactivity, Connect on Demand enables the Router to automatically re-establish your connection as soon as you attempt to access the Internet again. Enter the number of minutes you want to have elapsed before your Internet access disconnects. The default is 5 minutes. If you select the Keep alive option, the Router will keep the connection alive by sending out a few data packets periodically, so your ISP thinks that the connection is still active. This option keeps your connection active indefinitely, even when it sits idle. The default Redial Period is 30 seconds. The default Keepalive Interval is 30 seconds. The default Keepalive Retry Times is 5 times. Click Next to continue, and proceed to step 6. Click Previous if you want to return to the previous screen. Click Exit if you want to exit the Setup Wizard. Connect on Demand or Keep Alive 6. To set up the WAN2 port as a WAN (Internet) port, repeat step 5. To set up the WAN2 port as a DMZ port, go to step 7. 7. Complete the DMZ IP and Subnet Mask fields with the information provided by your ISP. Click Next to continue, and proceed to step 8. Click Previous if you want to return to the previous screen. Click Exit if you want to exit the Setup Wizard. DMZ 10/100 4-Port VPN Router 53
-
 1
1 -
2
-
3
-
4
-
5
-
6
-
7
-
8
-
9
-
10
-
11
-
12
-
13
-
14
-
15
-
16
-
17
-
18
-
19
-
20
-
21
-
22
-
23
-
24
-
25
-
26
-
27
-
28
-
29
-
30
-
31
-
32
-
33
-
34
-
35
-
36
-
37
-
38
-
39
-
40
-
41
-
42
-
43
-
44
-
45
-
46
-
47
-
48
-
49
-
50
-
51
-
52
-
53
-
54
-
 55
55 -
 56
56 -
 57
57 -
 58
58 -
 59
59 -
 60
60 -
 61
61 -
 62
62 -
 63
63 -
 64
64 -
 65
65 -
66
-
67
-
68
-
69
-
70
-
71
-
72
-
73
-
74
-
75
-
76
-
77
-
78
-
79
-
80
-
81
-
82
-
83
-
84
-
85
-
86
-
87
-
88
-
89
-
90
-
91
-
92
-
93
-
94
-
95
-
96
-
97
-
98
-
99
-
100
-
101
-
102
-
103
 |
 |