Cisco RV042 User Guide - Page 20
Password, Setup > Time, Time, Setup > DMZ Host, DMZ Host - user s manual
 |
UPC - 745883560530
View all Cisco RV042 manuals
Add to My Manuals
Save this manual to your list of manuals |
Page 20 highlights
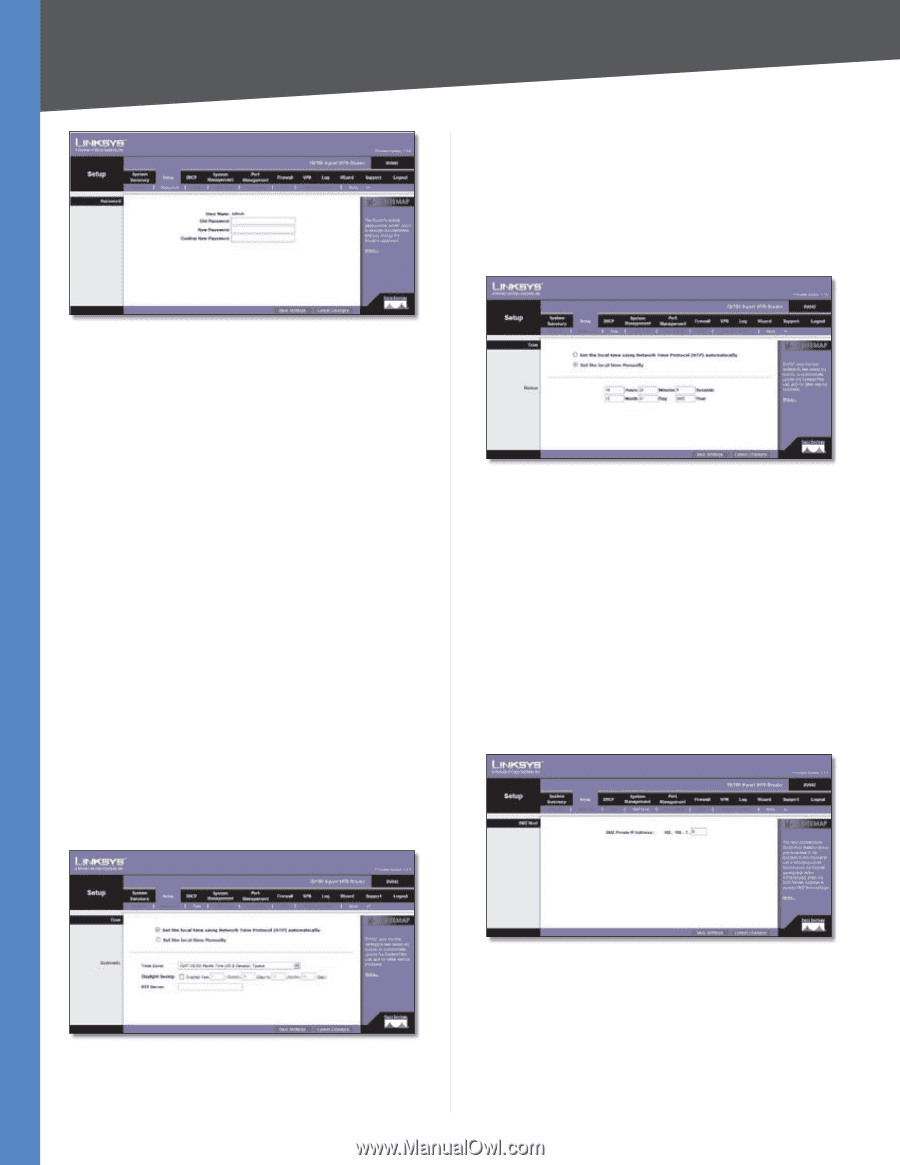
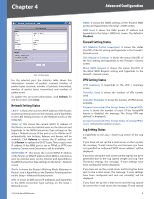
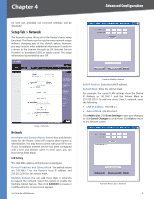
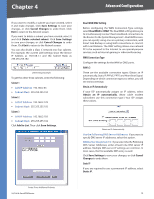
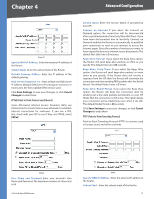
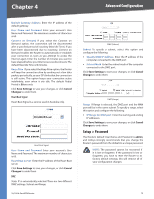
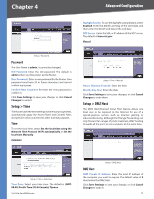
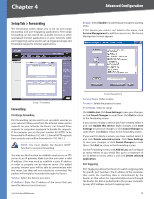
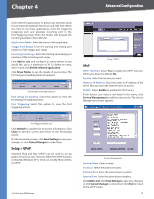
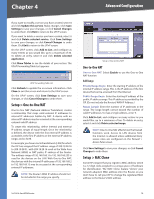
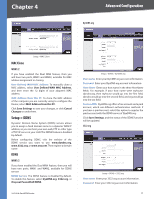
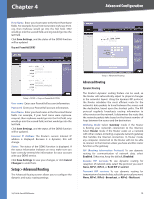
Chapter 4 Advanced Configuration Daylight Saving To use the daylight saving feature, select Enabled. Enter the Month and Day of the start date, and then enter the Month and Day of the end date. NTP Server Enter the URL or IP address of the NTP server. The default is time.nist.gov. Manual Setup > Password Password The User Name is admin; it cannot be changed. Old Password Enter the old password. The default is admin when you first power up the Router. New Password Enter a new password for the Router. Your password must have 20 or fewer characters and cannot contain any spaces. Confirm New Password Re-enter the new password to confirm it. Click Save Settings to save your change, or click Cancel Changes to undo it. Setup > Time The Router uses the time settings to time stamp log events, automatically apply the Access Rules and Content Filter, and perform other activities for other internal purposes. Time To set the local time, select Set the local time using the Network Time Protocol (NTP) automatically or Set the local time Manually. Automatic Setup > Time > Manual Hours, Minutes, Seconds Enter the time. Month, Day, Year Enter the date. Click Save Settings to save your changes, or click Cancel Changes to undo them. Setup > DMZ Host The DMZ (Demilitarized Zone) Host feature allows one local user to be exposed to the Internet for use of a special-purpose service such as Internet gaming or videoconferencing. Although Port Range Forwarding can only forward ten ranges of ports maximum, DMZ hosting forwards all the ports to one computer at the same time. Setup > Time > Automatic Time Zone Select your time zone. The default is (GMT08:00) Pacific Time (US & Canada); Tijuana. 10/100 4-Port VPN Router Setup > DMZ Host DMZ Host DMZ Private IP Address Enter the local IP address of the computer you want to expose. The default value of 0 deactivates the DMZ Host. Click Save Settings to save your change, or click Cancel Changes to undo it. 13
-
 1
1 -
2
-
3
-
4
-
5
-
6
-
7
-
8
-
9
-
10
-
11
-
12
-
13
-
14
-
 15
15 -
 16
16 -
 17
17 -
 18
18 -
 19
19 -
 20
20 -
 21
21 -
 22
22 -
 23
23 -
 24
24 -
 25
25 -
26
-
27
-
28
-
29
-
30
-
31
-
32
-
33
-
34
-
35
-
36
-
37
-
38
-
39
-
40
-
41
-
42
-
43
-
44
-
45
-
46
-
47
-
48
-
49
-
50
-
51
-
52
-
53
-
54
-
55
-
56
-
57
-
58
-
59
-
60
-
61
-
62
-
63
-
64
-
65
-
66
-
67
-
68
-
69
-
70
-
71
-
72
-
73
-
74
-
75
-
76
-
77
-
78
-
79
-
80
-
81
-
82
-
83
-
84
-
85
-
86
-
87
-
88
-
89
-
90
-
91
-
92
-
93
-
94
-
95
-
96
-
97
-
98
-
99
-
100
-
101
-
102
-
103
 |
 |