Cisco RV042 User Guide - Page 85
ProtectLink > Web Protection, Web Protection
 |
UPC - 745883560530
View all Cisco RV042 manuals
Add to My Manuals
Save this manual to your list of manuals |
Page 85 highlights
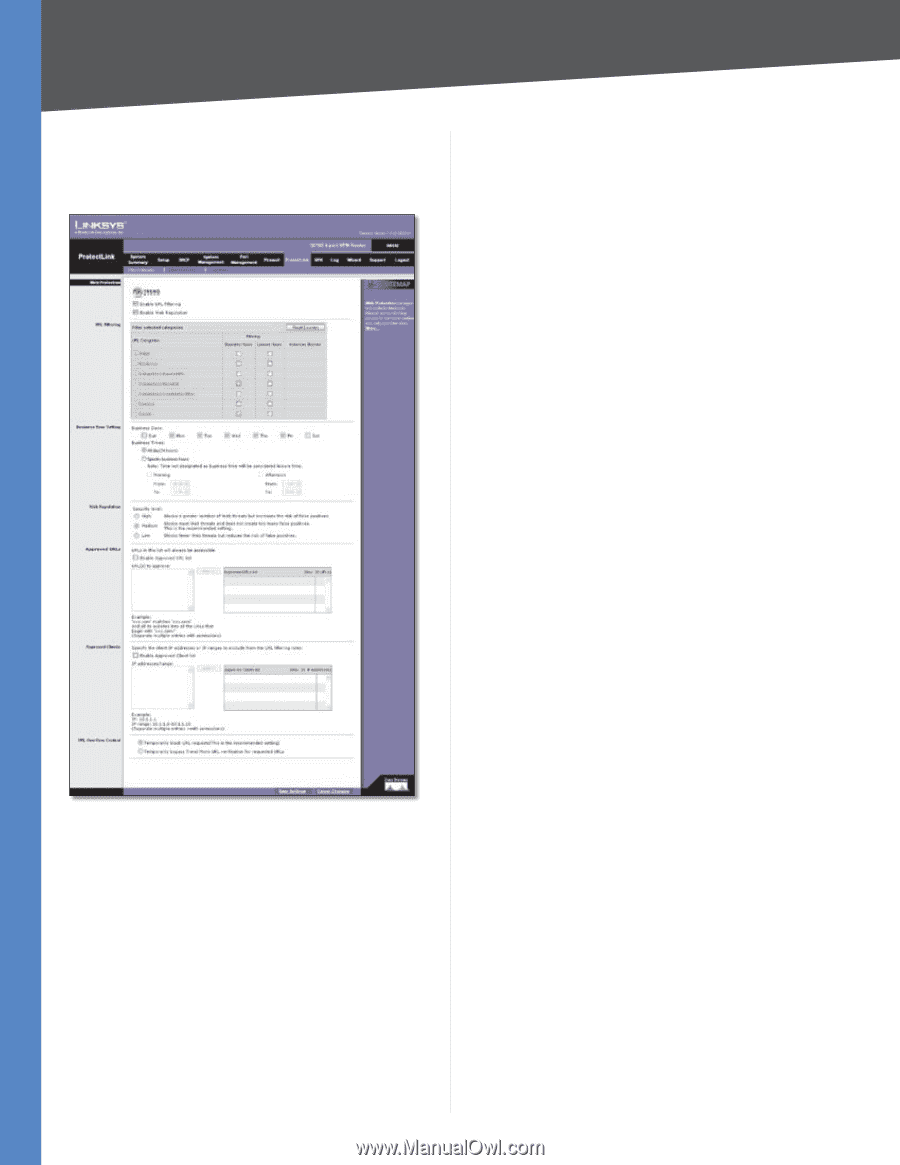
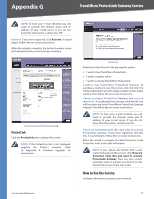
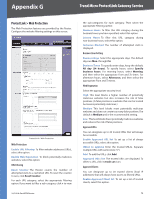
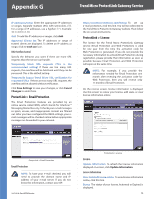
Appendix G Trend Micro ProtectLink Gateway Service ProtectLink > Web Protection The Web Protection features are provided by the Router. Configure the website filtering settings on this screen. ProtectLink > Web Protection Web Protection Enable URL Filtering To filter website addresses (URLs), select this option. Enable Web Reputation To block potentially malicious websites, select this option. URL Filtering Reset Counter The Router counts the number of attempted visits to a restricted URL. To reset the counter to zero, click Reset Counter. For each URL category, select the appropriate Filtering option. If you want to filter a sub-category, click + to view 10/100 4-Port VPN Router the sub-categories for each category. Then select the appropriate Filtering option: Business Hours To filter this URL category during the business hours you have specified, select this option. Leisure Hours To filter this URL category during non‑business hours, select this option. Instances Blocked The number of attempted visits is displayed. Business Hour Setting Business Days Select the appropriate days. The default days are Mon. through Fri. Business Times To specify entire days, keep the default, All day (24 hours). To specify hours, select Specify business hours. For morning hours, select Morning, and then select the appropriate From and To times. For afternoon hours, select Afternoon, and then select the appropriate From and To times. Web Reputation Select the appropriate security level: High This level blocks a higher number of potentially malicious websites but also increases the risk of false positives. (A false positive is a website that can be trusted but seems potentially malicious.) Medium This level blocks most potentially malicious websites and does not create too many false positives. The default is Medium and is the recommended setting. Low This level blocks fewer potentially malicious websites and reduces the risk of false positives. Approved URLs You can designate up to 20 trusted URLs that will always be accessible. Enable Approved URL list To set up a list of always accessible URLs, select this option. URL(s) to approve Enter the trusted URL(s). Separate multiple URLs with semicolons (";"). Add To add the URLs, click Add. Approved URLs list The trusted URLs are displayed. To delete a URL, click its trash can icon. Approved Clients You can designate up to 20 trusted clients (local IP addresses) that will always have access to filtered URLs. Enable Approved Client list To set up a list of trusted clients, select this option. 78
-
 1
1 -
2
-
3
-
4
-
5
-
6
-
7
-
8
-
9
-
10
-
11
-
12
-
13
-
14
-
15
-
16
-
17
-
18
-
19
-
20
-
21
-
22
-
23
-
24
-
25
-
26
-
27
-
28
-
29
-
30
-
31
-
32
-
33
-
34
-
35
-
36
-
37
-
38
-
39
-
40
-
41
-
42
-
43
-
44
-
45
-
46
-
47
-
48
-
49
-
50
-
51
-
52
-
53
-
54
-
55
-
56
-
57
-
58
-
59
-
60
-
61
-
62
-
63
-
64
-
65
-
66
-
67
-
68
-
69
-
70
-
71
-
72
-
73
-
74
-
75
-
76
-
77
-
78
-
79
-
 80
80 -
 81
81 -
 82
82 -
 83
83 -
 84
84 -
 85
85 -
 86
86 -
 87
87 -
 88
88 -
 89
89 -
 90
90 -
91
-
92
-
93
-
94
-
95
-
96
-
97
-
98
-
99
-
100
-
101
-
102
-
103
 |
 |