Yamaha 02R96 Owner's Manual - Page 185
INSERT ASSIGN/EDIT Display Mode, INSERT/PARAM Display, Encoder Display, Channel Display Mode, ASSIGN
 |
View all Yamaha 02R96 manuals
Add to My Manuals
Save this manual to your list of manuals |
Page 185 highlights
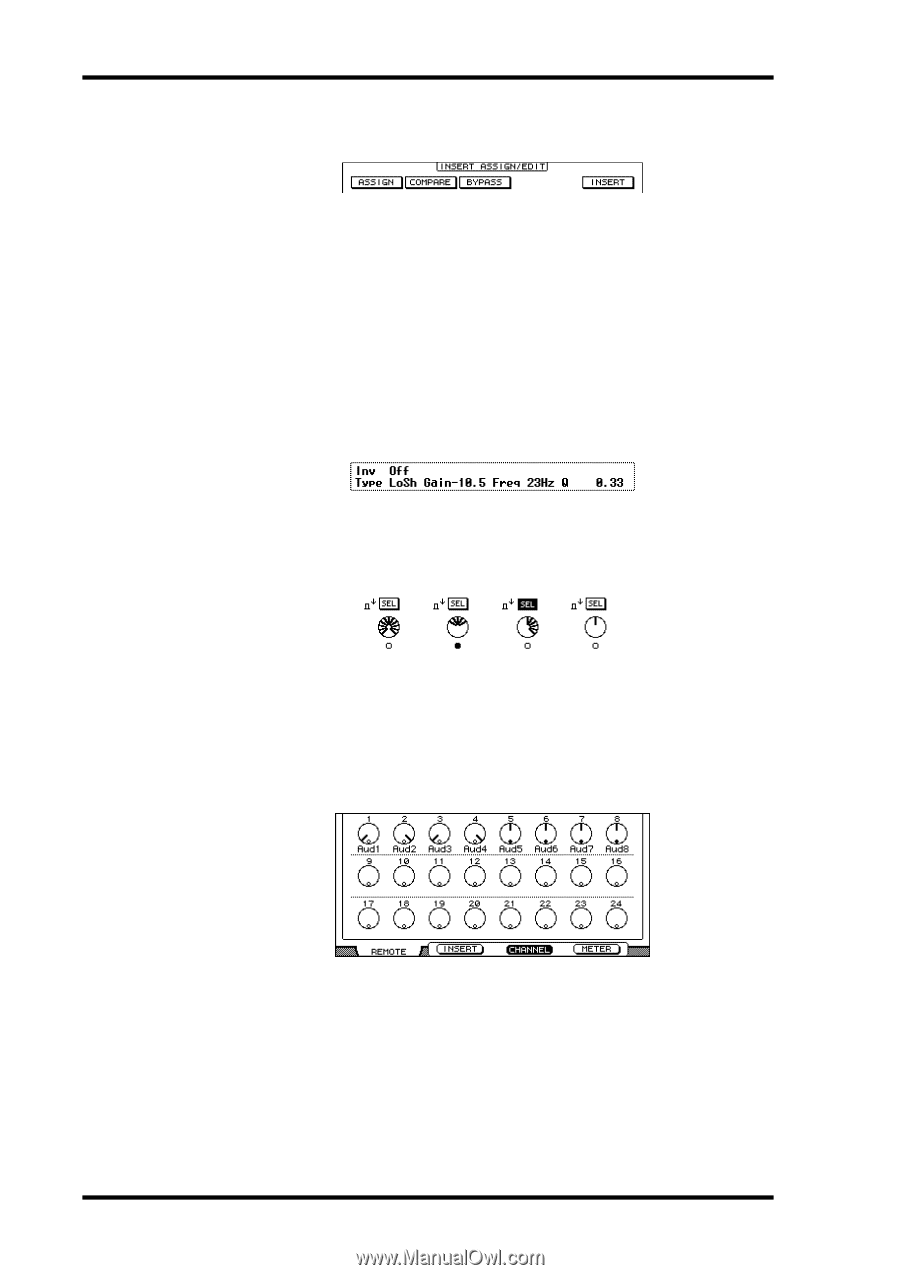
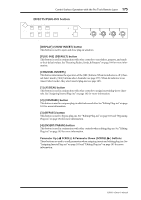
172 Chapter 18-Pro Tools Remote Layer INSERT ASSIGN/EDIT Display Mode Press the [F2] button to select this mode. ASSIGN: This indicator flashes when the EFFECTS/PLUG-INS [1] (ASSIGN) button is pressed. See "Assigning Inserts/Plug-ins" on page 182 for more information. COMPARE: This indicator appears highlighted when the EFFECTS/PLUG-INS [2] (COMPARE) button is pressed. See "Editing Plug-ins" on page 183 for more information. BYPASS: This indicator appears highlighted when the EFFECTS/PLUG-INS [3] (BYPASS) button is pressed. See "Editing Plug-ins" on page 183 and "Bypassing Plug-ins" on page 184 for more information. INSERT: This indicator appears highlighted when the EFFECTS/PLUG-INS [4] (INSERT/ASSIGN) button is pressed. See "Editing Plug-ins" on page 183 for more information. INSERT/PARAM Display This section displays mainly insert and plug-in-related information, although other messages are also displayed here. Encoder Display This section displays information about the Parameter controls 1-4. The SEL indicators show the on/off status of the Parameter control push-switches. The rotary control indicators show the positions of the Parameter controls. The "O" symbol below each Parameter control shows the automation status for each Parameter control. Channel Display Mode Press the [F3] button to select this display mode. In this display mode, controls for the parameters currently assigned to the Encoders are displayed (e.g., pan or aux send). When displaying panpots, the small circles inside the Encoder icons are highlighted when pan is at center. The name of each channel is displayed below the Encoder icons. Automation mode settings, aux send destinations, and aux send pre/post settings can also be displayed here. See "Viewing the Automation Mode" on page 187, "Viewing Send Destinations" on page 180, and "Configuring Sends as Pre or Post" on page 180 respectively for more information. 02R96-Owner's Manual
-
 1
1 -
2
-
3
-
4
-
5
-
6
-
7
-
8
-
9
-
10
-
11
-
12
-
13
-
14
-
15
-
16
-
17
-
18
-
19
-
20
-
21
-
22
-
23
-
24
-
25
-
26
-
27
-
28
-
29
-
30
-
31
-
32
-
33
-
34
-
35
-
36
-
37
-
38
-
39
-
40
-
41
-
42
-
43
-
44
-
45
-
46
-
47
-
48
-
49
-
50
-
51
-
52
-
53
-
54
-
55
-
56
-
57
-
58
-
59
-
60
-
61
-
62
-
63
-
64
-
65
-
66
-
67
-
68
-
69
-
70
-
71
-
72
-
73
-
74
-
75
-
76
-
77
-
78
-
79
-
80
-
81
-
82
-
83
-
84
-
85
-
86
-
87
-
88
-
89
-
90
-
91
-
92
-
93
-
94
-
95
-
96
-
97
-
98
-
99
-
100
-
101
-
102
-
103
-
104
-
105
-
106
-
107
-
108
-
109
-
110
-
111
-
112
-
113
-
114
-
115
-
116
-
117
-
118
-
119
-
120
-
121
-
122
-
123
-
124
-
125
-
126
-
127
-
128
-
129
-
130
-
131
-
132
-
133
-
134
-
135
-
136
-
137
-
138
-
139
-
140
-
141
-
142
-
143
-
144
-
145
-
146
-
147
-
148
-
149
-
150
-
151
-
152
-
153
-
154
-
155
-
156
-
157
-
158
-
159
-
160
-
161
-
162
-
163
-
164
-
165
-
166
-
167
-
168
-
169
-
170
-
171
-
172
-
173
-
174
-
175
-
176
-
177
-
178
-
179
-
 180
180 -
 181
181 -
 182
182 -
 183
183 -
 184
184 -
 185
185 -
 186
186 -
 187
187 -
 188
188 -
 189
189 -
 190
190 -
191
-
192
-
193
-
194
-
195
-
196
-
197
-
198
-
199
-
200
-
201
-
202
-
203
-
204
-
205
-
206
-
207
-
208
-
209
-
210
-
211
-
212
-
213
-
214
-
215
-
216
-
217
-
218
-
219
-
220
-
221
-
222
-
223
-
224
-
225
-
226
-
227
-
228
-
229
-
230
-
231
-
232
-
233
-
234
-
235
-
236
-
237
-
238
-
239
-
240
-
241
-
242
-
243
-
244
-
245
-
246
-
247
-
248
-
249
-
250
-
251
-
252
-
253
-
254
-
255
-
256
-
257
-
258
-
259
-
260
-
261
-
262
-
263
-
264
-
265
-
266
-
267
-
268
-
269
-
270
-
271
-
272
-
273
-
274
-
275
-
276
-
277
-
278
-
279
-
280
-
281
-
282
-
283
-
284
-
285
-
286
-
287
-
288
-
289
-
290
-
291
-
292
-
293
-
294
-
295
-
296
-
297
-
298
-
299
-
300
-
301
-
302
-
303
-
304
-
305
-
306
-
307
-
308
-
309
-
310
-
311
-
312
-
313
-
314
-
315
 |
 |