Cisco AIR-LAP1252AG-A-K9 Software Configuration Guide - Page 258
Finding an Access Point by Blinking the Top Panel Indicators, Checking Basic Settings, SSID, WEP Keys - led
 |
UPC - 882658140716
View all Cisco AIR-LAP1252AG-A-K9 manuals
Add to My Manuals
Save this manual to your list of manuals |
Page 258 highlights
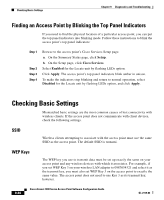
Checking Basic Settings Chapter 9 Diagnostics and Troubleshooting Finding an Access Point by Blinking the Top Panel Indicators If you need to find the physical location of a particular access point, you can put the top panel indicators into blinking mode. Follow these instructions to blink the access point's top panel indicators: Step 1 Step 2 Step 3 Step 4 Browse to the access point's Cisco Services Setup page: a. On the Summary Status page, click Setup. b. On the Setup page, click Cisco Services. Select Enabled for the Locate unit by flashing LEDs option. Click Apply. The access point's top panel indicators blink amber in unison. To make the indicators stop blinking and return to normal operation, select Disabled for the Locate unit by flashing LEDs option, and click Apply. Checking Basic Settings Mismatched basic settings are the most common causes of lost connectivity with wireless clients. If the access point does not communicate with client devices, check the following settings. SSID Wireless clients attempting to associate with the access point must use the same SSID as the access point. The default SSID is tsunami. WEP Keys The WEP key you use to transmit data must be set up exactly the same on your access point and any wireless devices with which it associates. For example, if you set WEP Key 3 on your wireless LAN adapter to 0987654321 and select it as the transmit key, you must also set WEP Key 3 on the access point to exactly the same value. The access point does not need to use Key 3 as its transmit key, however. 9-40 Cisco Aironet 1200 Series Access Point Software Configuration Guide OL-2159-03
-
 1
1 -
2
-
3
-
4
-
5
-
6
-
7
-
8
-
9
-
10
-
11
-
12
-
13
-
14
-
15
-
16
-
17
-
18
-
19
-
20
-
21
-
22
-
23
-
24
-
25
-
26
-
27
-
28
-
29
-
30
-
31
-
32
-
33
-
34
-
35
-
36
-
37
-
38
-
39
-
40
-
41
-
42
-
43
-
44
-
45
-
46
-
47
-
48
-
49
-
50
-
51
-
52
-
53
-
54
-
55
-
56
-
57
-
58
-
59
-
60
-
61
-
62
-
63
-
64
-
65
-
66
-
67
-
68
-
69
-
70
-
71
-
72
-
73
-
74
-
75
-
76
-
77
-
78
-
79
-
80
-
81
-
82
-
83
-
84
-
85
-
86
-
87
-
88
-
89
-
90
-
91
-
92
-
93
-
94
-
95
-
96
-
97
-
98
-
99
-
100
-
101
-
102
-
103
-
104
-
105
-
106
-
107
-
108
-
109
-
110
-
111
-
112
-
113
-
114
-
115
-
116
-
117
-
118
-
119
-
120
-
121
-
122
-
123
-
124
-
125
-
126
-
127
-
128
-
129
-
130
-
131
-
132
-
133
-
134
-
135
-
136
-
137
-
138
-
139
-
140
-
141
-
142
-
143
-
144
-
145
-
146
-
147
-
148
-
149
-
150
-
151
-
152
-
153
-
154
-
155
-
156
-
157
-
158
-
159
-
160
-
161
-
162
-
163
-
164
-
165
-
166
-
167
-
168
-
169
-
170
-
171
-
172
-
173
-
174
-
175
-
176
-
177
-
178
-
179
-
180
-
181
-
182
-
183
-
184
-
185
-
186
-
187
-
188
-
189
-
190
-
191
-
192
-
193
-
194
-
195
-
196
-
197
-
198
-
199
-
200
-
201
-
202
-
203
-
204
-
205
-
206
-
207
-
208
-
209
-
210
-
211
-
212
-
213
-
214
-
215
-
216
-
217
-
218
-
219
-
220
-
221
-
222
-
223
-
224
-
225
-
226
-
227
-
228
-
229
-
230
-
231
-
232
-
233
-
234
-
235
-
236
-
237
-
238
-
239
-
240
-
241
-
242
-
243
-
244
-
245
-
246
-
247
-
248
-
249
-
250
-
251
-
252
-
 253
253 -
 254
254 -
 255
255 -
 256
256 -
 257
257 -
 258
258 -
 259
259 -
 260
260 -
 261
261 -
 262
262 -
 263
263 -
264
-
265
-
266
-
267
-
268
-
269
-
270
-
271
-
272
-
273
-
274
-
275
-
276
-
277
-
278
-
279
-
280
-
281
-
282
-
283
-
284
 |
 |
