Dell PowerConnect B - MLXe 16 Hardware Installation Guide - Page 178
Replacing a power supply
 |
View all Dell PowerConnect B - MLXe 16 manuals
Add to My Manuals
Save this manual to your list of manuals |
Page 178 highlights
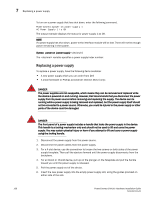
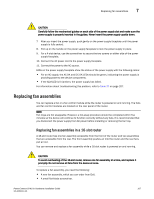
7 Replacing a power supply To turn on a power supply that has shut down, enter the following command. PowerConnect#power-on power-supply 1 AC Power Supply 1 is OK The output example displays the status for power supply 1 as OK. NOTE If a power supply has shut down, power to the interface module will be lost. There will not be enough power remaining in the system. Syntax: power-on [power-supply ] The variable specifies a power supply index number. Replacing a power supply To replace a power supply, have the following items available: • A new power supply which you can order from Dell • A small flat-blade or Phillips screwdriver (NetIron MLX-4 only) DANGER The power supplies are hot swappable, which means they can be removed and replaced while the device is powered on and running. However, Dell recommends that you disconnect the power supply from its power source before removing and replacing the supply. The device can be running while a power supply is being removed and replaced, but the power supply itself should not be connected to a power source. Otherwise, you could be injured or the power supply or other parts of the device could be damaged. DANGER The front panel of a power supply includes a handle that locks the power supply in the device. This handle is a locking mechanism only and should not be used to lift and carry the power supply. You may sustain physical injury or harm if you attempt to lift and carry a power supply using the locking handle. 1. Disconnect the power supply from the power source. 2. Disconnect the power cables from the power supply. 3. For a 4-slot device, use the screwdriver to loosen the two screws on both sides of the power supply faceplate. Then pull the ejectors forward until the power supply disconnects from the backplane. 4. For an 8-slot or 16-slot device, pull up on the plunger on the faceplate and pull the handle toward you until the power supply is released. 5. Pull the power supply out of the device. 6. Insert the new power supply into the empty power supply slot, using the guides provided on either side of the slot. 166 PowerConnect B-MLXe Hardware Installation Guide 53-1002111-01
-
 1
1 -
2
-
3
-
4
-
5
-
6
-
7
-
8
-
9
-
10
-
11
-
12
-
13
-
14
-
15
-
16
-
17
-
18
-
19
-
20
-
21
-
22
-
23
-
24
-
25
-
26
-
27
-
28
-
29
-
30
-
31
-
32
-
33
-
34
-
35
-
36
-
37
-
38
-
39
-
40
-
41
-
42
-
43
-
44
-
45
-
46
-
47
-
48
-
49
-
50
-
51
-
52
-
53
-
54
-
55
-
56
-
57
-
58
-
59
-
60
-
61
-
62
-
63
-
64
-
65
-
66
-
67
-
68
-
69
-
70
-
71
-
72
-
73
-
74
-
75
-
76
-
77
-
78
-
79
-
80
-
81
-
82
-
83
-
84
-
85
-
86
-
87
-
88
-
89
-
90
-
91
-
92
-
93
-
94
-
95
-
96
-
97
-
98
-
99
-
100
-
101
-
102
-
103
-
104
-
105
-
106
-
107
-
108
-
109
-
110
-
111
-
112
-
113
-
114
-
115
-
116
-
117
-
118
-
119
-
120
-
121
-
122
-
123
-
124
-
125
-
126
-
127
-
128
-
129
-
130
-
131
-
132
-
133
-
134
-
135
-
136
-
137
-
138
-
139
-
140
-
141
-
142
-
143
-
144
-
145
-
146
-
147
-
148
-
149
-
150
-
151
-
152
-
153
-
154
-
155
-
156
-
157
-
158
-
159
-
160
-
161
-
162
-
163
-
164
-
165
-
166
-
167
-
168
-
169
-
170
-
171
-
172
-
 173
173 -
 174
174 -
 175
175 -
 176
176 -
 177
177 -
 178
178 -
 179
179 -
 180
180 -
 181
181 -
 182
182 -
 183
183 -
184
-
185
-
186
-
187
-
188
-
189
-
190
-
191
-
192
-
193
-
194
-
195
-
196
-
197
-
198
-
199
-
200
-
201
-
202
-
203
-
204
-
205
-
206
-
207
-
208
-
209
-
210
-
211
-
212
 |
 |
