Dell PowerConnect B - MLXe 16 Hardware Installation Guide - Page 65
Final steps, Installing a PowerConnect B-MLXe-16 router, Preparing the installation site
 |
View all Dell PowerConnect B - MLXe 16 manuals
Add to My Manuals
Save this manual to your list of manuals |
Page 65 highlights
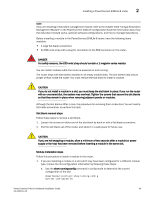
Installing a PowerConnect B-MLXe-16 router 2 NOTE For the NEBS-compliant installation, AC power connections must use a surge protection device (SPD) to protect the AC power supplies from damage due to excessive power line surges. AC power connection steps Follow these steps to connect the AC power cord. 1. Locate the power receptable on the rear of the chassis. 2. Lift the cord-retainer and connect an AC power cord to the power supply. 3. Snap the cord-retainer over the power plug to hold it in place. DANGER If the installation requires a different power cord than the one supplied with the router, make sure you use a power cord displaying the mark of the safety agency that defines the regulations for power cords in your country. The mark is your assurance that the power cord can be used safely with the router. For information about powering on the system, refer to "Activating the power source" on page 69. Final steps Complete these final steps in the order listed: • "Attaching a management station" • "Activating the power source" • "Verifying proper operation" Installing a PowerConnect B-MLXe-16 router The following sections describe how to install a PowerConnect B-MLXe-16 router. NOTE Illustrations in this chapter may differ slightly from the actual equipment. Preparing the installation site Before installing the router, plan the location and orientation relative to other devices and equipment. For cooling purposes, allow a minimum of six inches of space between the sides, front, and the back of the router and walls or other obstructions. If you are installing the router in a perforated enclosure, the perforations must cover at least 60 percent of the surface. Ensure that the proper power and network cabling is installed at the site. For information about cabling, refer to "Installing power supplies in a PowerConnect B-MLXe-16 router" on page 66,and "Attaching a management station" on page 68. PowerConnect B-MLXe Hardware Installation Guide 53 53-1002111-01
-
 1
1 -
2
-
3
-
4
-
5
-
6
-
7
-
8
-
9
-
10
-
11
-
12
-
13
-
14
-
15
-
16
-
17
-
18
-
19
-
20
-
21
-
22
-
23
-
24
-
25
-
26
-
27
-
28
-
29
-
30
-
31
-
32
-
33
-
34
-
35
-
36
-
37
-
38
-
39
-
40
-
41
-
42
-
43
-
44
-
45
-
46
-
47
-
48
-
49
-
50
-
51
-
52
-
53
-
54
-
55
-
56
-
57
-
58
-
59
-
 60
60 -
 61
61 -
 62
62 -
 63
63 -
 64
64 -
 65
65 -
 66
66 -
 67
67 -
 68
68 -
 69
69 -
 70
70 -
71
-
72
-
73
-
74
-
75
-
76
-
77
-
78
-
79
-
80
-
81
-
82
-
83
-
84
-
85
-
86
-
87
-
88
-
89
-
90
-
91
-
92
-
93
-
94
-
95
-
96
-
97
-
98
-
99
-
100
-
101
-
102
-
103
-
104
-
105
-
106
-
107
-
108
-
109
-
110
-
111
-
112
-
113
-
114
-
115
-
116
-
117
-
118
-
119
-
120
-
121
-
122
-
123
-
124
-
125
-
126
-
127
-
128
-
129
-
130
-
131
-
132
-
133
-
134
-
135
-
136
-
137
-
138
-
139
-
140
-
141
-
142
-
143
-
144
-
145
-
146
-
147
-
148
-
149
-
150
-
151
-
152
-
153
-
154
-
155
-
156
-
157
-
158
-
159
-
160
-
161
-
162
-
163
-
164
-
165
-
166
-
167
-
168
-
169
-
170
-
171
-
172
-
173
-
174
-
175
-
176
-
177
-
178
-
179
-
180
-
181
-
182
-
183
-
184
-
185
-
186
-
187
-
188
-
189
-
190
-
191
-
192
-
193
-
194
-
195
-
196
-
197
-
198
-
199
-
200
-
201
-
202
-
203
-
204
-
205
-
206
-
207
-
208
-
209
-
210
-
211
-
212
 |
 |
