Dell PowerConnect J-8208 Hardware Guide - Page 138
Installing a Line Card in a J-EX8200 Switch
 |
View all Dell PowerConnect J-8208 manuals
Add to My Manuals
Save this manual to your list of manuals |
Page 138 highlights
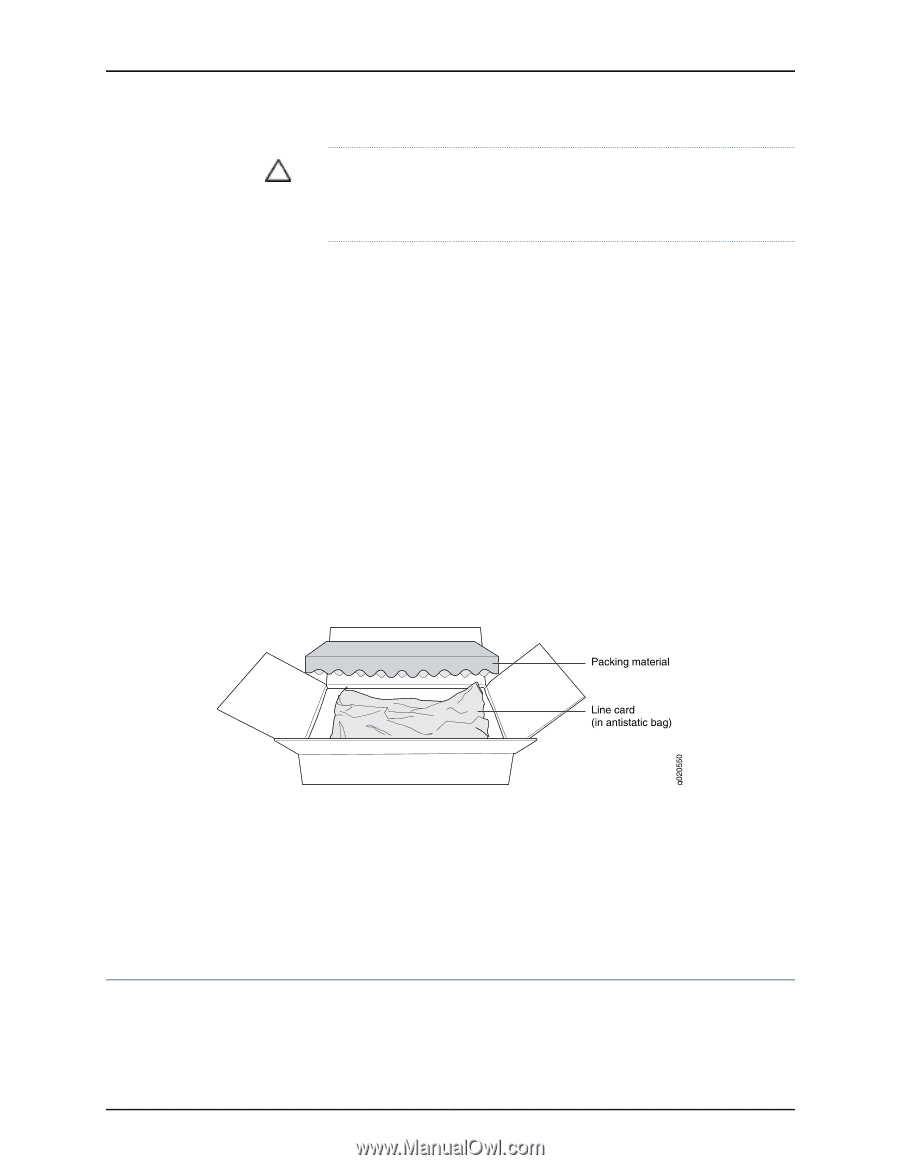
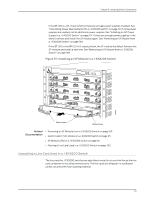
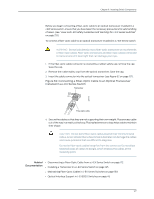
Dell PowerConnect J-Series J-EX8208 Ethernet Switch Hardware Guide CAUTION: The line cards are maximally protected inside the shipping carton. Do not unpack the line cards until you are ready to install them in the switch chassis. Before you unpack a line card: • Ensure that you have taken the necessary precautions to prevent ESD damage (see "Prevention of Electrostatic Discharge Damage on J-EX Series Switches" on page 236). • Ensure that you know how to handle and store the line card (see "Handling and Storing Line Cards in J-EX8200 Switches" on page 179). To unpack a line card (see Figure 58 on page 122): 1. Move the shipping carton to a staging area as close to the installation site as possible. 2. Position the carton so that the arrows are pointing up. 3. Open the top flaps on the shipping carton. 4. Pull out the packing material, which holds the line card in place. 5. Remove the line card from the antistatic bag. 6. Save the shipping carton and packing materials in case you need to move or ship the line card later. Figure 58: Unpacking a Line Card Used in a J-EX8200 Switch Related • Packing a Line Card Used in a J-EX8200 Switch on page 202 Documentation • Installing a Line Card in a J-EX8200 Switch on page 122 • 8-port SFP+ Line Card in a J-EX8200 Switch on page 27 • 48-port SFP Line Card in a J-EX8200 Switch on page 28 • 48-port RJ-45 Line Card in a J-EX8200 Switch on page 29 Installing a Line Card in a J-EX8200 Switch J-EX8200 switches have field-replaceable unit (FRU) line cards that can be installed in the line card slots on the front of the switch chassis. The line cards are hot-insertable 122
-
 1
1 -
2
-
3
-
4
-
5
-
6
-
7
-
8
-
9
-
10
-
11
-
12
-
13
-
14
-
15
-
16
-
17
-
18
-
19
-
20
-
21
-
22
-
23
-
24
-
25
-
26
-
27
-
28
-
29
-
30
-
31
-
32
-
33
-
34
-
35
-
36
-
37
-
38
-
39
-
40
-
41
-
42
-
43
-
44
-
45
-
46
-
47
-
48
-
49
-
50
-
51
-
52
-
53
-
54
-
55
-
56
-
57
-
58
-
59
-
60
-
61
-
62
-
63
-
64
-
65
-
66
-
67
-
68
-
69
-
70
-
71
-
72
-
73
-
74
-
75
-
76
-
77
-
78
-
79
-
80
-
81
-
82
-
83
-
84
-
85
-
86
-
87
-
88
-
89
-
90
-
91
-
92
-
93
-
94
-
95
-
96
-
97
-
98
-
99
-
100
-
101
-
102
-
103
-
104
-
105
-
106
-
107
-
108
-
109
-
110
-
111
-
112
-
113
-
114
-
115
-
116
-
117
-
118
-
119
-
120
-
121
-
122
-
123
-
124
-
125
-
126
-
127
-
128
-
129
-
130
-
131
-
132
-
 133
133 -
 134
134 -
 135
135 -
 136
136 -
 137
137 -
 138
138 -
 139
139 -
 140
140 -
 141
141 -
 142
142 -
 143
143 -
144
-
145
-
146
-
147
-
148
-
149
-
150
-
151
-
152
-
153
-
154
-
155
-
156
-
157
-
158
-
159
-
160
-
161
-
162
-
163
-
164
-
165
-
166
-
167
-
168
-
169
-
170
-
171
-
172
-
173
-
174
-
175
-
176
-
177
-
178
-
179
-
180
-
181
-
182
-
183
-
184
-
185
-
186
-
187
-
188
-
189
-
190
-
191
-
192
-
193
-
194
-
195
-
196
-
197
-
198
-
199
-
200
-
201
-
202
-
203
-
204
-
205
-
206
-
207
-
208
-
209
-
210
-
211
-
212
-
213
-
214
-
215
-
216
-
217
-
218
-
219
-
220
-
221
-
222
-
223
-
224
-
225
-
226
-
227
-
228
-
229
-
230
-
231
-
232
-
233
-
234
-
235
-
236
-
237
-
238
-
239
-
240
-
241
-
242
-
243
-
244
-
245
-
246
-
247
-
248
-
249
-
250
-
251
-
252
-
253
-
254
-
255
-
256
-
257
-
258
-
259
-
260
-
261
-
262
-
263
-
264
-
265
-
266
-
267
-
268
-
269
-
270
-
271
-
272
-
273
-
274
-
275
-
276
 |
 |