Epson CX5400 User Manual - Page 33
Start Here, You can also do the following
 |
UPC - 010343848412
View all Epson CX5400 manuals
Add to My Manuals
Save this manual to your list of manuals |
Page 33 highlights
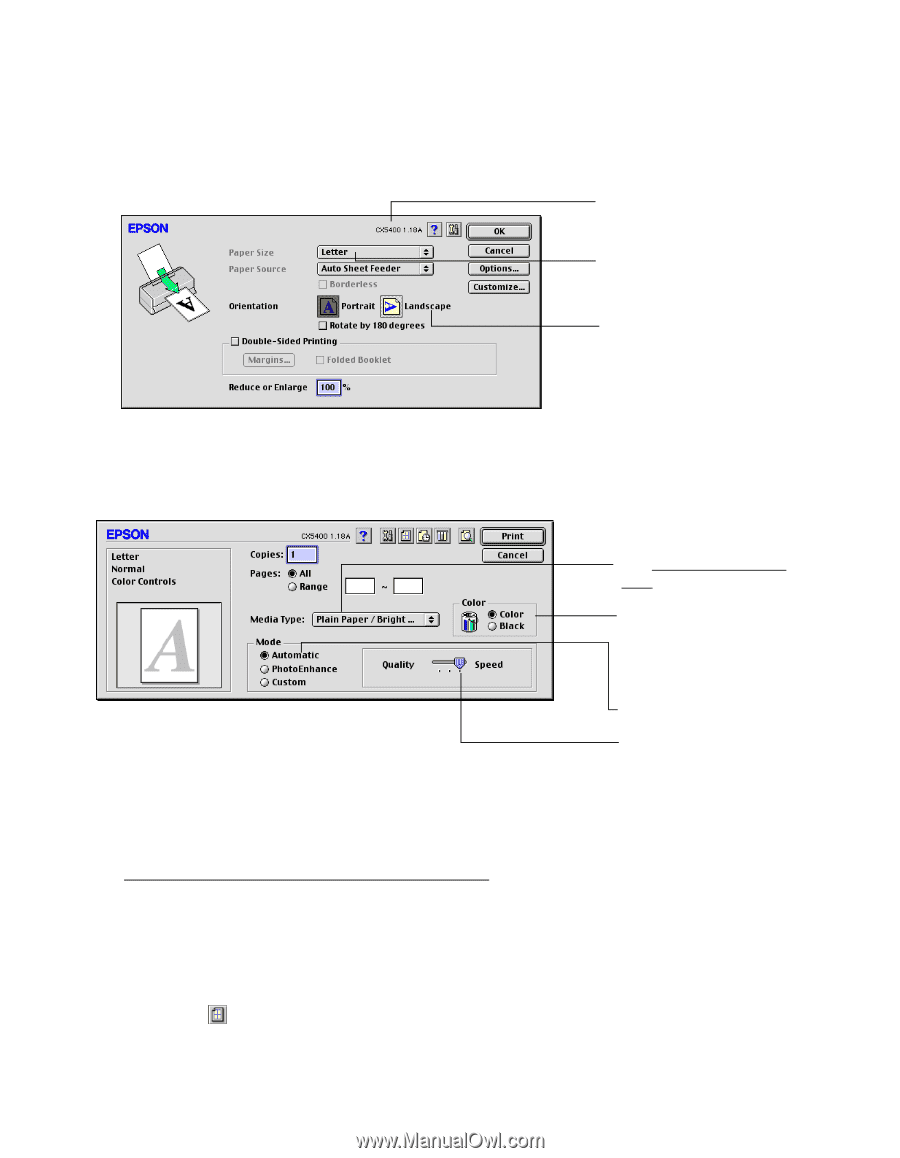
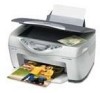
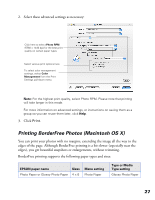
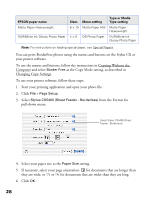
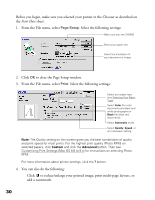
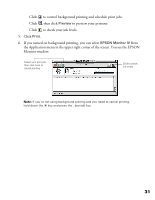
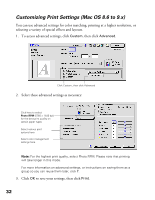
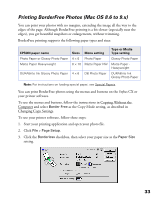
Before you begin, make sure you selected your printer in the Chooser as described on the Start Here sheet. 1. From the File menu, select Page Setup. Select the following settings: Make sure you see CX5400 Select your paper size Select the orientation of your document or image 2. Click OK to close the Page Setup window. 3. From the File menu, select Print. Select the following settings: Select your paper type (see Selecting Your Paper Type) Select Color (for color documents and black and white photographs) or Black (for black text documents) Select Automatic mode Select Quality, Speed, or an in-between setting Note: The Quality setting on this screen gives you the best combination of quality and print speed for most prints. For the highest print quality (Photo RPM) on selected papers, click Custom and click the Advanced button. Then see Customizing Print Settings (Mac OS 8.6 to 9.x) for instructions on selecting Photo RPM. For more information about printer settings, click the ? button. 4. You can also do the following: ■ Click to reduce/enlarge your printed image, print multi-page layouts, or add a watermark. 30
-
 1
1 -
2
-
3
-
4
-
5
-
6
-
7
-
8
-
9
-
10
-
11
-
12
-
13
-
14
-
15
-
16
-
17
-
18
-
19
-
20
-
21
-
22
-
23
-
24
-
25
-
26
-
27
-
 28
28 -
 29
29 -
 30
30 -
 31
31 -
 32
32 -
 33
33 -
 34
34 -
 35
35 -
 36
36 -
 37
37 -
 38
38 -
39
-
40
-
41
-
42
-
43
-
44
-
45
-
46
-
47
-
48
-
49
-
50
-
51
-
52
-
53
-
54
-
55
-
56
-
57
-
58
-
59
-
60
-
61
-
62
-
63
-
64
-
65
-
66
-
67
-
68
-
69
-
70
-
71
-
72
-
73
-
74
-
75
-
76
-
77
-
78
-
79
-
80
-
81
-
82
-
83
-
84
-
85
-
86
-
87
-
88
-
89
-
90
-
91
-
92
-
93
-
94
-
95
-
96
-
97
-
98
-
99
-
100
-
101
-
102
-
103
-
104
-
105
-
106
-
107
-
108
-
109
-
110
-
111
-
112
-
113
 |
 |