Epson CX5400 User Manual - Page 49
marquee, see Adjusting the Scan Area Marquee, image
 |
UPC - 010343848412
View all Epson CX5400 manuals
Add to My Manuals
Save this manual to your list of manuals |
Page 49 highlights
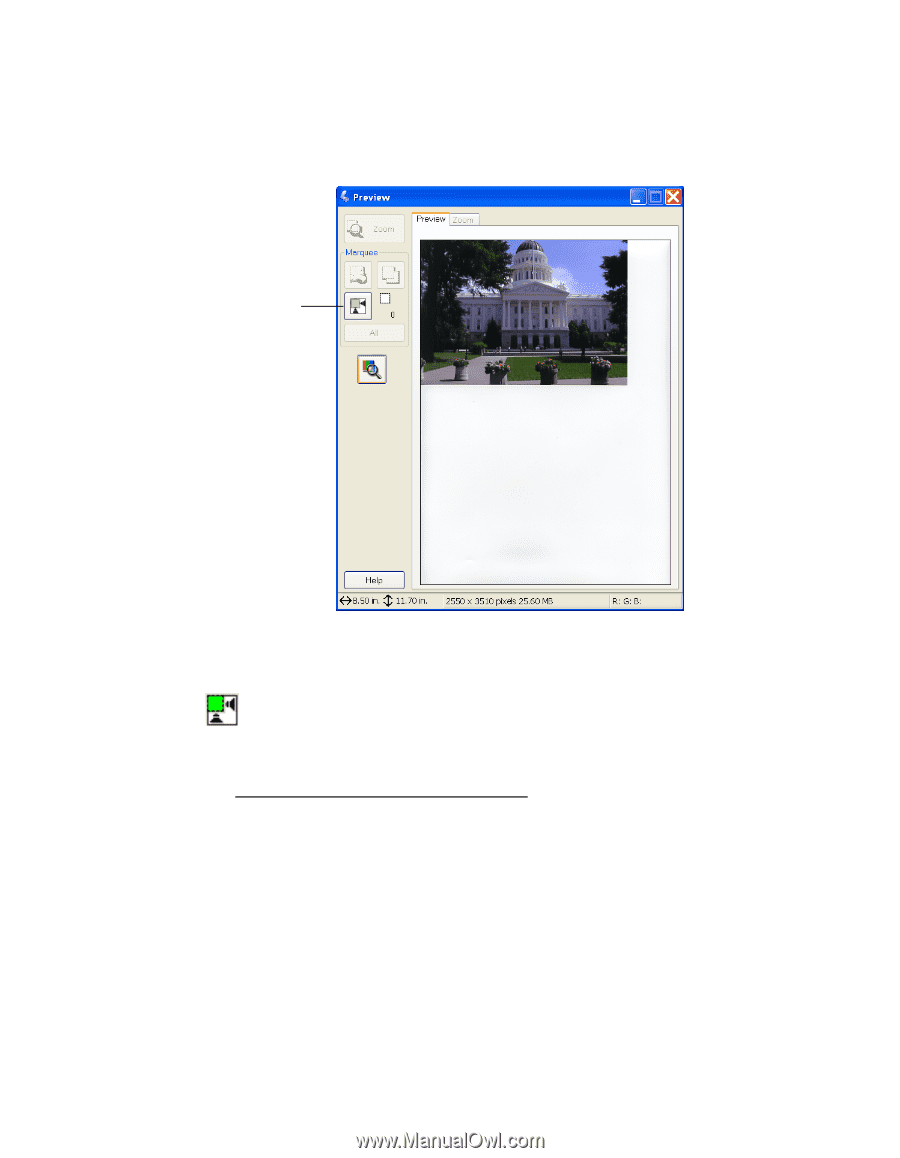
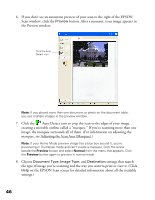
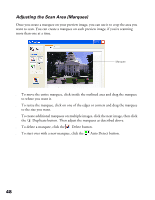
6. If you don't see an automatic preview of your scan to the right of the EPSON Scan window, click the Preview button. After a moment, your image appears in the Preview window. Click the Auto Detect icon Note: If you placed more than one document or photo on the document table, you see multiple images in the preview window. 7. Click the Auto Detect icon to crop the scan to the edges of your image, creating a movable outline called a "marquee." If you're scanning more than one image, the marquee surrounds all of them. (For information on adjusting the marquee, see Adjusting the Scan Area (Marquee).) Note: If your Home Mode preview image has a blue box around it, you're previewing in Thumbnail mode and can't create a marquee. Click the arrow beside the Preview button and select Normal from the menu that appears. Click the Preview button again to preview in normal mode. 8. Choose Document Type, Image Type, and Destination settings that match the type of image you're scanning and the way you want to print or view it. (Click Help on the EPSON Scan screen for detailed information about all the available settings.) 46
-
 1
1 -
2
-
3
-
4
-
5
-
6
-
7
-
8
-
9
-
10
-
11
-
12
-
13
-
14
-
15
-
16
-
17
-
18
-
19
-
20
-
21
-
22
-
23
-
24
-
25
-
26
-
27
-
28
-
29
-
30
-
31
-
32
-
33
-
34
-
35
-
36
-
37
-
38
-
39
-
40
-
41
-
42
-
43
-
 44
44 -
 45
45 -
 46
46 -
 47
47 -
 48
48 -
 49
49 -
 50
50 -
 51
51 -
 52
52 -
 53
53 -
 54
54 -
55
-
56
-
57
-
58
-
59
-
60
-
61
-
62
-
63
-
64
-
65
-
66
-
67
-
68
-
69
-
70
-
71
-
72
-
73
-
74
-
75
-
76
-
77
-
78
-
79
-
80
-
81
-
82
-
83
-
84
-
85
-
86
-
87
-
88
-
89
-
90
-
91
-
92
-
93
-
94
-
95
-
96
-
97
-
98
-
99
-
100
-
101
-
102
-
103
-
104
-
105
-
106
-
107
-
108
-
109
-
110
-
111
-
112
-
113
 |
 |