HP P Class 450/500/550/600/650/700/750 HP Visualize x- and p-Class (733,800, 8 - Page 108
Install the Hard Disk Drive Mounting Bracket
 |
View all HP P Class 450/500/550/600/650/700/750 manuals
Add to My Manuals
Save this manual to your list of manuals |
Page 108 highlights
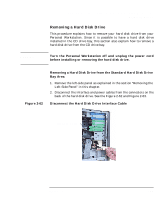
Opening Your Personal Workstation and Installing Accessories Hard Disk Drives Figure 2-71 7. Install the hard disk drive mounting bracket in the third shelf down from the top of the CD drive's bay area. To do this, align the guide rails with the bay area guide and slide the mounting bracket into the bay area until it snaps in place. See Figure 2-71. Install the Hard Disk Drive Mounting Bracket 8. Ensure all cables internal to the Personal Workstation are clear of any sharp edges or hot components. Next replace the top section of the front panel and the left-side panel of the Personal Workstation as explained in the sections "Replacing the Top Section" and "Replacing the Left-Side Panel" in this chapter. 108 Chapter 2
-
 1
1 -
2
-
3
-
4
-
5
-
6
-
7
-
8
-
9
-
10
-
11
-
12
-
13
-
14
-
15
-
16
-
17
-
18
-
19
-
20
-
21
-
22
-
23
-
24
-
25
-
26
-
27
-
28
-
29
-
30
-
31
-
32
-
33
-
34
-
35
-
36
-
37
-
38
-
39
-
40
-
41
-
42
-
43
-
44
-
45
-
46
-
47
-
48
-
49
-
50
-
51
-
52
-
53
-
54
-
55
-
56
-
57
-
58
-
59
-
60
-
61
-
62
-
63
-
64
-
65
-
66
-
67
-
68
-
69
-
70
-
71
-
72
-
73
-
74
-
75
-
76
-
77
-
78
-
79
-
80
-
81
-
82
-
83
-
84
-
85
-
86
-
87
-
88
-
89
-
90
-
91
-
92
-
93
-
94
-
95
-
96
-
97
-
98
-
99
-
100
-
101
-
102
-
 103
103 -
 104
104 -
 105
105 -
 106
106 -
 107
107 -
 108
108 -
 109
109 -
 110
110 -
 111
111 -
 112
112 -
 113
113 -
114
-
115
-
116
-
117
-
118
-
119
-
120
-
121
-
122
-
123
-
124
-
125
-
126
-
127
-
128
-
129
-
130
-
131
-
132
-
133
-
134
-
135
-
136
-
137
-
138
-
139
-
140
-
141
-
142
-
143
-
144
-
145
-
146
-
147
-
148
-
149
-
150
-
151
-
152
-
153
-
154
-
155
-
156
-
157
-
158
-
159
-
160
-
161
-
162
-
163
-
164
-
165
-
166
-
167
-
168
-
169
-
170
-
171
-
172
-
173
-
174
-
175
-
176
-
177
-
178
-
179
-
180
-
181
-
182
-
183
-
184
-
185
-
186
-
187
-
188
-
189
-
190
-
191
-
192
-
193
-
194
-
195
 |
 |
108
Chapter 2
Opening Your Personal Workstation and Installing Accessories
Hard Disk Drives
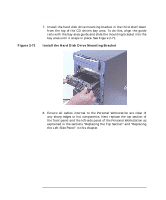
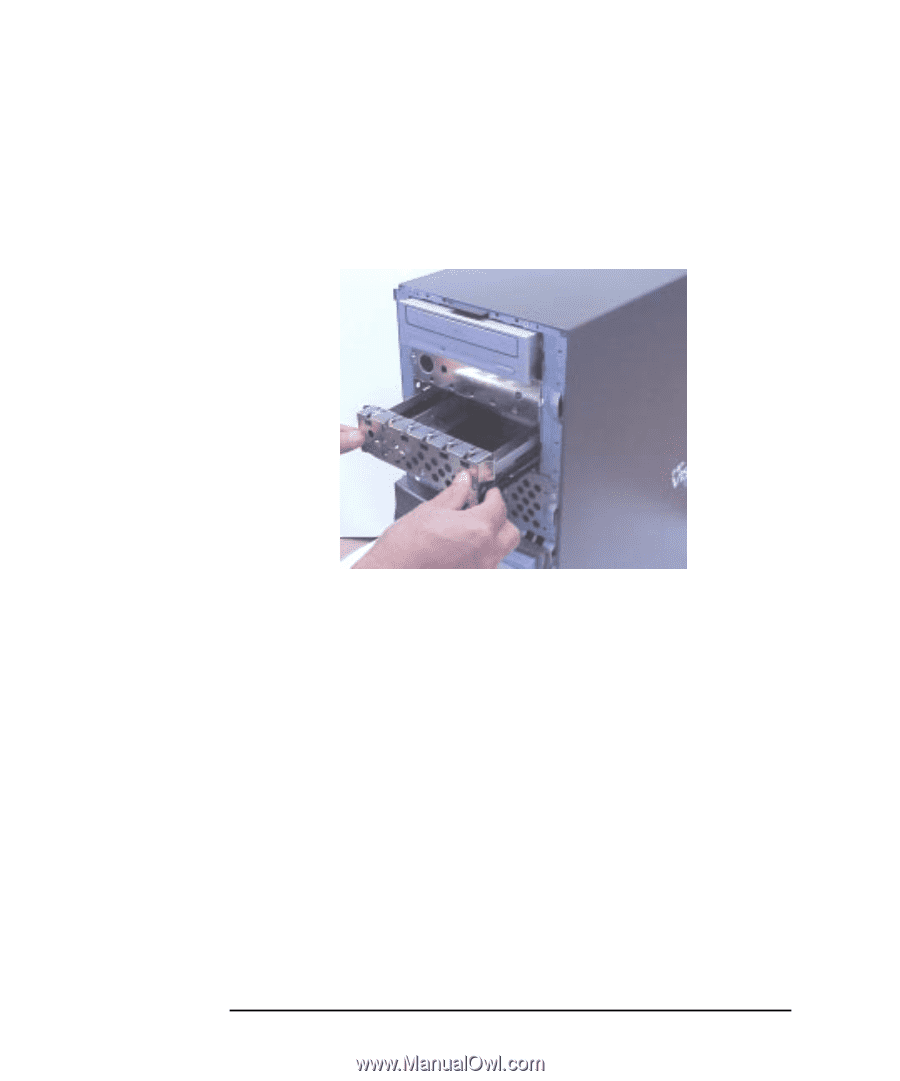
7.
Install the hard disk drive mounting bracket in the third shelf down
from the top of the CD drive’s bay area. To do this, align the guide
rails with the bay area guide and slide the mounting bracket into the
bay area until it snaps in place. See Figure 2-71.
Figure 2-71
Install the Hard Disk Drive Mounting Bracket
8.
Ensure all cables internal to the Personal Workstation are clear of
any sharp edges or hot components. Next replace the top section of
the front panel and the left-side panel of the Personal Workstation as
explained in the sections “Replacing the Top Section” and “Replacing
the Left-Side Panel” in this chapter.