HP P Class 450/500/550/600/650/700/750 HP Visualize x- and p-Class (733,800, 8 - Page 75
Removing Memory
 |
View all HP P Class 450/500/550/600/650/700/750 manuals
Add to My Manuals
Save this manual to your list of manuals |
Page 75 highlights
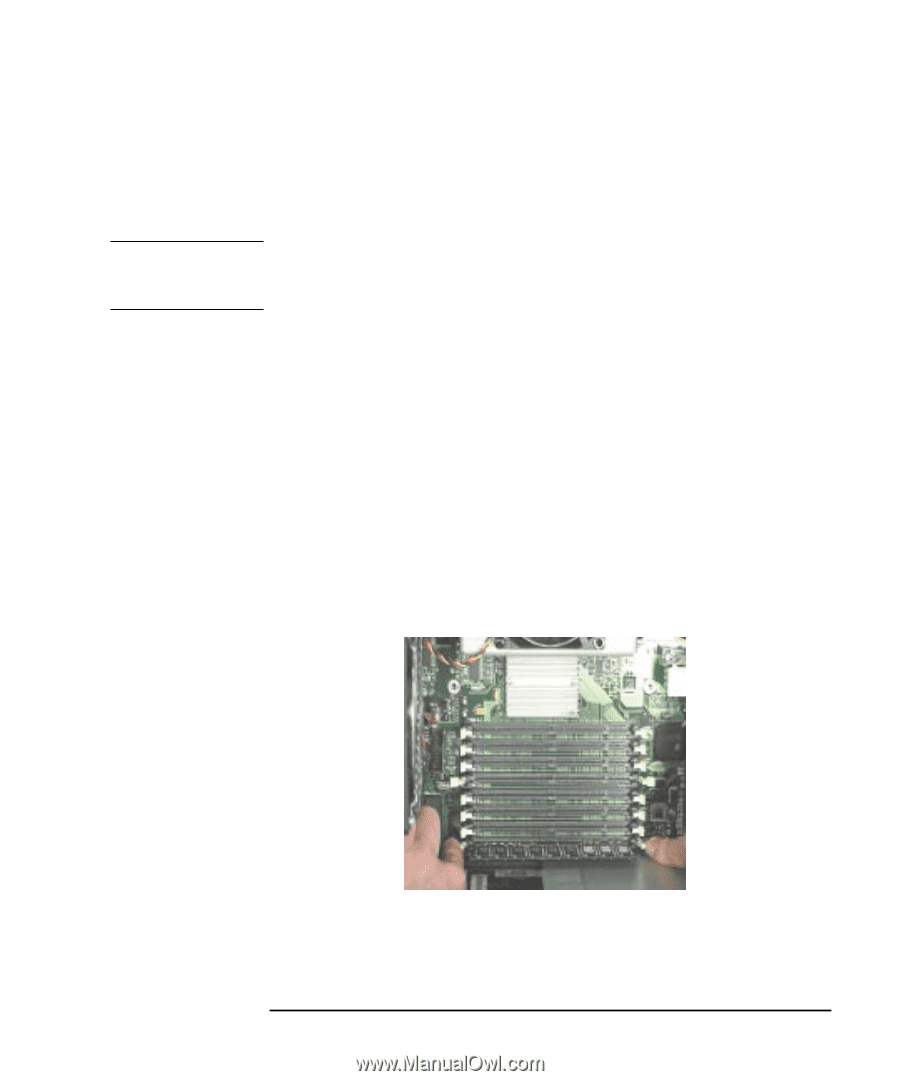
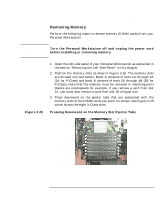
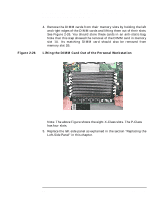
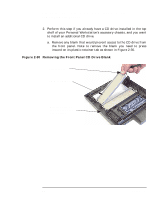
WARNING Opening Your Personal Workstation and Installing Accessories Installing and Removing Memory Removing Memory Perform the following steps to remove memory (DIMM cards) from your Personal Workstation. Turn the Personal Workstation off and unplug the power cord before installing or removing memory. Figure 2-25 1. Open the left-side panel of your Personal Workstation as explained in the section "Removing the Left-Side Panel" in this chapter. 2. Position the memory slots as show in Figure 2-25. The memory slots are divided into two banks. Bank A consists of slots 1A through 4A (2A for P-Class) and bank B consists of slots 1B through 4B (2B for P-Class). Note that the memory must be removed in matching pairs (banks are interleaved) for example, if you remove a card from slot 1A, you must also remove a card from slot 1B of equal size. 3. Press downward on the ejector tabs that are associated with the memory slots of the DIMM cards you want to remove. See Figure 2-25 which shows the eight X-Class slots. Pressing Downward on the Memory Slot Ejector Tabs Chapter 2 75
-
 1
1 -
2
-
3
-
4
-
5
-
6
-
7
-
8
-
9
-
10
-
11
-
12
-
13
-
14
-
15
-
16
-
17
-
18
-
19
-
20
-
21
-
22
-
23
-
24
-
25
-
26
-
27
-
28
-
29
-
30
-
31
-
32
-
33
-
34
-
35
-
36
-
37
-
38
-
39
-
40
-
41
-
42
-
43
-
44
-
45
-
46
-
47
-
48
-
49
-
50
-
51
-
52
-
53
-
54
-
55
-
56
-
57
-
58
-
59
-
60
-
61
-
62
-
63
-
64
-
65
-
66
-
67
-
68
-
69
-
 70
70 -
 71
71 -
 72
72 -
 73
73 -
 74
74 -
 75
75 -
 76
76 -
 77
77 -
 78
78 -
 79
79 -
 80
80 -
81
-
82
-
83
-
84
-
85
-
86
-
87
-
88
-
89
-
90
-
91
-
92
-
93
-
94
-
95
-
96
-
97
-
98
-
99
-
100
-
101
-
102
-
103
-
104
-
105
-
106
-
107
-
108
-
109
-
110
-
111
-
112
-
113
-
114
-
115
-
116
-
117
-
118
-
119
-
120
-
121
-
122
-
123
-
124
-
125
-
126
-
127
-
128
-
129
-
130
-
131
-
132
-
133
-
134
-
135
-
136
-
137
-
138
-
139
-
140
-
141
-
142
-
143
-
144
-
145
-
146
-
147
-
148
-
149
-
150
-
151
-
152
-
153
-
154
-
155
-
156
-
157
-
158
-
159
-
160
-
161
-
162
-
163
-
164
-
165
-
166
-
167
-
168
-
169
-
170
-
171
-
172
-
173
-
174
-
175
-
176
-
177
-
178
-
179
-
180
-
181
-
182
-
183
-
184
-
185
-
186
-
187
-
188
-
189
-
190
-
191
-
192
-
193
-
194
-
195
 |
 |