HP P Class 450/500/550/600/650/700/750 HP Visualize x- and p-Class (733,800, 8 - Page 94
Remove the Floppy Disk Drive from Its Shelf
 |
View all HP P Class 450/500/550/600/650/700/750 manuals
Add to My Manuals
Save this manual to your list of manuals |
Page 94 highlights
Opening Your Personal Workstation and Installing Accessories Removable Media Devices Figure 2-51 3. Remove the floppy disk drive from the fifth-internal shelf down from the top of the Personal Workstation's chassis. To do this, press inward on the guide rail's retainer tabs and slide the floppy disk drive outward as shown in Figure 2-51. Remove the Floppy Disk Drive from Its Shelf 4. Ensure all cables internal to the Personal Workstation are clear of any sharp edges or hot components. Next replace the top section of the front panel and the left-side panel of the Personal Workstation as explained in the sections "Replacing the Front Panel" and "Replacing the Left-Side Panel" in this chapter. 94 Chapter 2
-
 1
1 -
2
-
3
-
4
-
5
-
6
-
7
-
8
-
9
-
10
-
11
-
12
-
13
-
14
-
15
-
16
-
17
-
18
-
19
-
20
-
21
-
22
-
23
-
24
-
25
-
26
-
27
-
28
-
29
-
30
-
31
-
32
-
33
-
34
-
35
-
36
-
37
-
38
-
39
-
40
-
41
-
42
-
43
-
44
-
45
-
46
-
47
-
48
-
49
-
50
-
51
-
52
-
53
-
54
-
55
-
56
-
57
-
58
-
59
-
60
-
61
-
62
-
63
-
64
-
65
-
66
-
67
-
68
-
69
-
70
-
71
-
72
-
73
-
74
-
75
-
76
-
77
-
78
-
79
-
80
-
81
-
82
-
83
-
84
-
85
-
86
-
87
-
88
-
 89
89 -
 90
90 -
 91
91 -
 92
92 -
 93
93 -
 94
94 -
 95
95 -
 96
96 -
 97
97 -
 98
98 -
 99
99 -
100
-
101
-
102
-
103
-
104
-
105
-
106
-
107
-
108
-
109
-
110
-
111
-
112
-
113
-
114
-
115
-
116
-
117
-
118
-
119
-
120
-
121
-
122
-
123
-
124
-
125
-
126
-
127
-
128
-
129
-
130
-
131
-
132
-
133
-
134
-
135
-
136
-
137
-
138
-
139
-
140
-
141
-
142
-
143
-
144
-
145
-
146
-
147
-
148
-
149
-
150
-
151
-
152
-
153
-
154
-
155
-
156
-
157
-
158
-
159
-
160
-
161
-
162
-
163
-
164
-
165
-
166
-
167
-
168
-
169
-
170
-
171
-
172
-
173
-
174
-
175
-
176
-
177
-
178
-
179
-
180
-
181
-
182
-
183
-
184
-
185
-
186
-
187
-
188
-
189
-
190
-
191
-
192
-
193
-
194
-
195
 |
 |

94
Chapter 2
Opening Your Personal Workstation and Installing Accessories
Removable Media Devices
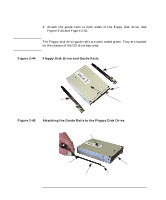
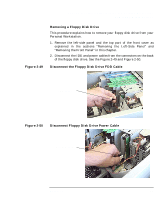
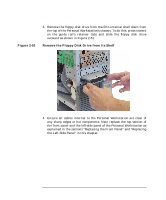
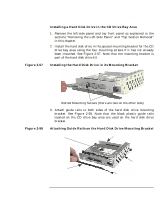
3.
Remove the floppy disk drive from the fifth-internal shelf down from
the top of the Personal Workstation’s chassis. To do this, press inward
on the guide rail’s retainer tabs and slide the floppy disk drive
outward as shown in Figure 2-51.
Figure 2-51
Remove the Floppy Disk Drive from Its Shelf
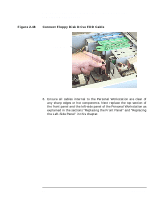
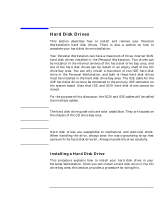
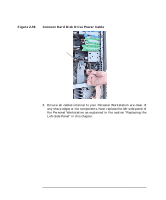
4.
Ensure all cables internal to the Personal Workstation are clear of
any sharp edges or hot components. Next replace the top section of
the front panel and the left-side panel of the Personal Workstation as
explained in the sections “Replacing the Front Panel” and “Replacing
the Left-Side Panel” in this chapter.