Intermec PX4i PX4i and PX6i High Performance Printer User's Manual - Page 73
Setup, NETWORK, NETWORK TYPE, ETHERNET, I/O net1, Enter - default password
 |
View all Intermec PX4i manuals
Add to My Manuals
Save this manual to your list of manuals |
Page 73 highlights
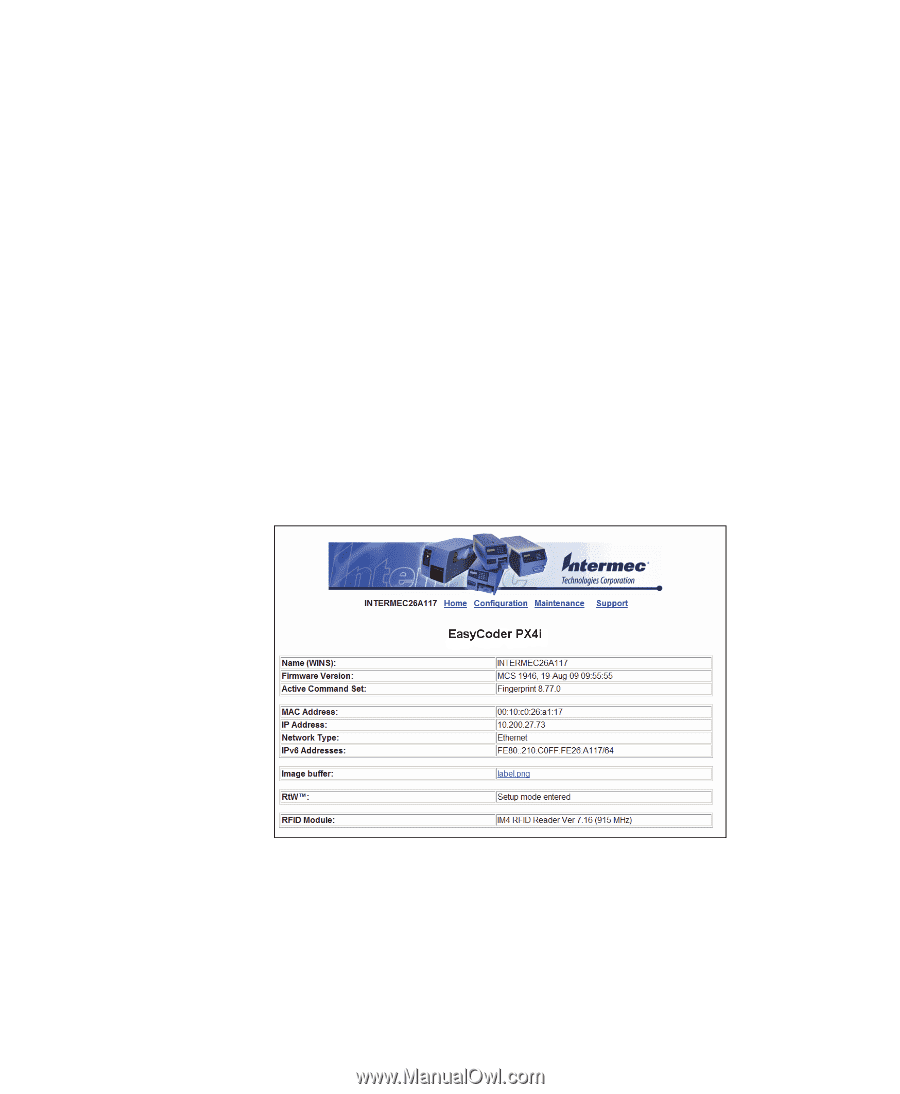
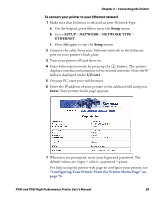
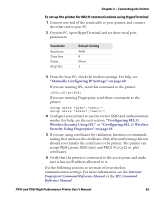
Chapter 2 - Connecting the Printer To connect your printer to your Ethernet network 1 Make sure that Ethernet is selected as your Network Type. a On the keypad, press T to enter the Setup menu. b Go to SETUP > NETWORK > NETWORK TYPE > ETHERNET. c Press T again to exit the Setup menu. 2 Connect the cable from your Ethernet network to the Ethernet port on your printer's back plate. 3 Turn your printer off and then on. 4 Enter Information mode by pressing the I button. The printer displays interface information in five-second intervals. Note the IP address displayed under I/O net1. 5 On your PC, start your web browser. 6 Enter the IP address of your printer in the address field and press Enter. Your printer home page appears. 7 When you are prompted, enter your login and password. The default values are: login = admin, password = pass. For help using the printer web page to configure your printer, see "Configuring Your Printer From the Printer Home Page" on page 76. PX4i and PX6i High Performance Printer User's Manual 59
-
 1
1 -
2
-
3
-
4
-
5
-
6
-
7
-
8
-
9
-
10
-
11
-
12
-
13
-
14
-
15
-
16
-
17
-
18
-
19
-
20
-
21
-
22
-
23
-
24
-
25
-
26
-
27
-
28
-
29
-
30
-
31
-
32
-
33
-
34
-
35
-
36
-
37
-
38
-
39
-
40
-
41
-
42
-
43
-
44
-
45
-
46
-
47
-
48
-
49
-
50
-
51
-
52
-
53
-
54
-
55
-
56
-
57
-
58
-
59
-
60
-
61
-
62
-
63
-
64
-
65
-
66
-
67
-
 68
68 -
 69
69 -
 70
70 -
 71
71 -
 72
72 -
 73
73 -
 74
74 -
 75
75 -
 76
76 -
 77
77 -
 78
78 -
79
-
80
-
81
-
82
-
83
-
84
-
85
-
86
-
87
-
88
-
89
-
90
-
91
-
92
-
93
-
94
-
95
-
96
-
97
-
98
-
99
-
100
-
101
-
102
-
103
-
104
-
105
-
106
-
107
-
108
-
109
-
110
-
111
-
112
-
113
-
114
-
115
-
116
-
117
-
118
-
119
-
120
-
121
-
122
-
123
-
124
-
125
-
126
-
127
-
128
-
129
-
130
-
131
-
132
-
133
-
134
-
135
-
136
-
137
-
138
-
139
-
140
-
141
-
142
-
143
-
144
-
145
-
146
-
147
-
148
-
149
-
150
-
151
-
152
-
153
-
154
-
155
-
156
-
157
-
158
-
159
-
160
-
161
-
162
-
163
-
164
-
165
-
166
-
167
-
168
-
169
-
170
-
171
-
172
-
173
-
174
-
175
-
176
-
177
-
178
-
179
-
180
-
181
-
182
-
183
-
184
-
185
-
186
-
187
-
188
-
189
-
190
-
191
-
192
-
193
-
194
-
195
-
196
-
197
-
198
-
199
-
200
-
201
-
202
-
203
-
204
 |
 |