Intermec PX4i PX4i and PX6i High Performance Printer User's Manual - Page 85
Using a USB Mass Storage Device, Connecting a Keyboard to the USB Host Port, DEVICES., Run cd d
 |
View all Intermec PX4i manuals
Add to My Manuals
Save this manual to your list of manuals |
Page 85 highlights
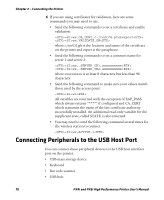
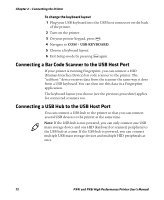
Chapter 2 - Connecting the Printer Using a USB Mass Storage Device You can use a USB mass storage device (thumb drive) to store additional fonts and images for the printer. You can also use the device to upgrade your firmware. For more information on using the USB mass storage device to upgrade the printer, see "Upgrading Firmware" on page 102. To verify the USB storage device is supported by your printer, insert the USB storage device in the appropriate slot on the back of your printer. On the display screen, one of the following status messages briefly appears: • USB memory stick connected • USB memory stick not supported If no status message appears when you insert the USB storage device, you can manually verify the USB storage device is supported using HyperTerminal. To verify the USB storage device is supported by your printer 1 Connect one end of your serial cable to your printer, and connect the other end to your PC. 2 On your PC, open HyperTerminal. 3 In HyperTerminal, use one of the following Fingerprint commands: • Type DEVICES. The list of devices your printer supports appears. If the USB storage device is supported, it appears as drive d: in this list. • Type Run "cd d:" and press Enter. Type Run "ls" and press Enter. If the USB storage device is supported, the contents of the USB storage device appears. Connecting a Keyboard to the USB Host Port You can use an external USB keyboard to input data in Fingerprint applications. Some applications may require more complex input from users than the simple push of a button. The printer comes with five keyboard layouts: US, Swedish, French, German, and User Defined. PX4i and PX6i High Performance Printer User's Manual 71
-
 1
1 -
2
-
3
-
4
-
5
-
6
-
7
-
8
-
9
-
10
-
11
-
12
-
13
-
14
-
15
-
16
-
17
-
18
-
19
-
20
-
21
-
22
-
23
-
24
-
25
-
26
-
27
-
28
-
29
-
30
-
31
-
32
-
33
-
34
-
35
-
36
-
37
-
38
-
39
-
40
-
41
-
42
-
43
-
44
-
45
-
46
-
47
-
48
-
49
-
50
-
51
-
52
-
53
-
54
-
55
-
56
-
57
-
58
-
59
-
60
-
61
-
62
-
63
-
64
-
65
-
66
-
67
-
68
-
69
-
70
-
71
-
72
-
73
-
74
-
75
-
76
-
77
-
78
-
79
-
 80
80 -
 81
81 -
 82
82 -
 83
83 -
 84
84 -
 85
85 -
 86
86 -
 87
87 -
 88
88 -
 89
89 -
 90
90 -
91
-
92
-
93
-
94
-
95
-
96
-
97
-
98
-
99
-
100
-
101
-
102
-
103
-
104
-
105
-
106
-
107
-
108
-
109
-
110
-
111
-
112
-
113
-
114
-
115
-
116
-
117
-
118
-
119
-
120
-
121
-
122
-
123
-
124
-
125
-
126
-
127
-
128
-
129
-
130
-
131
-
132
-
133
-
134
-
135
-
136
-
137
-
138
-
139
-
140
-
141
-
142
-
143
-
144
-
145
-
146
-
147
-
148
-
149
-
150
-
151
-
152
-
153
-
154
-
155
-
156
-
157
-
158
-
159
-
160
-
161
-
162
-
163
-
164
-
165
-
166
-
167
-
168
-
169
-
170
-
171
-
172
-
173
-
174
-
175
-
176
-
177
-
178
-
179
-
180
-
181
-
182
-
183
-
184
-
185
-
186
-
187
-
188
-
189
-
190
-
191
-
192
-
193
-
194
-
195
-
196
-
197
-
198
-
199
-
200
-
201
-
202
-
203
-
204
 |
 |