Lexmark OptraImage Color 1200r User's Guide - Page 20
Using the operator panel, Indicator light
 |
View all Lexmark OptraImage Color 1200r manuals
Add to My Manuals
Save this manual to your list of manuals |
Page 20 highlights
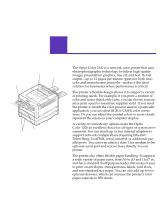
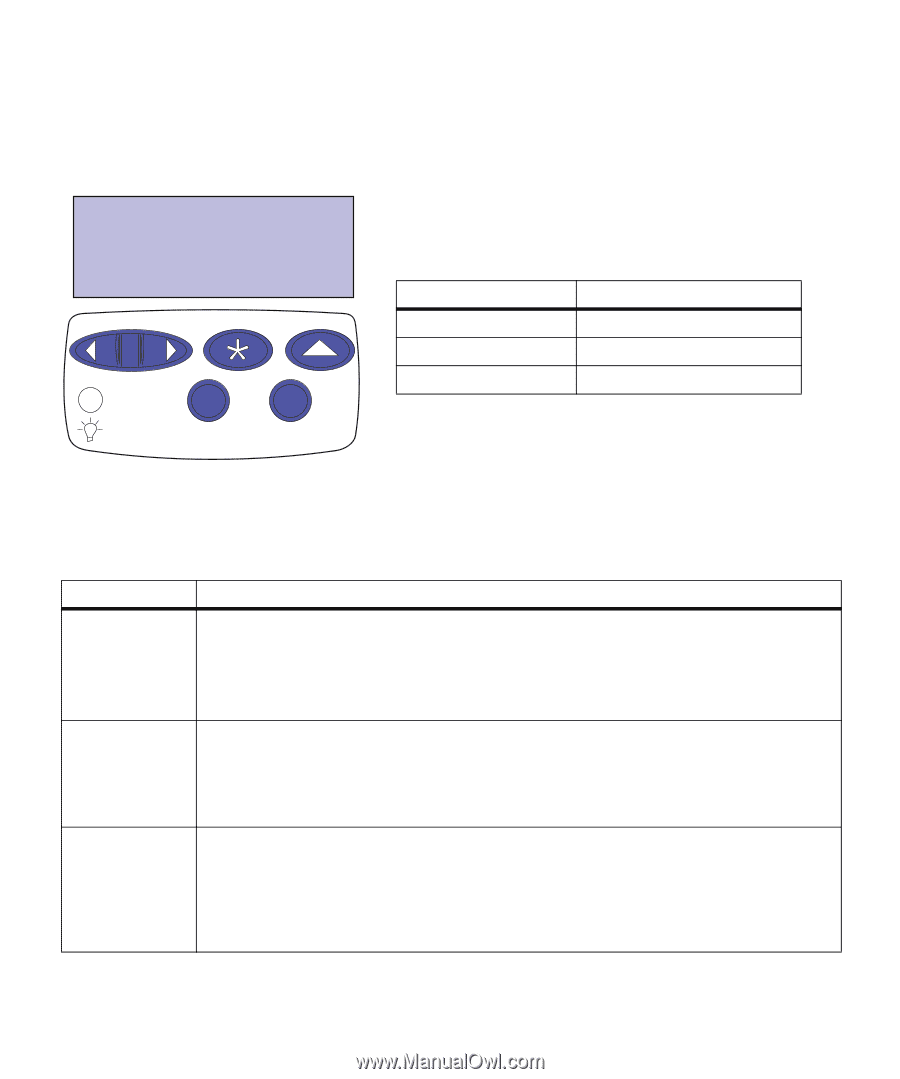
Using the operator panel The operator panel on the top of your printer has a 2-line by 16-character liquid crystal display (LCD), five buttons, and one indicator light. The light indicates whether the printer power is on and whether the printer is idle or busy processing a job. Menu Select Return Indicator light State Off On Flashing Indicates Printer power is off. Printer is on, but idle. Printer is busy processing a job. Go Stop Use the five operator panel buttons to open a menu, scroll through a list of values, select printer settings, and clear error messages. Detailed instructions for changing a printer setting begin on page 9. Operator panel buttons Button Go Menu > and
-
 1
1 -
2
-
3
-
4
-
5
-
6
-
7
-
8
-
9
-
10
-
11
-
12
-
13
-
14
-
 15
15 -
 16
16 -
 17
17 -
 18
18 -
 19
19 -
 20
20 -
 21
21 -
 22
22 -
 23
23 -
 24
24 -
 25
25 -
26
-
27
-
28
-
29
-
30
-
31
-
32
-
33
-
34
-
35
-
36
-
37
-
38
-
39
-
40
-
41
-
42
-
43
-
44
-
45
-
46
-
47
-
48
-
49
-
50
-
51
-
52
-
53
-
54
-
55
-
56
-
57
-
58
-
59
-
60
-
61
-
62
-
63
-
64
-
65
-
66
-
67
-
68
-
69
-
70
-
71
-
72
-
73
-
74
-
75
-
76
-
77
-
78
-
79
-
80
-
81
-
82
-
83
-
84
-
85
-
86
-
87
-
88
-
89
-
90
-
91
-
92
-
93
-
94
-
95
-
96
-
97
-
98
-
99
-
100
-
101
-
102
-
103
-
104
-
105
-
106
-
107
-
108
-
109
-
110
-
111
-
112
-
113
-
114
-
115
-
116
-
117
-
118
-
119
-
120
-
121
-
122
-
123
-
124
-
125
-
126
-
127
-
128
-
129
-
130
-
131
-
132
-
133
-
134
-
135
-
136
-
137
-
138
-
139
-
140
-
141
-
142
-
143
-
144
-
145
-
146
-
147
-
148
-
149
-
150
-
151
-
152
-
153
-
154
-
155
-
156
-
157
-
158
-
159
-
160
-
161
-
162
-
163
-
164
-
165
-
166
-
167
-
168
-
169
-
170
-
171
-
172
-
173
-
174
-
175
-
176
-
177
-
178
-
179
-
180
-
181
-
182
-
183
-
184
-
185
-
186
-
187
-
188
-
189
-
190
-
191
-
192
-
193
-
194
-
195
-
196
-
197
-
198
-
199
-
200
-
201
-
202
-
203
-
204
-
205
-
206
-
207
-
208
 |
 |
6
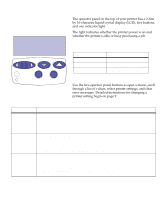
Chapter 2: Changing printer settings
Using the
operator panel
The operator panel on the top of your printer has a 2-line
by 16-character liquid crystal display (LCD), five buttons,
and one indicator light.
The light indicates whether the printer power is on and
whether the printer is idle or busy processing a job.
Use the five operator panel buttons to open a menu, scroll
through a list of values, select printer settings, and clear
error messages. Detailed instructions for changing a
printer setting begin on page 9.
Select
Return
Go
Stop
Menu
Indicator light
State
Indicates
Off
Printer power is off.
On
Printer is on, but idle.
Flashing
Printer is busy processing a job.
Operator panel buttons
Button
Function
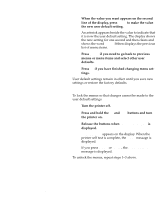
Go
Press the
Go
button to:
•
Exit printer menus and return the printer to the ready state
•
Clear certain messages from the display
If you’ve changed printer settings from the operator panel menus, press
Go
before you send a
job to print.
Menu >
and
<Menu
Press the
Menu>
or
<Menu
button to:
•
Enter the menus from the
ready
state
•
Scroll to the next (
Menu>
) or the previous (
<Menu
) menu, menu item, or value
•
Increase or decrease a numerical value for a menu item setting
•
Display the
Job Menu or the Supplies Menu while the printer is busy
Select
Press the
Select
button to:
•
Select the menu shown on the second line of the display and view the available menu items
•
Select the menu item shown on the second line of the display and view the available values
and the current user default setting for that menu item
•
Save the value displayed on the second line of the display as the new user default setting
•
Clear certain messages from the display