Samsung SCD6550 User Manual (ENGLISH) - Page 90
FranÇais, English - reset
 |
UPC - 036725365506
View all Samsung SCD6550 manuals
Add to My Manuals
Save this manual to your list of manuals |
Page 90 highlights
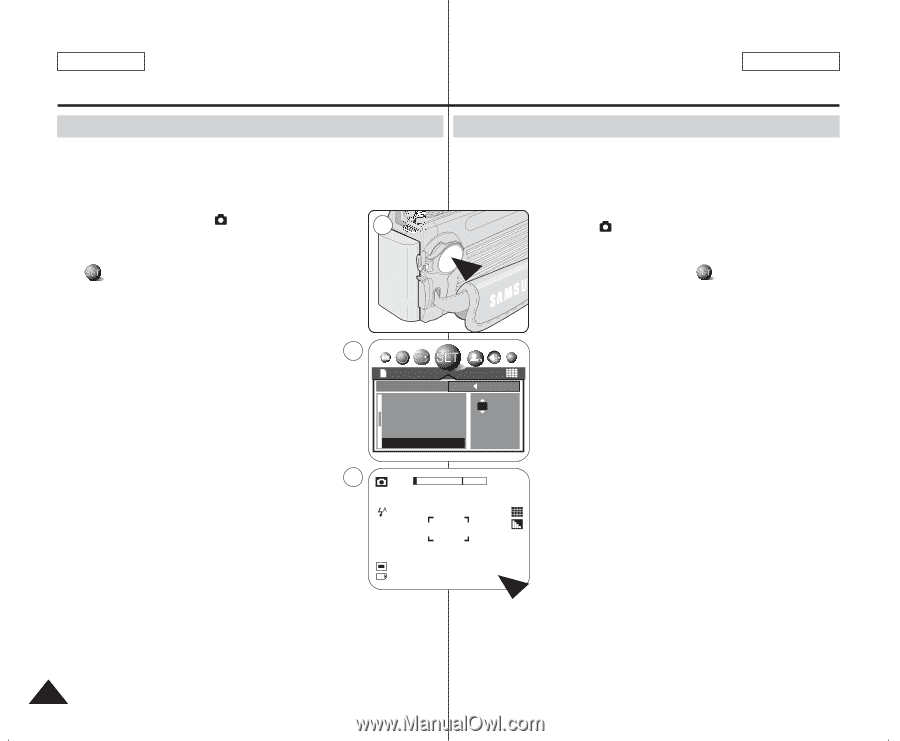
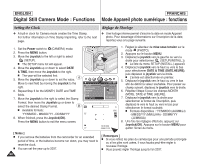
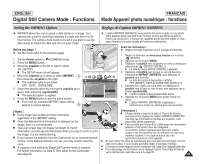
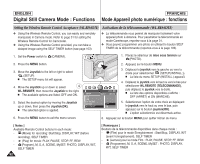
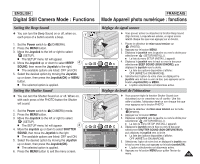
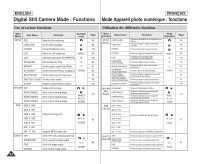
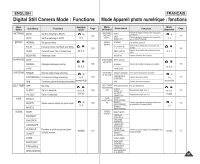
ENGLISH FRANÇAIS Digital Still Camera Mode : Functions Mode Appareil photo numérique : fonctions Setting the Clock Réglage de l'horloge ✤ A built-in clock for Camera mode creates the Time Stamp. For further information on Time Stamp Imprinting, refer to the next page. ✤ Une horloge interne permet d'inscrire la date en mode Appareil photo. Pour davantage d'informations sur l'inscription de la date, reportez-vous à la page suivante. 1. Set the Power switch to (CAMERA) mode. 2. Press the MENU button. 3. Move the Joystick to the left or right to select (SETUP). I The SETUP menu list will appear. 4. Move the Joystick up or down to select DATE & TIME, then move the Joystick to the right. I The year will be selected first. 5. Move the Joystick up or down to set the value. 4 Move to next field by moving the Joystick to the right. 6. Repeat Step 5 for the MONTH, DATE and TIME fields. 7. Move the Joystick to the right to select the Stamp Format, then move the Joystick up or down to select the desired Stamp Format. 8 I Available formats: 'YY/MM/DD - MM/DD/'YY - DD/MM/'YY 8. When finished, press the Joystick(OK). Press the MENU button to exit the menu screen. 1 SETUP LANGUAGE FORMAT LCD USB DATE&TIME 2592 BACK: SET:OK 05/01/01 00:00 'YY/MM/DD 10 2592 10:30 AM 2005.01.01 1. Réglez le sélecteur de mise sous tension sur le mode (PHOTO). 2. Appuyez sur le bouton MENU. 3. Déplacez le joystick vers la gauche ou vers la droite pour sélectionner (SETUP(INSTALL.)). I La liste du menu SETUP (INSTALL.) apparaît. 4. Déplacez le joystick vers le haut ou vers le bas pour sélectionner DATE & TIME (DATE.HEURE), puis déplacez le joystick vers la droite. I L'année est sélectionnée en premier. 5. Déplacez le joystick vers le haut ou vers le bas afin de définir la valeur souhaitée. Pour passer au champ suivant, déplacez le joystick vers la droite. 6. Répétez l'étape 5 pour les champs MONTH (MOIS), DATE et TIME (HEURE). 7. Déplacez le joystick vers la droite pour sélectionner le format de l'inscription, puis déplacez-le vers le haut ou vers le bas pour sélectionner le format souhaité. I Formats disponibles : 'YY/MM/DD (AA/MM/JJ) - MM/DD/'YY (MM/JJ/AA) - DD/MM/'YY (JJ/MM/AA) 8. Une fois les réglages effectués, appuyez sur Joystick(OK). Appuyez sur le bouton MENU pour quitter l'écran du menu. [ Notes ] I If you remove the batteries from the camcorder for an extended period of time, or the batteries become run down, you may need to reset the clock. I You can set the year up to 2037. 90 [ Remarques ] I Si vous retirez les piles du caméscope pour une période prolongée ou si les piles sont usées, il vous faudra peut-être régler à nouveau l'horloge. I Vous pouvez régler l'horloge jusqu'à l'an 2037.
-
 1
1 -
2
-
3
-
4
-
5
-
6
-
7
-
8
-
9
-
10
-
11
-
12
-
13
-
14
-
15
-
16
-
17
-
18
-
19
-
20
-
21
-
22
-
23
-
24
-
25
-
26
-
27
-
28
-
29
-
30
-
31
-
32
-
33
-
34
-
35
-
36
-
37
-
38
-
39
-
40
-
41
-
42
-
43
-
44
-
45
-
46
-
47
-
48
-
49
-
50
-
51
-
52
-
53
-
54
-
55
-
56
-
57
-
58
-
59
-
60
-
61
-
62
-
63
-
64
-
65
-
66
-
67
-
68
-
69
-
70
-
71
-
72
-
73
-
74
-
75
-
76
-
77
-
78
-
79
-
80
-
81
-
82
-
83
-
84
-
 85
85 -
 86
86 -
 87
87 -
 88
88 -
 89
89 -
 90
90 -
 91
91 -
 92
92 -
 93
93 -
 94
94 -
 95
95 -
96
-
97
-
98
-
99
-
100
-
101
-
102
-
103
-
104
-
105
-
106
-
107
-
108
-
109
-
110
-
111
-
112
-
113
-
114
-
115
-
116
-
117
-
118
-
119
-
120
-
121
-
122
-
123
-
124
-
125
-
126
-
127
-
128
-
129
-
130
-
131
-
132
-
133
-
134
-
135
-
136
-
137
-
138
-
139
-
140
-
141
-
142
-
143
-
144
-
145
-
146
-
147
-
148
-
149
-
150
-
151
-
152
-
153
-
154
-
155
 |
 |