Samsung SCH U520 User Manual (ENGLISH) - Page 136
White Balance, Options
 |
View all Samsung SCH U520 manuals
Add to My Manuals
Save this manual to your list of manuals |
Page 136 highlights
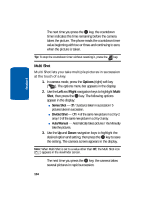
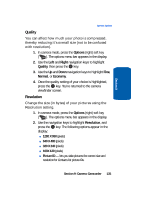
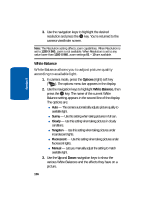
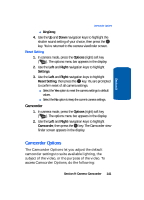
Section 9 3. Use the navigation keys to highlight the desired resolution and press the OK key. You're returned to the camera viewfinder screen. Note: The Resolution setting affects zoom capabilities. When Resolution is set to 1280 X 960, zoom is not available. When Resolution is set to any value lower than 1280 X 960, zoom settings 01 - 10 are available. White Balance White Balance allows you to adjust picture quality according to available light. 1. In camera mode, press the Options (right) soft key ( ). The options menu bar appears in the display. 2. Use the navigation keys to highlight White Balance, then press the OK key. The name of the current White Balance setting appears in the second line of the display. The options are: ⅷ Auto - The camera automatically adjusts picture quality to available light. ⅷ Sunny - Use this setting when taking pictures in full sun. ⅷ Cloudy - Use this setting when taking pictures in cloudy conditions. ⅷ Tungsten - Use this setting when taking pictures under incandescent lights. ⅷ Fluorescent - Use this setting when taking pictures under fluorescent lights. ⅷ Manual - Lets you manually adjust the setting to match available light. 3. Use the Up and Down navigation keys to show the various White Balances and the effects they have on a picture. 136
-
 1
1 -
2
-
3
-
4
-
5
-
6
-
7
-
8
-
9
-
10
-
11
-
12
-
13
-
14
-
15
-
16
-
17
-
18
-
19
-
20
-
21
-
22
-
23
-
24
-
25
-
26
-
27
-
28
-
29
-
30
-
31
-
32
-
33
-
34
-
35
-
36
-
37
-
38
-
39
-
40
-
41
-
42
-
43
-
44
-
45
-
46
-
47
-
48
-
49
-
50
-
51
-
52
-
53
-
54
-
55
-
56
-
57
-
58
-
59
-
60
-
61
-
62
-
63
-
64
-
65
-
66
-
67
-
68
-
69
-
70
-
71
-
72
-
73
-
74
-
75
-
76
-
77
-
78
-
79
-
80
-
81
-
82
-
83
-
84
-
85
-
86
-
87
-
88
-
89
-
90
-
91
-
92
-
93
-
94
-
95
-
96
-
97
-
98
-
99
-
100
-
101
-
102
-
103
-
104
-
105
-
106
-
107
-
108
-
109
-
110
-
111
-
112
-
113
-
114
-
115
-
116
-
117
-
118
-
119
-
120
-
121
-
122
-
123
-
124
-
125
-
126
-
127
-
128
-
129
-
130
-
 131
131 -
 132
132 -
 133
133 -
 134
134 -
 135
135 -
 136
136 -
 137
137 -
 138
138 -
 139
139 -
 140
140 -
 141
141 -
142
-
143
-
144
-
145
-
146
-
147
-
148
-
149
-
150
-
151
-
152
-
153
-
154
-
155
-
156
-
157
-
158
-
159
-
160
-
161
-
162
-
163
-
164
-
165
-
166
-
167
-
168
-
169
-
170
-
171
-
172
-
173
-
174
-
175
-
176
-
177
-
178
-
179
-
180
-
181
-
182
-
183
-
184
-
185
-
186
-
187
-
188
-
189
-
190
-
191
-
192
-
193
-
194
-
195
-
196
-
197
-
198
-
199
-
200
-
201
-
202
-
203
-
204
-
205
-
206
-
207
-
208
-
209
-
210
-
211
-
212
-
213
-
214
-
215
-
216
-
217
-
218
-
219
-
220
-
221
-
222
-
223
-
224
-
225
-
226
-
227
-
228
-
229
-
230
-
231
-
232
-
233
-
234
-
235
-
236
-
237
-
238
-
239
-
240
-
241
-
242
-
243
-
244
-
245
-
246
-
247
-
248
-
249
-
250
-
251
-
252
-
253
-
254
-
255
-
256
-
257
-
258
-
259
-
260
-
261
-
262
-
263
-
264
-
265
-
266
-
267
-
268
-
269
-
270
-
271
-
272
-
273
-
274
-
275
-
276
-
277
-
278
 |
 |
