Samsung SPH-M930 User Manual (user Manual) (ver.f2) (English(north America)) - Page 46
Synchronize Contacts
 |
View all Samsung SPH-M930 manuals
Add to My Manuals
Save this manual to your list of manuals |
Page 46 highlights
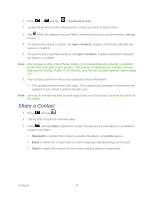
Open an image location (Take photo or Select photo from Gallery) and tap an onscreen image to prepare it for use. See Open Gallery and Take Pictures for more information. Press image. to return to the Select picture screen where you can now select the new 3. Touch and drag along the sides of the yellow border box to begin cropping the desired area, and then tap Save to assign selected picture. 4. To save the phonebook, tap Done. Assign a New Picture to a Contact 1. From the Camera gallery (or other image folder), tap an image icon to open the image. 2. With the picture displayed, press and tap More > Set as, and select Contact icon. Join a Contact When you have contacts from various sources (Gmail, phone, Facebook, etc.), you may have multiple similar entries for a single contact. Your device's Contacts application lets you link multiple entries into a single contact. 1. Press and tap . 2. Tap a contact to display it, then press and tap Edit contact. 3. Press and tap Join. 4. Tap another entry to link it to the original contact. Delete a Contact 1. From the Contact's overview screen, touch and hold an entry from the list. 2. From the Contacts Entry context menu, tap Delete contact. 3. Tap OK to confirm the deletion. Synchronize Contacts Syncing data from your managed accounts allows you to add and manage a new or existing contact from your online or remote accounts to your device. Prior to syncing, you must first have an active Google or Corporate account with current Contact entries, and be signed into your account via the device. With syncing, any Contact entries (with phone numbers, email addresses, pictures, etc.) are updated and synced with your device. Contacts 46
-
 1
1 -
2
-
3
-
4
-
5
-
6
-
7
-
8
-
9
-
10
-
11
-
12
-
13
-
14
-
15
-
16
-
17
-
18
-
19
-
20
-
21
-
22
-
23
-
24
-
25
-
26
-
27
-
28
-
29
-
30
-
31
-
32
-
33
-
34
-
35
-
36
-
37
-
38
-
39
-
40
-
 41
41 -
 42
42 -
 43
43 -
 44
44 -
 45
45 -
 46
46 -
 47
47 -
 48
48 -
 49
49 -
 50
50 -
 51
51 -
52
-
53
-
54
-
55
-
56
-
57
-
58
-
59
-
60
-
61
-
62
-
63
-
64
-
65
-
66
-
67
-
68
-
69
-
70
-
71
-
72
-
73
-
74
-
75
-
76
-
77
-
78
-
79
-
80
-
81
-
82
-
83
-
84
-
85
-
86
-
87
-
88
-
89
-
90
-
91
-
92
-
93
-
94
-
95
-
96
-
97
-
98
-
99
-
100
-
101
-
102
-
103
-
104
-
105
-
106
-
107
-
108
-
109
-
110
-
111
-
112
-
113
-
114
-
115
-
116
-
117
-
118
-
119
-
120
-
121
-
122
-
123
-
124
-
125
-
126
-
127
-
128
-
129
-
130
-
131
-
132
-
133
-
134
-
135
-
136
-
137
-
138
-
139
-
140
-
141
-
142
-
143
-
144
-
145
-
146
-
147
-
148
-
149
-
150
-
151
-
152
-
153
-
154
-
155
-
156
-
157
 |
 |
