Samsung SPH-M930 User Manual (user Manual) (ver.f2) (English(north America)) - Page 71
Recording Qik Video
 |
View all Samsung SPH-M930 manuals
Add to My Manuals
Save this manual to your list of manuals |
Page 71 highlights
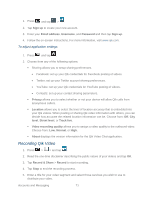
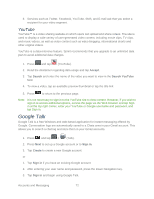
1. Press and tap > 2. Tap Sign up to create your new account. 3. Enter your Email address, Username, and Password and then tap Sign up. 4. Follow the on-screen instructions. For more information, visit www.qik.com. To adjust application settings: 1. Press and tap . 2. Choose from any of the following options: Sharing allows you to setup sharing preferences. Facebook: set up your Qik credentials for Facebook posting of videos. Twitter: set up your Twitter account sharing preferences. YouTube: set up your Qik credentials for YouTube posting of videos. Contacts: set up your contact sharing parameters. Privacy allows you to select whether or not your device will allow Qik calls from anonymous callers. Location allows you to select the level of location accuracy that is embedded into your Qik videos. When posting or sharing Qik video information with others, you can decide how accurate the related location information can be. Choose from: Off, City level, Street level, or Track live. Video recording quality allows you to assign a video quality to the outbound video. Choose from: Low, Normal, or High. About displays the version information for the Qik Video Chat application. Recording Qik Video 1. Press > > and tap . 2. Read the one-time disclaimer describing the public nature of your videos and tap OK. 3. Tap Record & Share > Record to start recording. 4. Tap Stop to end the recording process. 5. Enter a title for your video segment and select those services you wish to use to distribute your video. Accounts and Messaging 71
-
 1
1 -
2
-
3
-
4
-
5
-
6
-
7
-
8
-
9
-
10
-
11
-
12
-
13
-
14
-
15
-
16
-
17
-
18
-
19
-
20
-
21
-
22
-
23
-
24
-
25
-
26
-
27
-
28
-
29
-
30
-
31
-
32
-
33
-
34
-
35
-
36
-
37
-
38
-
39
-
40
-
41
-
42
-
43
-
44
-
45
-
46
-
47
-
48
-
49
-
50
-
51
-
52
-
53
-
54
-
55
-
56
-
57
-
58
-
59
-
60
-
61
-
62
-
63
-
64
-
65
-
 66
66 -
 67
67 -
 68
68 -
 69
69 -
 70
70 -
 71
71 -
 72
72 -
 73
73 -
 74
74 -
 75
75 -
 76
76 -
77
-
78
-
79
-
80
-
81
-
82
-
83
-
84
-
85
-
86
-
87
-
88
-
89
-
90
-
91
-
92
-
93
-
94
-
95
-
96
-
97
-
98
-
99
-
100
-
101
-
102
-
103
-
104
-
105
-
106
-
107
-
108
-
109
-
110
-
111
-
112
-
113
-
114
-
115
-
116
-
117
-
118
-
119
-
120
-
121
-
122
-
123
-
124
-
125
-
126
-
127
-
128
-
129
-
130
-
131
-
132
-
133
-
134
-
135
-
136
-
137
-
138
-
139
-
140
-
141
-
142
-
143
-
144
-
145
-
146
-
147
-
148
-
149
-
150
-
151
-
152
-
153
-
154
-
155
-
156
-
157
 |
 |
