Epson AcuLaser CX11NF Basics - Page 105
Scanning Problems, Operation Problems
 |
View all Epson AcuLaser CX11NF manuals
Add to My Manuals
Save this manual to your list of manuals |
Page 105 highlights
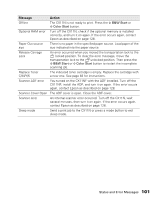
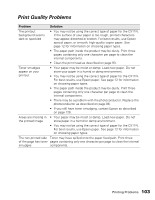
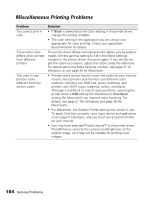
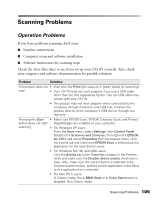
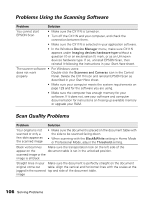
Scanning Problems Operation Problems If you have problems scanning check your: ■ Interface connections ■ Computer setup and software installation ■ Software instructions for scanning steps Check the Start Here sheet to see if you set up your CX11N correctly. Also, check your computer and software documentation for possible solutions. Problem Solution The product does not • Wait until the Print light stays on in green (ready for scanning). scan • Your CX11N may not work properly if you use a USB cable other than the one supplied by Epson. Use the USB cable that comes with your CX11N. • The product may not work properly when connected to the computer through more than one USB hub. Connect the product directly to the computer's USB port or through one hub only. Pressing the Start • Make sure EPSON Scan, EPSON Creativity Suite, and Presto! button does not start PageManager are installed on your computer. scanning • For Windows XP users: From the Start menu, select Settings, then Control Panel. Double-click Scanners and Cameras, then right-click EPSON AL-CX11 and select Properties from the pop-up menu. Click the Events tab and make sure EPSON Scan is selected as the application for the Scan Button event. • For Windows Me, 98, and 2000 users: Click the Events tab in the Properties window in the Printers utility and make sure the Disable device events check box is clear. Also, make sure the correct button is selected in the Scanner events list box, and the correct application in the Send to this application list is selected. • For Mac OS X users: In Classic mode, the x B&W Start or x Color Start button is disabled. Quit Classic mode. Scanning Problems 105
-
 1
1 -
2
-
3
-
4
-
5
-
6
-
7
-
8
-
9
-
10
-
11
-
12
-
13
-
14
-
15
-
16
-
17
-
18
-
19
-
20
-
21
-
22
-
23
-
24
-
25
-
26
-
27
-
28
-
29
-
30
-
31
-
32
-
33
-
34
-
35
-
36
-
37
-
38
-
39
-
40
-
41
-
42
-
43
-
44
-
45
-
46
-
47
-
48
-
49
-
50
-
51
-
52
-
53
-
54
-
55
-
56
-
57
-
58
-
59
-
60
-
61
-
62
-
63
-
64
-
65
-
66
-
67
-
68
-
69
-
70
-
71
-
72
-
73
-
74
-
75
-
76
-
77
-
78
-
79
-
80
-
81
-
82
-
83
-
84
-
85
-
86
-
87
-
88
-
89
-
90
-
91
-
92
-
93
-
94
-
95
-
96
-
97
-
98
-
99
-
 100
100 -
 101
101 -
 102
102 -
 103
103 -
 104
104 -
 105
105 -
 106
106 -
 107
107 -
 108
108 -
 109
109 -
 110
110 -
111
-
112
-
113
-
114
-
115
-
116
-
117
-
118
-
119
-
120
-
121
-
122
-
123
-
124
-
125
-
126
-
127
-
128
-
129
-
130
-
131
-
132
-
133
-
134
-
135
-
136
-
137
-
138
-
139
-
140
-
141
-
142
-
143
-
144
 |
 |