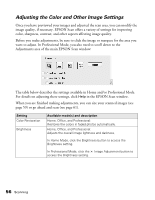
Epson AcuLaser CX11NF Basics - Page 58
Scanning, Configuration, Reset, Setting, Available modes and description
 |
View all Epson AcuLaser CX11NF manuals
Add to My Manuals
Save this manual to your list of manuals |
Page 58 highlights
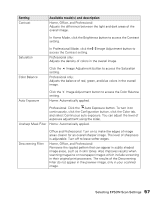
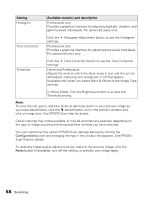
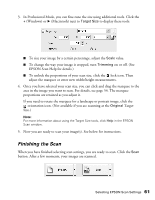
Setting Histogram Available mode(s) and description Professional only: Provides a graphical interface for adjusting highlight, shadow, and gamma levels individually. For advanced users only. Tone Correction Click the Histogram Adjustment button to use the Histogram settings. Professional only: Provides a graphical interface for adjusting tone levels individually. For advanced users only. Threshold Click the Tone Correction button to use the Tone Correction settings. Home and Professional: Adjusts the level at which the black areas in text and line art are delineated, improving text recognition in OCR programs. (Available only when you select Black & White as the Image Type setting.) In Home Mode, click the Brightness button to access the Threshold setting. Note: To view the red, green, and blue levels at particular points in your preview image as you make adjustments, click the densitometer icon in the preview window and click an image area. See EPSON Scan help for details. Certain settings may not be available, or may be automatically selected, depending on the type of image you are previewing and other settings you have selected. You can customize how certain EPSON Scan settings behave by clicking the Configuration button and changing settings in the window that appears. See EPSON Scan Help for details. To undo any image quality adjustments you make to the preview image, click the Reset button (if available), turn off the setting, or preview your image again. 58 Scanning
-
 1
1 -
2
-
3
-
4
-
5
-
6
-
7
-
8
-
9
-
10
-
11
-
12
-
13
-
14
-
15
-
16
-
17
-
18
-
19
-
20
-
21
-
22
-
23
-
24
-
25
-
26
-
27
-
28
-
29
-
30
-
31
-
32
-
33
-
34
-
35
-
36
-
37
-
38
-
39
-
40
-
41
-
42
-
43
-
44
-
45
-
46
-
47
-
48
-
49
-
50
-
51
-
52
-
 53
53 -
 54
54 -
 55
55 -
 56
56 -
 57
57 -
 58
58 -
 59
59 -
 60
60 -
 61
61 -
 62
62 -
 63
63 -
64
-
65
-
66
-
67
-
68
-
69
-
70
-
71
-
72
-
73
-
74
-
75
-
76
-
77
-
78
-
79
-
80
-
81
-
82
-
83
-
84
-
85
-
86
-
87
-
88
-
89
-
90
-
91
-
92
-
93
-
94
-
95
-
96
-
97
-
98
-
99
-
100
-
101
-
102
-
103
-
104
-
105
-
106
-
107
-
108
-
109
-
110
-
111
-
112
-
113
-
114
-
115
-
116
-
117
-
118
-
119
-
120
-
121
-
122
-
123
-
124
-
125
-
126
-
127
-
128
-
129
-
130
-
131
-
132
-
133
-
134
-
135
-
136
-
137
-
138
-
139
-
140
-
141
-
142
-
143
-
144
 |
 |