Epson AcuLaser CX11NF Basics - Page 76
Printing a Status Sheet, Copy Settings
 |
View all Epson AcuLaser CX11NF manuals
Add to My Manuals
Save this manual to your list of manuals |
Page 76 highlights
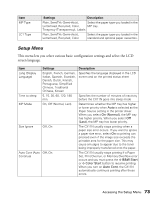
Copy Settings To access this menu, press the Setup button, press the u or d button to select Copy Settings, then press the r button. This menu lets you reset just the copy settings to their default or factory settings. Item Copy Function Settings Copy Factory Settings Description Changes the copy settings to their default values. Changes the copy settings to their factory values. Printing a Status Sheet To confirm the current status of the CX11N and verify that options are installed correctly, you may want to print a status sheet. 1. Make sure the CX11N is turned on. 2. Press the Setup button. The Setup light turns on and the Setup menu appears. 3. Make sure Printer settings is selected, then press the r button. The Printer settings menu appears. 4. Make sure Information Menu is selected, then press the r button. 5. Press the d button to select Status Sheet, then press the r button. The Data light flashes, the status sheet starts printing, and the LCD screen displays Printing. If options are installed correctly, they appear under Hardware Configurations. If they are not listed, try reinstalling them and make sure they are securely connected. If you cannot print a status sheet, contact Epson as described on page 128. 76 Using the Control Panel
-
 1
1 -
2
-
3
-
4
-
5
-
6
-
7
-
8
-
9
-
10
-
11
-
12
-
13
-
14
-
15
-
16
-
17
-
18
-
19
-
20
-
21
-
22
-
23
-
24
-
25
-
26
-
27
-
28
-
29
-
30
-
31
-
32
-
33
-
34
-
35
-
36
-
37
-
38
-
39
-
40
-
41
-
42
-
43
-
44
-
45
-
46
-
47
-
48
-
49
-
50
-
51
-
52
-
53
-
54
-
55
-
56
-
57
-
58
-
59
-
60
-
61
-
62
-
63
-
64
-
65
-
66
-
67
-
68
-
69
-
70
-
 71
71 -
 72
72 -
 73
73 -
 74
74 -
 75
75 -
 76
76 -
 77
77 -
 78
78 -
 79
79 -
 80
80 -
 81
81 -
82
-
83
-
84
-
85
-
86
-
87
-
88
-
89
-
90
-
91
-
92
-
93
-
94
-
95
-
96
-
97
-
98
-
99
-
100
-
101
-
102
-
103
-
104
-
105
-
106
-
107
-
108
-
109
-
110
-
111
-
112
-
113
-
114
-
115
-
116
-
117
-
118
-
119
-
120
-
121
-
122
-
123
-
124
-
125
-
126
-
127
-
128
-
129
-
130
-
131
-
132
-
133
-
134
-
135
-
136
-
137
-
138
-
139
-
140
-
141
-
142
-
143
-
144
 |
 |