HP t310 PCoIP Administrator's Guide - Page 130
OSD Logo Upload Process Example, 8.3 Uploading the Certificate
 |
View all HP t310 manuals
Add to My Manuals
Save this manual to your list of manuals |
Page 130 highlights
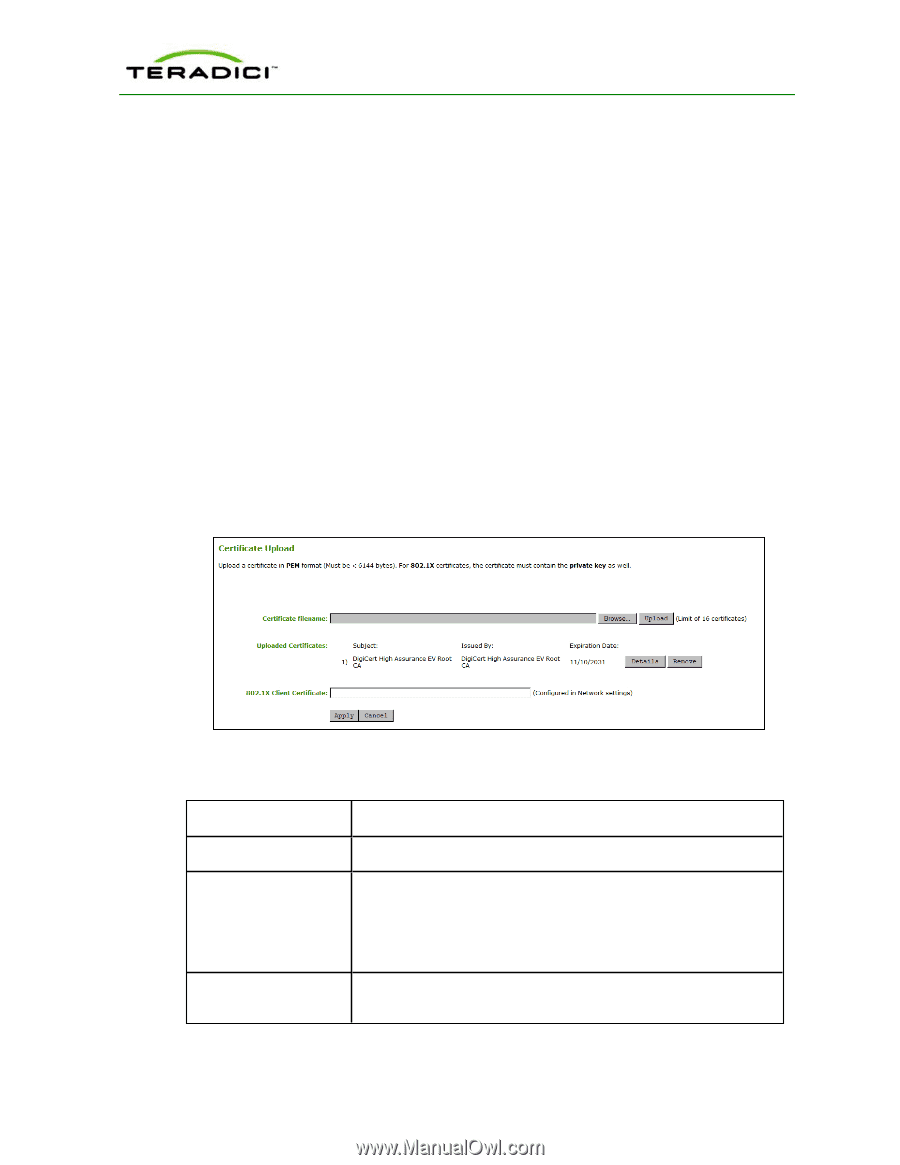
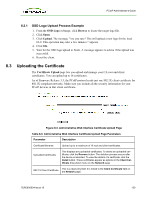
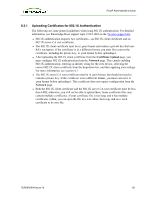
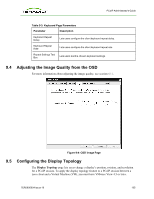
PCoIP Administrator's Guide 8.2.1 OSD Logo Upload Process Example 1. From the OSD Logo webpage, click Browse to locate the target logo file. 2. Click Open. 3. Click Upload. The message "Are you sure? This will upload a new logo for the local GUI. This operation may take a few minutes." appears. 4. Click OK. 5. Wait for the OSD logo upload to finish. A message appears to advise if the upload was successful. 6. Reset the client. 8.3 Uploading the Certificate The Certificate Upload page lets you upload and manage your CA root and client certificates. You can upload up to 16 certificates. As of Firmware Release 3.5, the PCoIP protocol reads just one 802.1X client certificate for 802.1X compliant networks. Make sure you include all the security information for your PCoIP devices in that client certificate. Figure 8-3: Administrative Web Interface Certificate Upload Page Table 8-3: Administrative Web Interface Certificate Upload Page Parameters Parameter Description Certificate filename Upload up to a maximum of 16 root and client certificates. Uploaded Certificates This displays any uploaded certificates. To delete an uploaded certificate, click the Remove button. The deletion process occurs after the device is rebooted. To view the details of a certificate, click the Detail button. These certificates appear as options in the Client Certificate drop-down menu on the Network page. 802.1X Client Certificate This is a read-only field. It is linked to the Client Certificate field on the Network page. TER0606004 Issue 16 130
-
 1
1 -
2
-
3
-
4
-
5
-
6
-
7
-
8
-
9
-
10
-
11
-
12
-
13
-
14
-
15
-
16
-
17
-
18
-
19
-
20
-
21
-
22
-
23
-
24
-
25
-
26
-
27
-
28
-
29
-
30
-
31
-
32
-
33
-
34
-
35
-
36
-
37
-
38
-
39
-
40
-
41
-
42
-
43
-
44
-
45
-
46
-
47
-
48
-
49
-
50
-
51
-
52
-
53
-
54
-
55
-
56
-
57
-
58
-
59
-
60
-
61
-
62
-
63
-
64
-
65
-
66
-
67
-
68
-
69
-
70
-
71
-
72
-
73
-
74
-
75
-
76
-
77
-
78
-
79
-
80
-
81
-
82
-
83
-
84
-
85
-
86
-
87
-
88
-
89
-
90
-
91
-
92
-
93
-
94
-
95
-
96
-
97
-
98
-
99
-
100
-
101
-
102
-
103
-
104
-
105
-
106
-
107
-
108
-
109
-
110
-
111
-
112
-
113
-
114
-
115
-
116
-
117
-
118
-
119
-
120
-
121
-
122
-
123
-
124
-
 125
125 -
 126
126 -
 127
127 -
 128
128 -
 129
129 -
 130
130 -
 131
131 -
 132
132 -
 133
133 -
 134
134 -
 135
135 -
136
-
137
-
138
-
139
-
140
-
141
-
142
-
143
-
144
-
145
-
146
-
147
-
148
-
149
-
150
-
151
-
152
-
153
-
154
-
155
-
156
-
157
-
158
-
159
-
160
-
161
-
162
-
163
 |
 |