Sharp MX-M260 MX-M260 MX-M310 Operation Manual - Page 132
B: Misfeed in the fusing area
 |
View all Sharp MX-M260 manuals
Add to My Manuals
Save this manual to your list of manuals |
Page 132 highlights
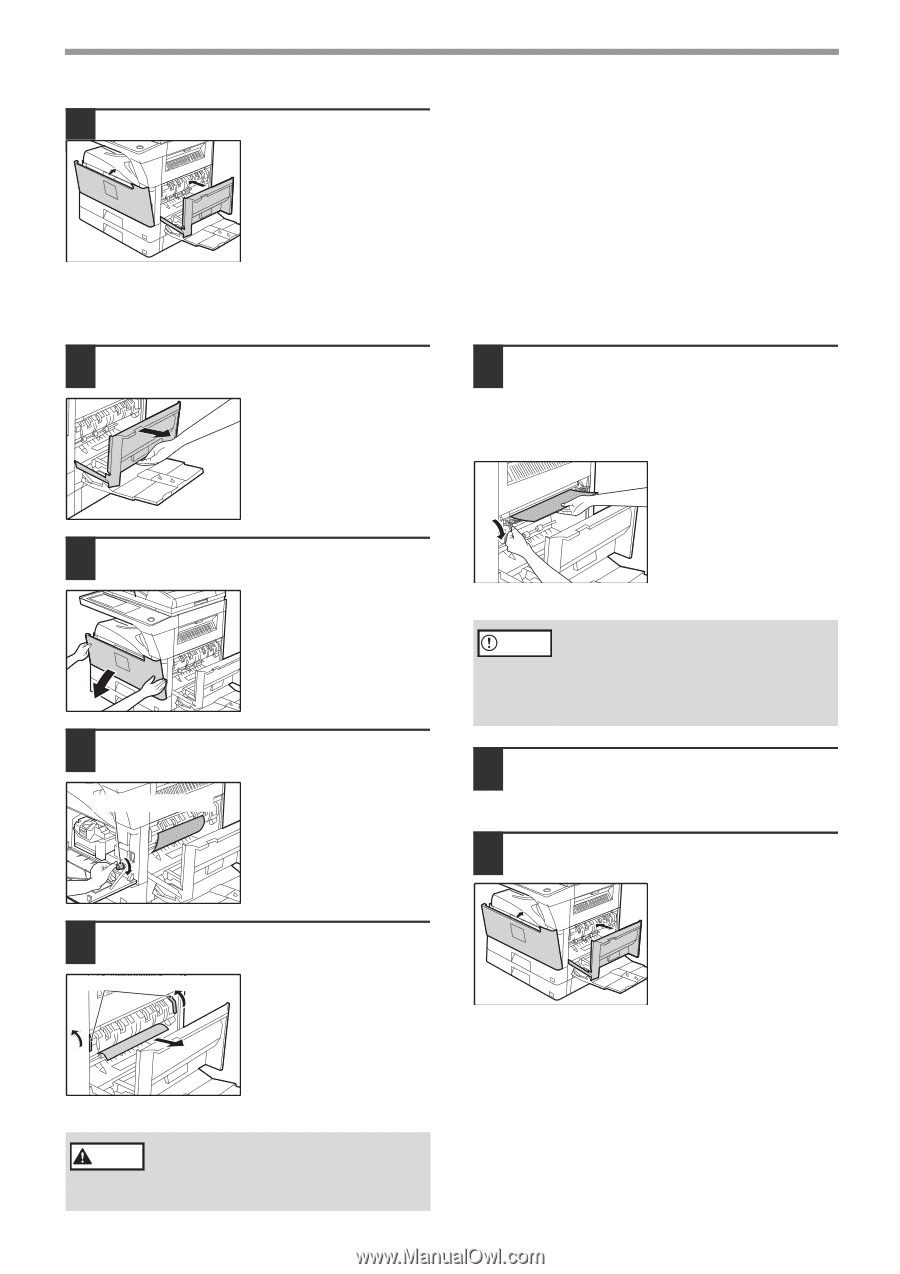
TROUBLESHOOTING AND MAINTENANCE 4 Close the front cover and side cover. Make sure that the misfeed message is cleared. B: Misfeed in the fusing area 1 Open the bypass tray and the side cover. 5 If you were unable to remove the misfeed in step 4, press down on the fusing unit paper guide knob to open the paper guide, and carefully remove the misfed paper. 2 Press and pull it open gently on both sides of the front cover. 3 Turn the roller rotating knob in the direction of the arrow. Roller rotating knob 4 Lift the fusing unit release levers and carefully remove the misfed paper. Fusing unit release levers Caution • Do not touch the photoconductive drum (green portion) when removing the misfed paper. Doing so may damage the drum and cause smudges on copies. • Take care not to let unfixed toner on the misfed paper soil your hands or clothes. 6 Close the fusing unit paper guide and press down on the fusing unit release levers. 7 Close the front cover and side cover. Make sure that the misfeed message is cleared. Warning The fusing unit is hot. Do not touch the fusing unit when removing misfed paper. Doing so may cause a burn or injury. 130
-
 1
1 -
2
-
3
-
4
-
5
-
6
-
7
-
8
-
9
-
10
-
11
-
12
-
13
-
14
-
15
-
16
-
17
-
18
-
19
-
20
-
21
-
22
-
23
-
24
-
25
-
26
-
27
-
28
-
29
-
30
-
31
-
32
-
33
-
34
-
35
-
36
-
37
-
38
-
39
-
40
-
41
-
42
-
43
-
44
-
45
-
46
-
47
-
48
-
49
-
50
-
51
-
52
-
53
-
54
-
55
-
56
-
57
-
58
-
59
-
60
-
61
-
62
-
63
-
64
-
65
-
66
-
67
-
68
-
69
-
70
-
71
-
72
-
73
-
74
-
75
-
76
-
77
-
78
-
79
-
80
-
81
-
82
-
83
-
84
-
85
-
86
-
87
-
88
-
89
-
90
-
91
-
92
-
93
-
94
-
95
-
96
-
97
-
98
-
99
-
100
-
101
-
102
-
103
-
104
-
105
-
106
-
107
-
108
-
109
-
110
-
111
-
112
-
113
-
114
-
115
-
116
-
117
-
118
-
119
-
120
-
121
-
122
-
123
-
124
-
125
-
126
-
 127
127 -
 128
128 -
 129
129 -
 130
130 -
 131
131 -
 132
132 -
 133
133 -
 134
134 -
 135
135 -
 136
136 -
 137
137 -
138
-
139
-
140
-
141
-
142
-
143
-
144
-
145
-
146
-
147
-
148
-
149
-
150
-
151
-
152
-
153
-
154
-
155
-
156
-
157
-
158
-
159
-
160
-
161
-
162
-
163
-
164
-
165
-
166
-
167
-
168
 |
 |