Sharp MX-M260 MX-M260 MX-M310 Operation Manual - Page 79
SCANNING A LARGE NUMBER OF ORIGINALS when, an RSPF is installed
 |
View all Sharp MX-M260 manuals
Add to My Manuals
Save this manual to your list of manuals |
Page 79 highlights
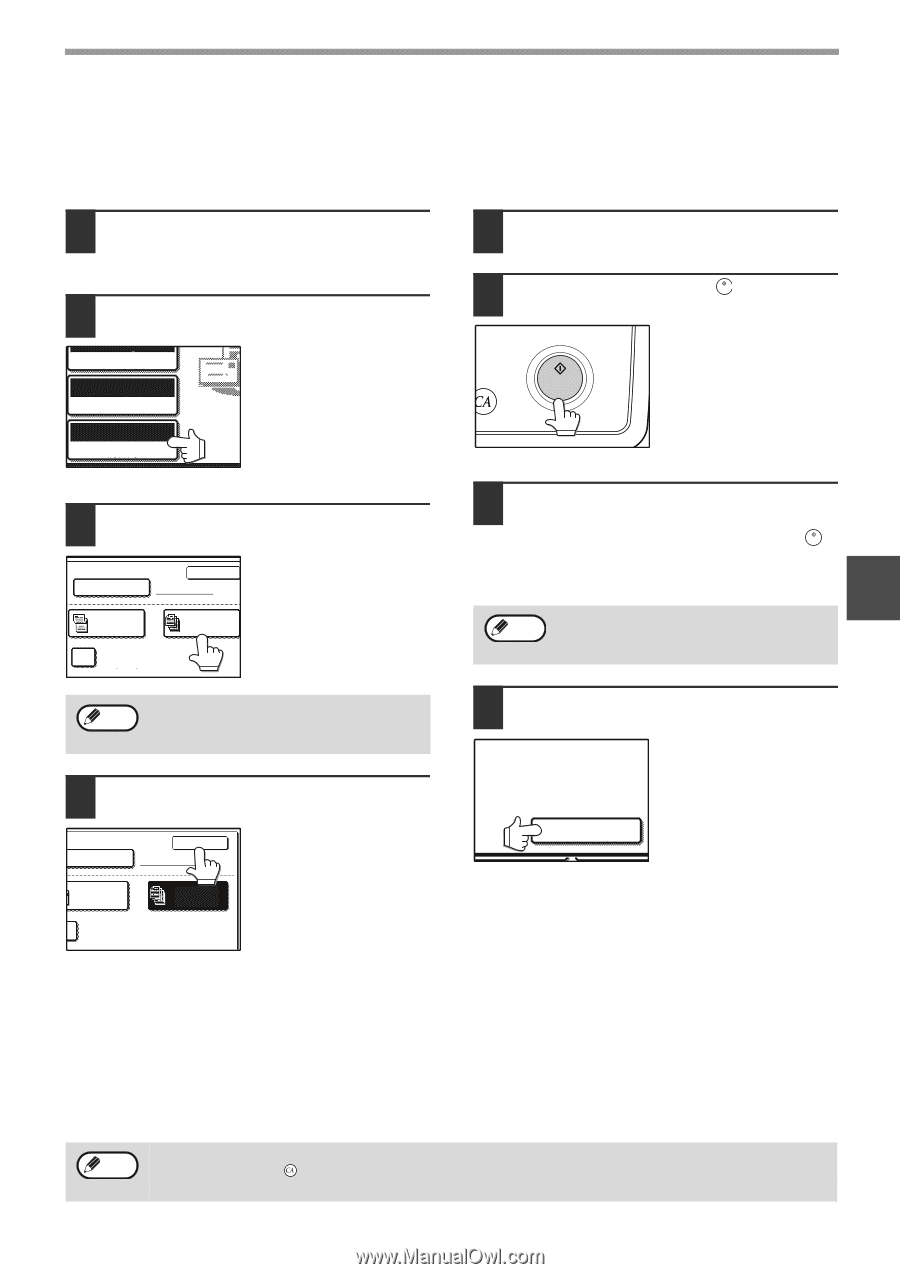
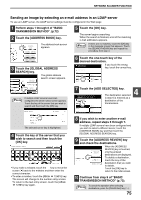
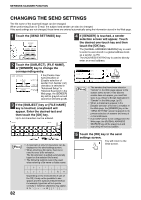
NETWORK SCANNER FUNCTION SCANNING A LARGE NUMBER OF ORIGINALS (when an RSPF is installed) If you have a large number of originals, the originals can be scanned in batches using the RSPF. 1 Make sure the machine is in scanner mode and then load the document in the RSPF. (p.72) 2 Touch the [ORIGINAL] key. 300dpi RESOLUTION TIFF-G4 FILE FORMAT AUTO 8½X11 ORIGINAL 5 Perform steps 4 through 9 of "BASIC TRANSMISSION METHOD". (p.72 to 73) 6 Press the [START] key ( ). Scanning of the originals begins. A message appears in the touch panel. 3 Touch the [JOB BUILD] key. RIGINAL SIZE OK MANUAL 2-SIDED TABLET JOB BUILD ROTATE THE IMAGE 90 DEGREES If you wish to rotate the original 90° when creating an image file, touch the [ROTATE THE IMAGE 90 DEGREES] checkbox (a checkmark should appear in the box). Note If the correct original size does not appear in the screen of step 2, touch the [MANUAL] key and specify the correct original size (p.78). 4 Touch the [OK] key. NAL SIZE MANUAL You will return to the OK initial screen. 2-SIDED TABLET JOB BUILD ROTATE THE IMAGE 90 DEGREES 7 When all of the originals in the RSPF have been scanned, load the next batch and press the [START] key ( ). Repeat this sequence until all pages have been scanned. 4 Note If no action is taken for one minute, scanning automatically ends and transmission begins. 8 When all originals have been scanned, touch the [READ-END] key. ESS [START]. EAD-END]. "SENDING. PRESS [C] TO CANCEL." appears in the touch panel and transmission begins. READ-END When transmission is finished, "SENDING COMPLETED." appears in the touch panel. Note • Job build mode turns off after transmission is finished. Job build mode can also be canceled by pressing the [CLEAR ALL] key ( ). • When performing Scan to E-mail, see the notes on page 74. 77
-
 1
1 -
2
-
3
-
4
-
5
-
6
-
7
-
8
-
9
-
10
-
11
-
12
-
13
-
14
-
15
-
16
-
17
-
18
-
19
-
20
-
21
-
22
-
23
-
24
-
25
-
26
-
27
-
28
-
29
-
30
-
31
-
32
-
33
-
34
-
35
-
36
-
37
-
38
-
39
-
40
-
41
-
42
-
43
-
44
-
45
-
46
-
47
-
48
-
49
-
50
-
51
-
52
-
53
-
54
-
55
-
56
-
57
-
58
-
59
-
60
-
61
-
62
-
63
-
64
-
65
-
66
-
67
-
68
-
69
-
70
-
71
-
72
-
73
-
 74
74 -
 75
75 -
 76
76 -
 77
77 -
 78
78 -
 79
79 -
 80
80 -
 81
81 -
 82
82 -
 83
83 -
 84
84 -
85
-
86
-
87
-
88
-
89
-
90
-
91
-
92
-
93
-
94
-
95
-
96
-
97
-
98
-
99
-
100
-
101
-
102
-
103
-
104
-
105
-
106
-
107
-
108
-
109
-
110
-
111
-
112
-
113
-
114
-
115
-
116
-
117
-
118
-
119
-
120
-
121
-
122
-
123
-
124
-
125
-
126
-
127
-
128
-
129
-
130
-
131
-
132
-
133
-
134
-
135
-
136
-
137
-
138
-
139
-
140
-
141
-
142
-
143
-
144
-
145
-
146
-
147
-
148
-
149
-
150
-
151
-
152
-
153
-
154
-
155
-
156
-
157
-
158
-
159
-
160
-
161
-
162
-
163
-
164
-
165
-
166
-
167
-
168
 |
 |