Brother International PE-DESIGN PLUS2 Instruction Manual - Page 102
Adding a new item, Deleting items, Editing an item, Changing the order of items, New Item]
 |
View all Brother International PE-DESIGN PLUS2 manuals
Add to My Manuals
Save this manual to your list of manuals |
Page 102 highlights
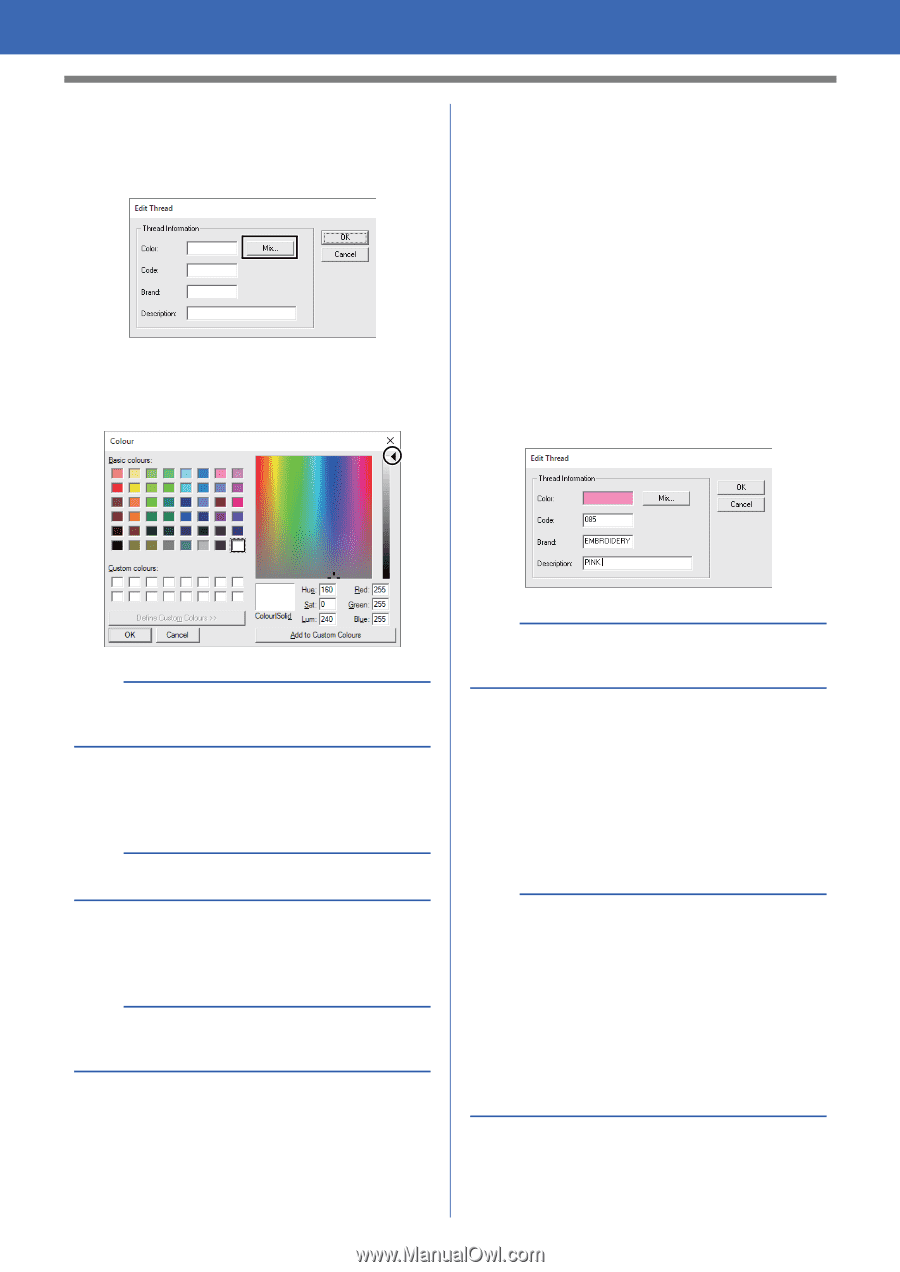
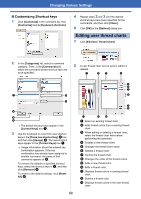
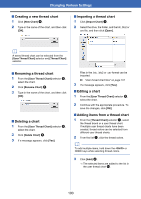
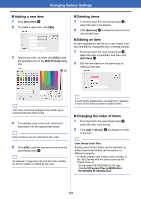
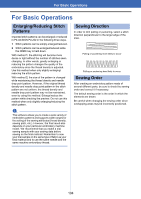
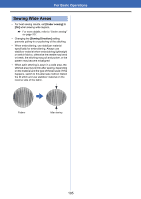
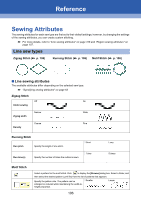
Changing Various Settings ■ Adding a new item 1 Click [New Item] i. 2 To create a new color, click [Mix]. 3 Specify the color, and then click [OK] to add the specified color to the [Edit Thread] dialog box. (a) ■ Deleting items 1 From the list for the user thread chart m, select the item to be deleted. 2 Click [Remove] l to delete the item from the user thread chart. ■ Editing an item An item registered in the list for a user thread chart can be edited to change the color or thread number. 1 From the list for the user thread chart m, select the item to be edited, and then click [Edit Item] j. 2 Edit the item details in the same way as adding a new item. b The color cannot be changed if the slider (a) is moved to the top of the scale. 4 If necessary, type in the code, brand and description into the appropriate boxes. b Only numbers can be entered for the code. 5 Click [OK] to add the new item to the list in the user thread chart m. b An asterisk (*) appears in front of the index number for items created or edited by the user. b As with newly added items, an asterisk (*) appears in front of the index number of edited items. ■ Changing the order of items 1 From the list for the user thread chart m, select the item to be moved. 2 Click [Up] or [Down] h to change the order of the item. b User thread chart files Existing user thread charts can be imported, or edited user thread charts can be used on a different computer. • A newly created user thread chart is saved, in the .btc2 format with the same name as the thread chart, at: (Drive where PE-DESIGN PLUS2 was installed)\Program Files (x86)\Brother\ PE-DESIGN PLUS2\MyChart 101
-
 1
1 -
2
-
3
-
4
-
5
-
6
-
7
-
8
-
9
-
10
-
11
-
12
-
13
-
14
-
15
-
16
-
17
-
18
-
19
-
20
-
21
-
22
-
23
-
24
-
25
-
26
-
27
-
28
-
29
-
30
-
31
-
32
-
33
-
34
-
35
-
36
-
37
-
38
-
39
-
40
-
41
-
42
-
43
-
44
-
45
-
46
-
47
-
48
-
49
-
50
-
51
-
52
-
53
-
54
-
55
-
56
-
57
-
58
-
59
-
60
-
61
-
62
-
63
-
64
-
65
-
66
-
67
-
68
-
69
-
70
-
71
-
72
-
73
-
74
-
75
-
76
-
77
-
78
-
79
-
80
-
81
-
82
-
83
-
84
-
85
-
86
-
87
-
88
-
89
-
90
-
91
-
92
-
93
-
94
-
95
-
96
-
 97
97 -
 98
98 -
 99
99 -
 100
100 -
 101
101 -
 102
102 -
 103
103 -
 104
104 -
 105
105 -
 106
106 -
 107
107 -
108
-
109
-
110
-
111
-
112
-
113
-
114
-
115
-
116
-
117
-
118
-
119
-
120
 |
 |