Brother International PE-DESIGN PLUS2 Instruction Manual - Page 80
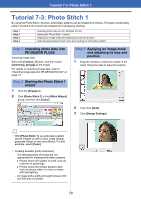
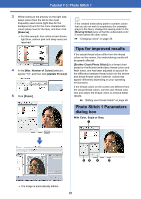
Tutorial 7-3: Photo Stitch 1
 |
View all Brother International PE-DESIGN PLUS2 manuals
Add to My Manuals
Save this manual to your list of manuals |
Page 80 highlights
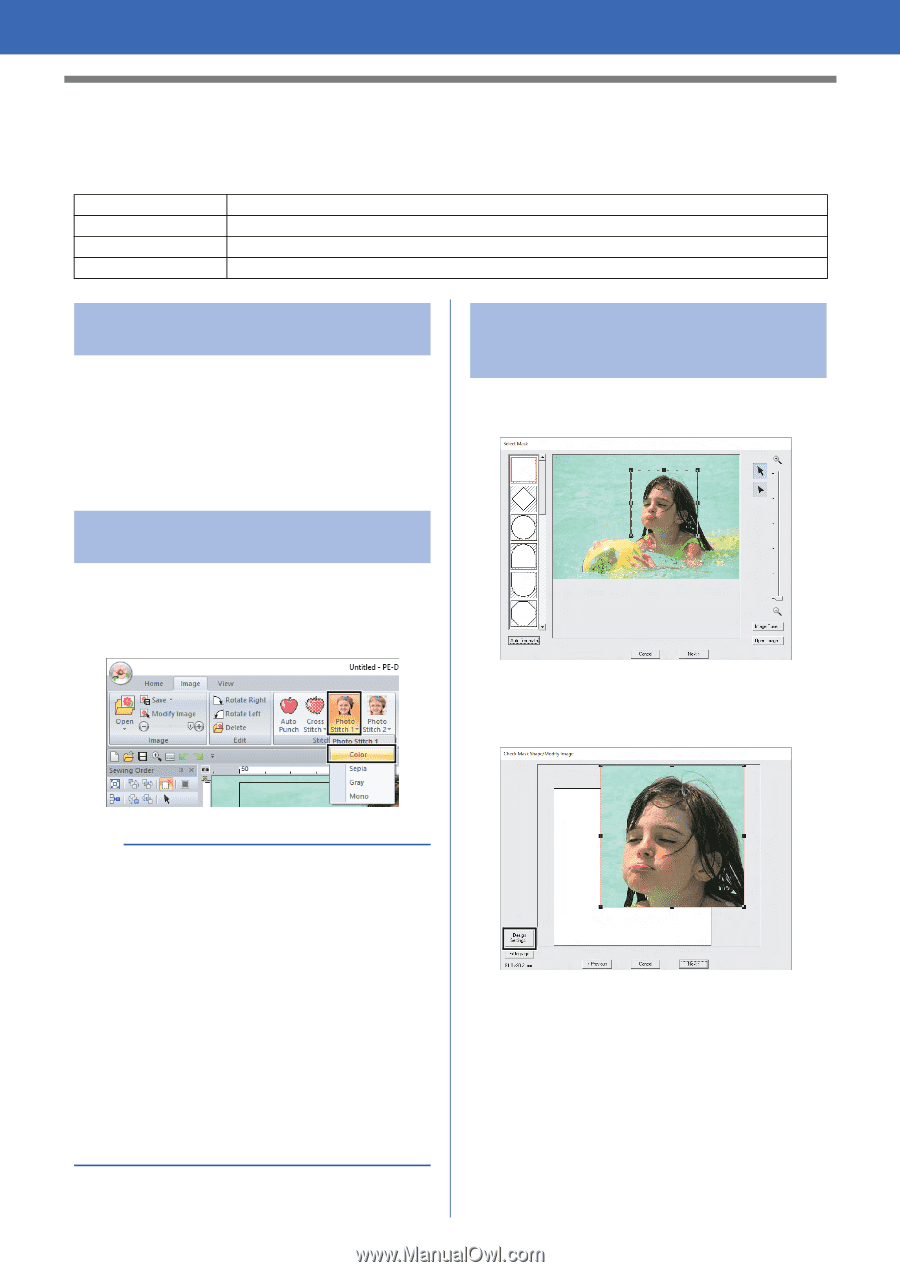
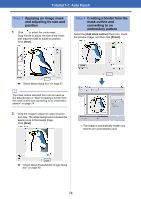
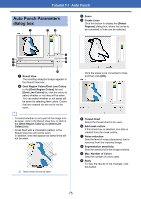
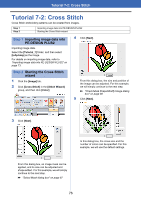
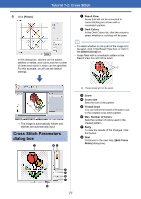
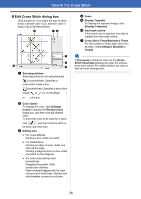
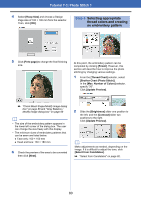
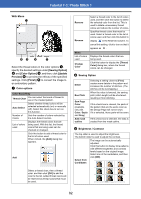
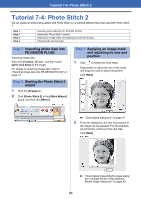
Tutorial 7-3: Photo Stitch 1 Tutorial 7-3: Photo Stitch 1 By using the Photo Stitch 1 function, embroidery patterns can be created from photos. This type of embroidery pattern created from a photo has detailed and overlapping stitching. Step 1 Step 2 Step 3 Step 4 Importing photo data into PE-DESIGN PLUS2 Starting the Photo Stitch 1 wizard Applying an image mask and adjusting its size and position Selecting appropriate thread colors and creating an embroidery pattern Step 1 Importing photo data into PE-DESIGN PLUS2 Importing image data. Select the [Tutorial_7] folder, and then select [swimming_girl.jpg] as the image. For details on importing image data, refer to "Importing image data into PE-DESIGN PLUS2" on page 73. Step 2 Starting the Photo Stitch 1 wizard 1 Click the [Image] tab. 2 Click [Photo Stitch 1] in the [Stitch Wizard] group, and then click [Color]. Step 3 Applying an image mask and adjusting its size and position 1 Drag the handles to adjust the shape of the mask. Drag the mask to adjust its position. 2 Then click [Next]. 3 Click [Design Settings]. b • With [Photo Stitch 1], an embroidery pattern can be created in color (Color), sepia (Sepia), grayscale (Gray) or one color (Mono). For this example, select [Color]. • Creating beautiful photo embroidery - The following types of photos are not appropriate for creating embroidery patterns. Photos where the subject is small, such as in photos of gatherings Photos where the subject appears dark, such as photos taken in a room or taken with backlighting - An image with a width and height between 300 and 500 dots is suitable. 79
-
 1
1 -
2
-
3
-
4
-
5
-
6
-
7
-
8
-
9
-
10
-
11
-
12
-
13
-
14
-
15
-
16
-
17
-
18
-
19
-
20
-
21
-
22
-
23
-
24
-
25
-
26
-
27
-
28
-
29
-
30
-
31
-
32
-
33
-
34
-
35
-
36
-
37
-
38
-
39
-
40
-
41
-
42
-
43
-
44
-
45
-
46
-
47
-
48
-
49
-
50
-
51
-
52
-
53
-
54
-
55
-
56
-
57
-
58
-
59
-
60
-
61
-
62
-
63
-
64
-
65
-
66
-
67
-
68
-
69
-
70
-
71
-
72
-
73
-
74
-
 75
75 -
 76
76 -
 77
77 -
 78
78 -
 79
79 -
 80
80 -
 81
81 -
 82
82 -
 83
83 -
 84
84 -
 85
85 -
86
-
87
-
88
-
89
-
90
-
91
-
92
-
93
-
94
-
95
-
96
-
97
-
98
-
99
-
100
-
101
-
102
-
103
-
104
-
105
-
106
-
107
-
108
-
109
-
110
-
111
-
112
-
113
-
114
-
115
-
116
-
117
-
118
-
119
-
120
 |
 |