Brother International PE-DESIGN PLUS2 Instruction Manual - Page 39
Editing the sewing order, Changing colors, Changing sewing attributes, Displaying/hiding frames
 |
View all Brother International PE-DESIGN PLUS2 manuals
Add to My Manuals
Save this manual to your list of manuals |
Page 39 highlights
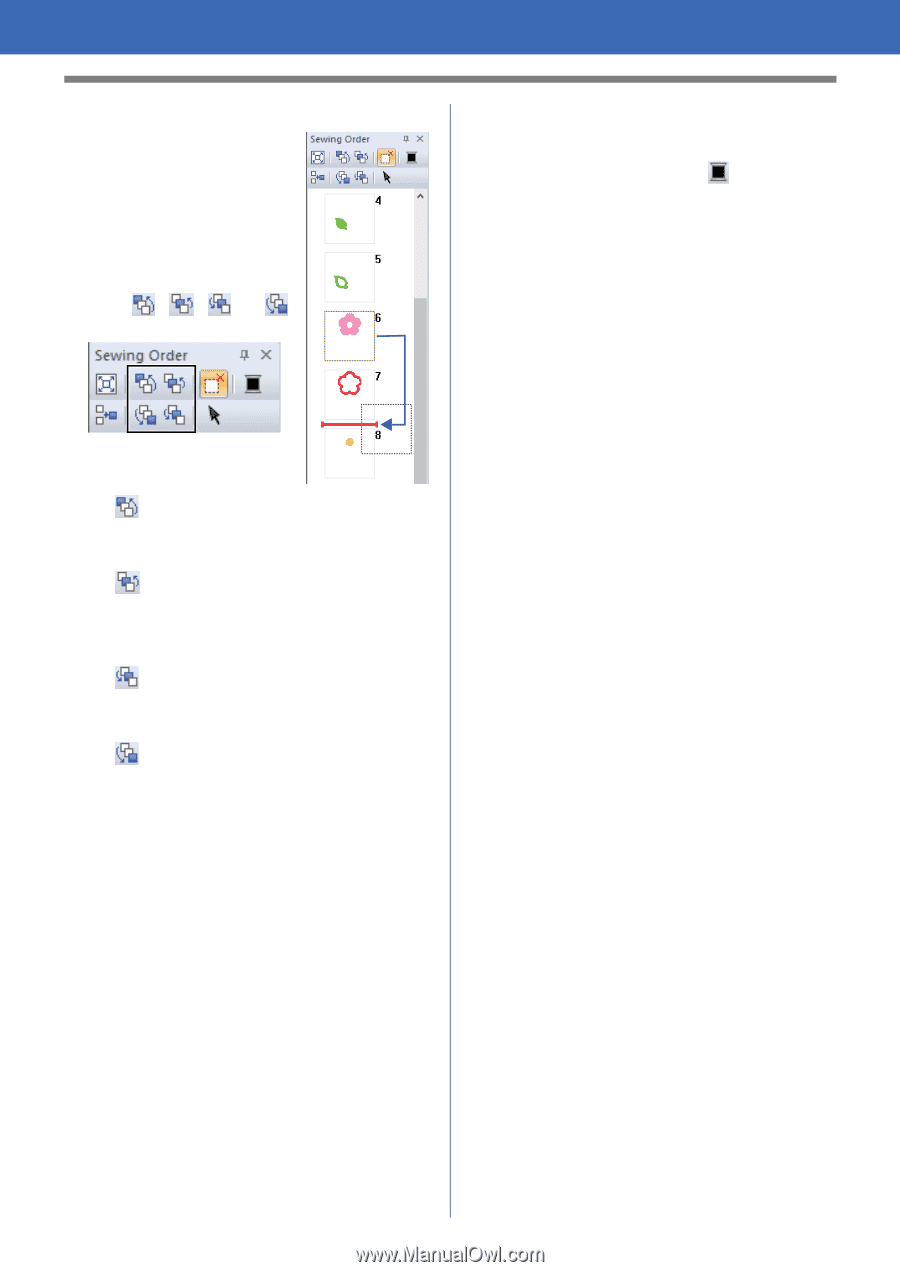
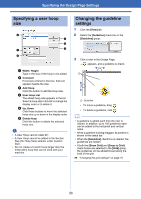
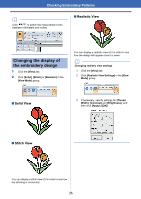
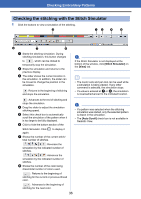
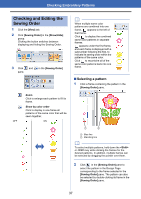
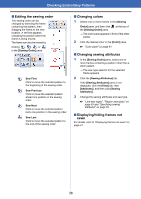
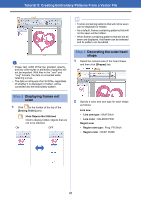
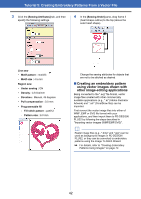
Checking Embroidery Patterns ■ Editing the sewing order The sewing order can be changed by selecting the frame containing the pattern, then dragging the frame to the new location. A red line appears, indicating the position where the frame is being moved. The frame can also be moved by clicking , , , or in the [Sewing Order] pane. Sew First Click to move the selected pattern to the beginning of the sewing order. Sew Previous Click to move the selected pattern ahead one position in the sewing order. Sew Next Click to move the selected pattern back one position in the sewing order. Sew Last Click to move the selected pattern to the end of the sewing order. ■ Changing colors 1 Select one or more frames in the [Sewing Order] pane, and then click the [Sewing Order] pane. at the top of The Color pane appears in front of the other panes. 2 Click the desired color in the [Color] pane. cc "Color pane" on page 61 ■ Changing sewing attributes 1 In the [Sewing Order] pane, select one or more frames containing a pattern other than a stitch pattern. The sew type selector for the selected frame appears. 2 Click the [Sewing Attributes] tab. If the [Sewing Attributes] pane is not displayed, click the [View] tab, then [Attributes], and then click [Sewing Attributes]. 3 Change the sewing attributes and sew type. cc "Line sew types", "Region sew types" on page 63 and "Specifying sewing attributes" on page 63 ■ Displaying/hiding frames not sewn For details, refer to "Displaying frames not sewn" on page 41. 38
-
 1
1 -
2
-
3
-
4
-
5
-
6
-
7
-
8
-
9
-
10
-
11
-
12
-
13
-
14
-
15
-
16
-
17
-
18
-
19
-
20
-
21
-
22
-
23
-
24
-
25
-
26
-
27
-
28
-
29
-
30
-
31
-
32
-
33
-
 34
34 -
 35
35 -
 36
36 -
 37
37 -
 38
38 -
 39
39 -
 40
40 -
 41
41 -
 42
42 -
 43
43 -
 44
44 -
45
-
46
-
47
-
48
-
49
-
50
-
51
-
52
-
53
-
54
-
55
-
56
-
57
-
58
-
59
-
60
-
61
-
62
-
63
-
64
-
65
-
66
-
67
-
68
-
69
-
70
-
71
-
72
-
73
-
74
-
75
-
76
-
77
-
78
-
79
-
80
-
81
-
82
-
83
-
84
-
85
-
86
-
87
-
88
-
89
-
90
-
91
-
92
-
93
-
94
-
95
-
96
-
97
-
98
-
99
-
100
-
101
-
102
-
103
-
104
-
105
-
106
-
107
-
108
-
109
-
110
-
111
-
112
-
113
-
114
-
115
-
116
-
117
-
118
-
119
-
120
 |
 |