Brother International PE-DESIGN PLUS2 Instruction Manual - Page 29
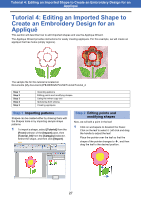
Tutorial 4: Editing an Imported Shape to Create an Embroidery Design for an, Appliqué
 |
View all Brother International PE-DESIGN PLUS2 manuals
Add to My Manuals
Save this manual to your list of manuals |
Page 29 highlights
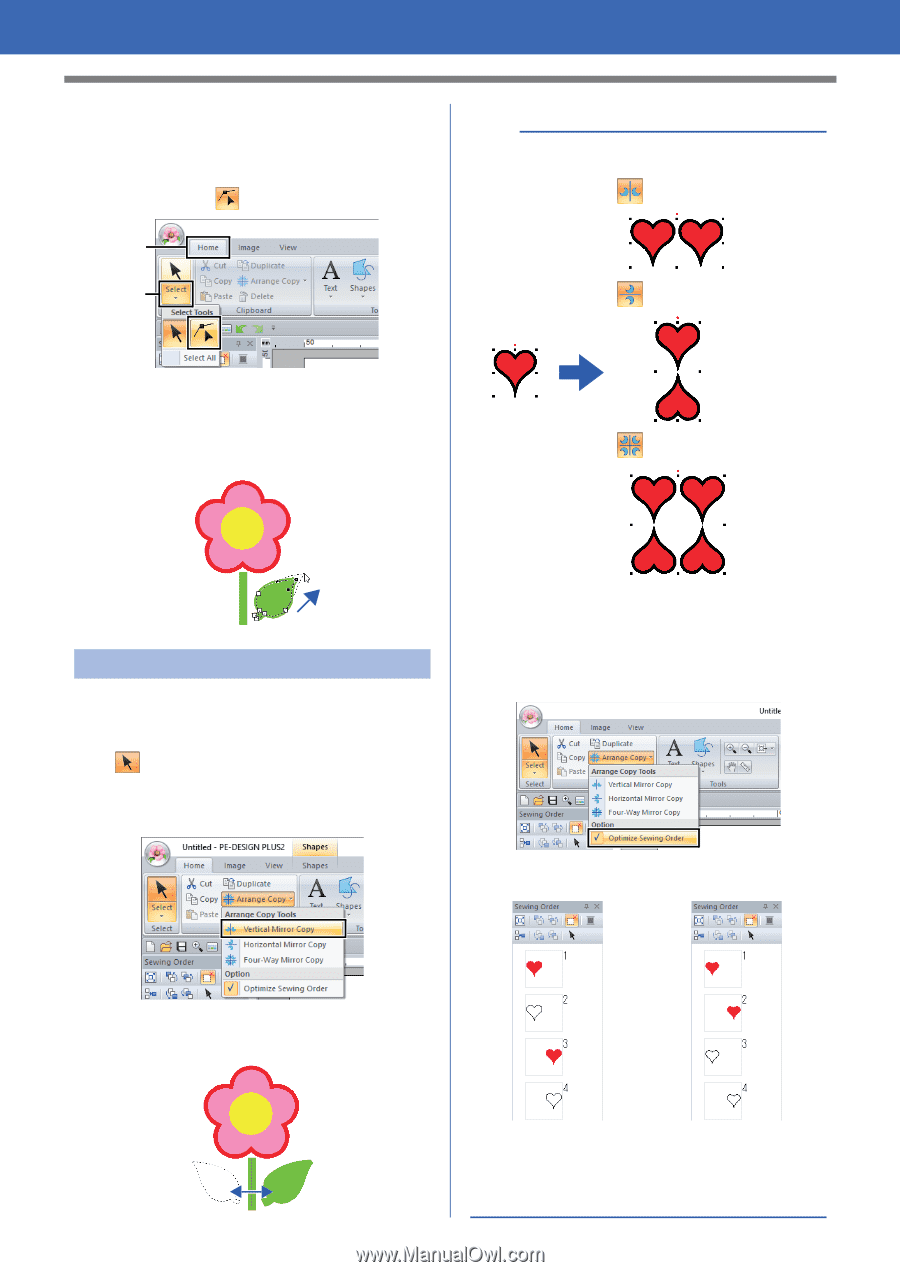
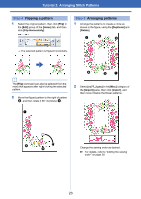
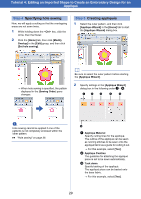
Tutorial 4: Editing an Imported Shape to Create an Embroidery Design for an Appliqué 2 Edit a point. (A) Click the [Home] tab. (B) Click [Select] in the [Select] group, and then click . (A) (B) b • Arrange copy type Vertical Mirror Copy Horizontal Mirror Copy (C) Click the shape for the leaf. The points in the shape appear. (D) Select the point, and then drag the point to the desired location. Four-Way Mirror Copy Step 3 Using the mirror copy tool 1 Click the [Home] tab. 2 Click [Select] in the [Select] group, then click , and then select the leaf. 3 Click [Arrange Copy] in the [Clipboard] group, and then click [Vertical Mirror Copy], • Optimize sewing order Before using an [Arrange Copy] tool, optimizing the sewing order adjusts the sewing order of the patterns created with the [Arrange Copy] tool in order to reduce the number of thread color changes. [Optimize Sewing Order] [Optimize Sewing Order] not selected selected 4 Move the pointer, and then click when the patterns are arranged as desired. The sewing order is the order in which patterns are created. Patterns will be sewn so that those with the same thread colors will be connected. 28
-
 1
1 -
2
-
3
-
4
-
5
-
6
-
7
-
8
-
9
-
10
-
11
-
12
-
13
-
14
-
15
-
16
-
17
-
18
-
19
-
20
-
21
-
22
-
23
-
 24
24 -
 25
25 -
 26
26 -
 27
27 -
 28
28 -
 29
29 -
 30
30 -
 31
31 -
 32
32 -
 33
33 -
 34
34 -
35
-
36
-
37
-
38
-
39
-
40
-
41
-
42
-
43
-
44
-
45
-
46
-
47
-
48
-
49
-
50
-
51
-
52
-
53
-
54
-
55
-
56
-
57
-
58
-
59
-
60
-
61
-
62
-
63
-
64
-
65
-
66
-
67
-
68
-
69
-
70
-
71
-
72
-
73
-
74
-
75
-
76
-
77
-
78
-
79
-
80
-
81
-
82
-
83
-
84
-
85
-
86
-
87
-
88
-
89
-
90
-
91
-
92
-
93
-
94
-
95
-
96
-
97
-
98
-
99
-
100
-
101
-
102
-
103
-
104
-
105
-
106
-
107
-
108
-
109
-
110
-
111
-
112
-
113
-
114
-
115
-
116
-
117
-
118
-
119
-
120
 |
 |