Brother International PE-DESIGN PLUS2 Instruction Manual - Page 7
Table of Contents, Creating Design for Multi-Position - tutorial
 |
View all Brother International PE-DESIGN PLUS2 manuals
Add to My Manuals
Save this manual to your list of manuals |
Page 7 highlights
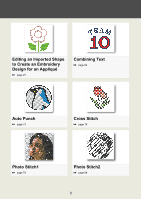
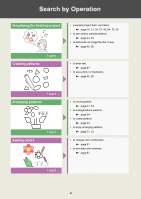
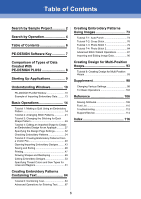
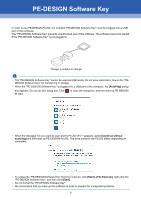
Table of Contents Search by Sample Project 2 Search by Operation 4 Table of Contents 6 PE-DESIGN Software Key 7 Comparison of Types of Data Created With PE-DESIGN PLUS2 8 Starting Up Applications 9 Understanding Windows 10 PE-DESIGN PLUS2 Window 10 Example of Importing Embroidery Data .......... 13 Basic Operations 14 Tutorial 1: Making a Quilt Using an Embroidery Pattern 14 Tutorial 2: Arranging Stitch Patterns 21 Tutorial 3: Changing the Stitching for Each Shape Pattern 24 Tutorial 4: Editing an Imported Shape to Create an Embroidery Design for an Appliqu 27 Specifying the Design Page Settings 32 Checking Embroidery Patterns 34 Tutorial 5: Creating Embroidery Patterns From a Vector File 40 Opening/Importing Embroidery Designs ......... 43 Saving and Exiting 46 Printing 47 Drawing Shapes and Reshaping 49 Editing Embroidery Designs 53 Specifying Thread Colors and Sew Types for Lines and Regions 61 Creating Embroidery Patterns Containing Text 64 Tutorial 6: Combining Text 64 Advanced Operations for Entering Text.......... 67 Creating Embroidery Patterns Using Images 73 Tutorial 7-1: Auto Punch 73 Tutorial 7-2: Cross Stitch 76 Tutorial 7-3: Photo Stitch 1 79 Tutorial 7-4: Photo Stitch 2 84 Advanced Stitch Wizard Operations 87 Importing and Editing Image Data 90 Creating Design for Multi-Position Hoops 93 Tutorial 8: Creating Design for Multi-Position Hoops 93 Supplement 98 Changing Various Settings 98 For Basic Operations 104 Reference 106 Sewing Attributes 106 Font List 110 Troubleshooting 112 Support/Service 114 Index 116 6
-
 1
1 -
 2
2 -
 3
3 -
 4
4 -
 5
5 -
 6
6 -
 7
7 -
 8
8 -
 9
9 -
 10
10 -
 11
11 -
 12
12 -
13
-
14
-
15
-
16
-
17
-
18
-
19
-
20
-
21
-
22
-
23
-
24
-
25
-
26
-
27
-
28
-
29
-
30
-
31
-
32
-
33
-
34
-
35
-
36
-
37
-
38
-
39
-
40
-
41
-
42
-
43
-
44
-
45
-
46
-
47
-
48
-
49
-
50
-
51
-
52
-
53
-
54
-
55
-
56
-
57
-
58
-
59
-
60
-
61
-
62
-
63
-
64
-
65
-
66
-
67
-
68
-
69
-
70
-
71
-
72
-
73
-
74
-
75
-
76
-
77
-
78
-
79
-
80
-
81
-
82
-
83
-
84
-
85
-
86
-
87
-
88
-
89
-
90
-
91
-
92
-
93
-
94
-
95
-
96
-
97
-
98
-
99
-
100
-
101
-
102
-
103
-
104
-
105
-
106
-
107
-
108
-
109
-
110
-
111
-
112
-
113
-
114
-
115
-
116
-
117
-
118
-
119
-
120
 |
 |