Brother International PE-DESIGN PLUS2 Instruction Manual - Page 34
Specifying a user hoop, Changing the guideline, settings, Width, Height, Comment, Add Hoop
 |
View all Brother International PE-DESIGN PLUS2 manuals
Add to My Manuals
Save this manual to your list of manuals |
Page 34 highlights
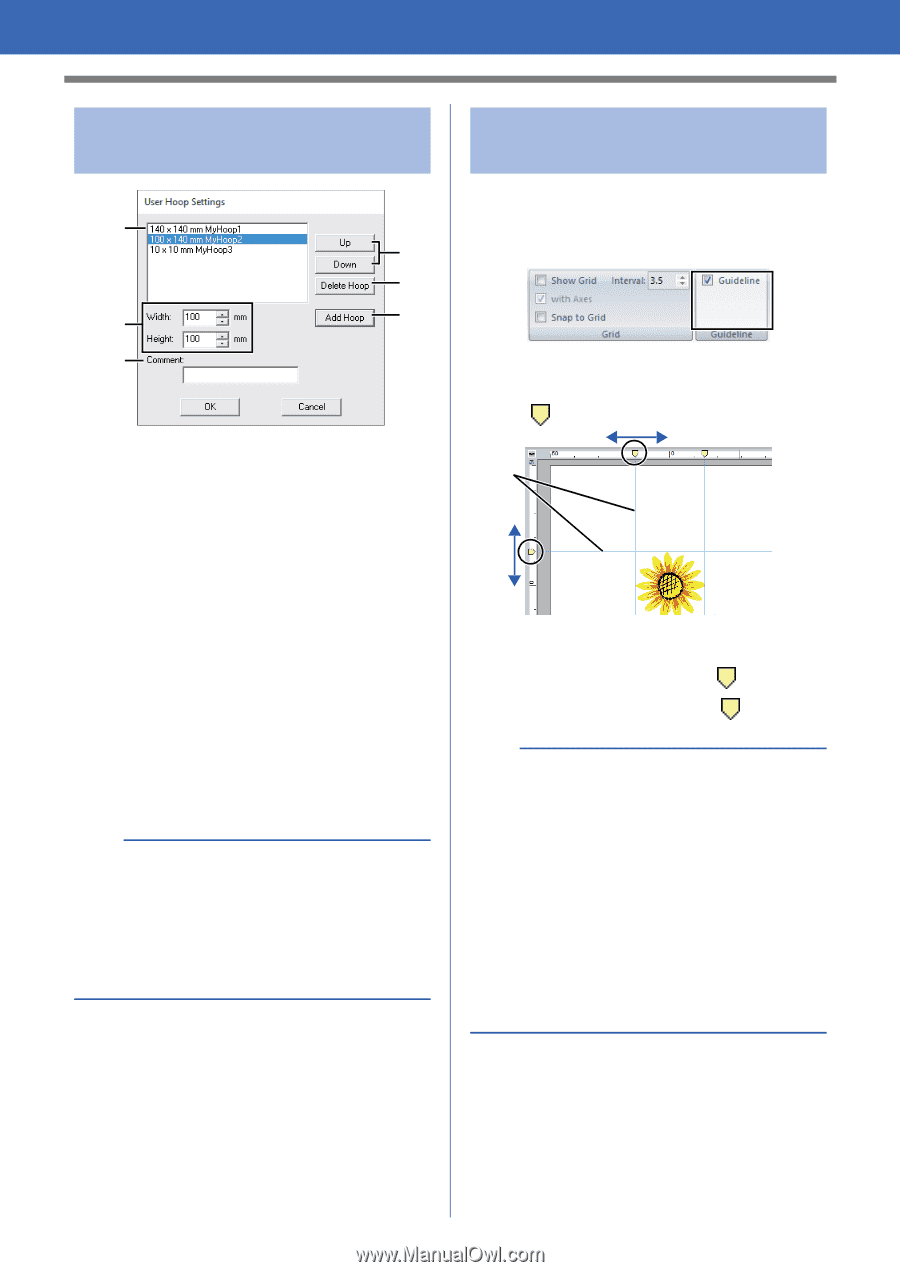
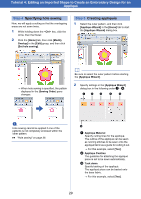
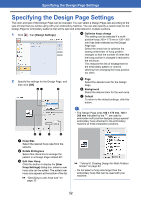
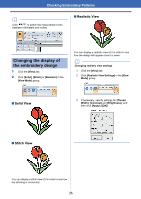
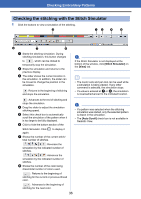
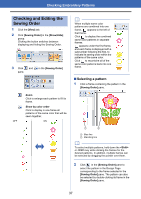
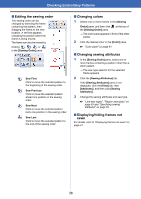
Specifying the Design Page Settings Specifying a user hoop size d a b e f c a Width, Height Type in the size of the hoop to be added. b Comment If text was entered in this box, that text appears beside the size. c Add Hoop Click this button to add the hoop size. d User Hoop List The added hoop size appears in the list. Select a hoop size in this list to change the display order or to delete it. e Up, Down Click these buttons to move the selected hoop size up or down in the display order. f Delete Hoop Click this button to delete the selected hoop size. a • A User Hoop cannot rotate 90°. • A User Hoop cannot be added to the Section Size (for Hoop Size) selector under Custom Size. • Do not create a Custom Hoop larger than the embroidery hoop that can be used with your machine. Changing the guideline settings 1 Click the [View] tab. 2 Select the [Guideline] check box in the [Guideline] group. 3 Click a ruler in the Design Page. appears, and a guideline is drawn. 1 1 Guideline • To move a guideline, drag . • To delete a guideline, click . b • A guideline is added each time the ruler is clicked. In addition, up to 100 guidelines each can be added to the horizontal and vertical rulers. • While a guideline is being dragged, its position is shown in the status bar. • When the [Guideline] check box is cleared, the guidelines are hidden. • If both the [Show Grid] and [Snap to Grid] check boxes are selected in the [Grid] group, the guidelines will be added/moved along the lines of the grid. cc "Changing the grid settings" on page 15 33
-
 1
1 -
2
-
3
-
4
-
5
-
6
-
7
-
8
-
9
-
10
-
11
-
12
-
13
-
14
-
15
-
16
-
17
-
18
-
19
-
20
-
21
-
22
-
23
-
24
-
25
-
26
-
27
-
28
-
 29
29 -
 30
30 -
 31
31 -
 32
32 -
 33
33 -
 34
34 -
 35
35 -
 36
36 -
 37
37 -
 38
38 -
 39
39 -
40
-
41
-
42
-
43
-
44
-
45
-
46
-
47
-
48
-
49
-
50
-
51
-
52
-
53
-
54
-
55
-
56
-
57
-
58
-
59
-
60
-
61
-
62
-
63
-
64
-
65
-
66
-
67
-
68
-
69
-
70
-
71
-
72
-
73
-
74
-
75
-
76
-
77
-
78
-
79
-
80
-
81
-
82
-
83
-
84
-
85
-
86
-
87
-
88
-
89
-
90
-
91
-
92
-
93
-
94
-
95
-
96
-
97
-
98
-
99
-
100
-
101
-
102
-
103
-
104
-
105
-
106
-
107
-
108
-
109
-
110
-
111
-
112
-
113
-
114
-
115
-
116
-
117
-
118
-
119
-
120
 |
 |