Brother International PE-DESIGN PLUS2 Instruction Manual - Page 33
Specifying the Design Settings
 |
View all Brother International PE-DESIGN PLUS2 manuals
Add to My Manuals
Save this manual to your list of manuals |
Page 33 highlights
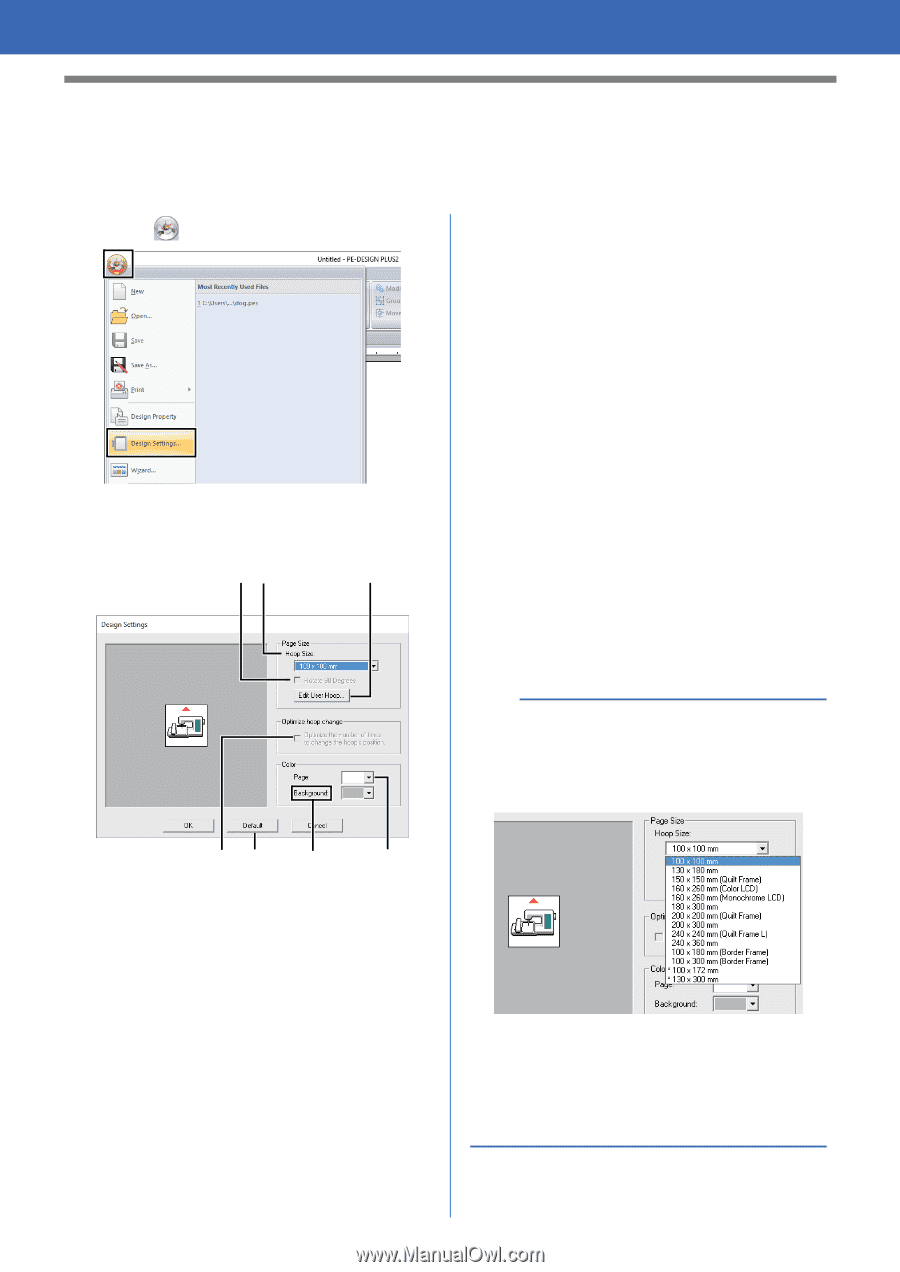
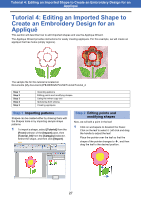
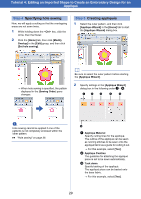
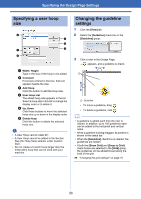
Specifying the Design Page Settings Specifying the Design Page Settings The color and size of the Design Page can be changed. You can select a Design Page size according to the size of hoop that you will be using with your embroidery machine. You can also specify a custom size for the Design Page for embroidery patterns that will be split and embroidered in multiple sections. 1 Click , then [Design Settings]. d Optimize hoop change This setting can be selected if a multiposition hoop (100 × 172 mm or 130 × 300 mm) has been selected as the Design Page size. Select the check box to optimize the sewing order/order of hoop position changes so that the number of times that the hoop position is changed is reduced to the minimum. This reduces the risk of misalignment in the embroidery pattern or uneven stitching from changing the hoop position too often. 2 Specify the settings for the Design Page, and then click [OK]. ba c e Page Select the desired color for the Design Page. f Background Select the desired color for the work area. g Default To return to the default settings, click this button. a • The Design Page sizes 100 × 172 mm, 130 × 300 mm indicated by the "*", are used to embroider multi-position designs using a special embroidery hoop attached to the embroidery machine at three installation positions. dg f e a Hoop Size Select the desired hoop size from the selector. b Rotate 90 Degrees Select this check box to arrange the pattern in a Design Page rotated 90°. c Edit User Hoop Click this button to display the [User Hoop Settings] dialog box, where a user hoop size can be added. The added user hoop size appears at the bottom of the list. cc "Specifying a user hoop size" on page 33 cc "Tutorial 8: Creating Design for Multi-Position Hoops" on page 93 • Do not select a hoop size larger than the embroidery hoop that can be used with your machine. 32
-
 1
1 -
2
-
3
-
4
-
5
-
6
-
7
-
8
-
9
-
10
-
11
-
12
-
13
-
14
-
15
-
16
-
17
-
18
-
19
-
20
-
21
-
22
-
23
-
24
-
25
-
26
-
27
-
 28
28 -
 29
29 -
 30
30 -
 31
31 -
 32
32 -
 33
33 -
 34
34 -
 35
35 -
 36
36 -
 37
37 -
 38
38 -
39
-
40
-
41
-
42
-
43
-
44
-
45
-
46
-
47
-
48
-
49
-
50
-
51
-
52
-
53
-
54
-
55
-
56
-
57
-
58
-
59
-
60
-
61
-
62
-
63
-
64
-
65
-
66
-
67
-
68
-
69
-
70
-
71
-
72
-
73
-
74
-
75
-
76
-
77
-
78
-
79
-
80
-
81
-
82
-
83
-
84
-
85
-
86
-
87
-
88
-
89
-
90
-
91
-
92
-
93
-
94
-
95
-
96
-
97
-
98
-
99
-
100
-
101
-
102
-
103
-
104
-
105
-
106
-
107
-
108
-
109
-
110
-
111
-
112
-
113
-
114
-
115
-
116
-
117
-
118
-
119
-
120
 |
 |