Brother International PE-DESIGN PLUS2 Instruction Manual - Page 99
Supplement, Changing Various Settings
 |
View all Brother International PE-DESIGN PLUS2 manuals
Add to My Manuals
Save this manual to your list of manuals |
Page 99 highlights
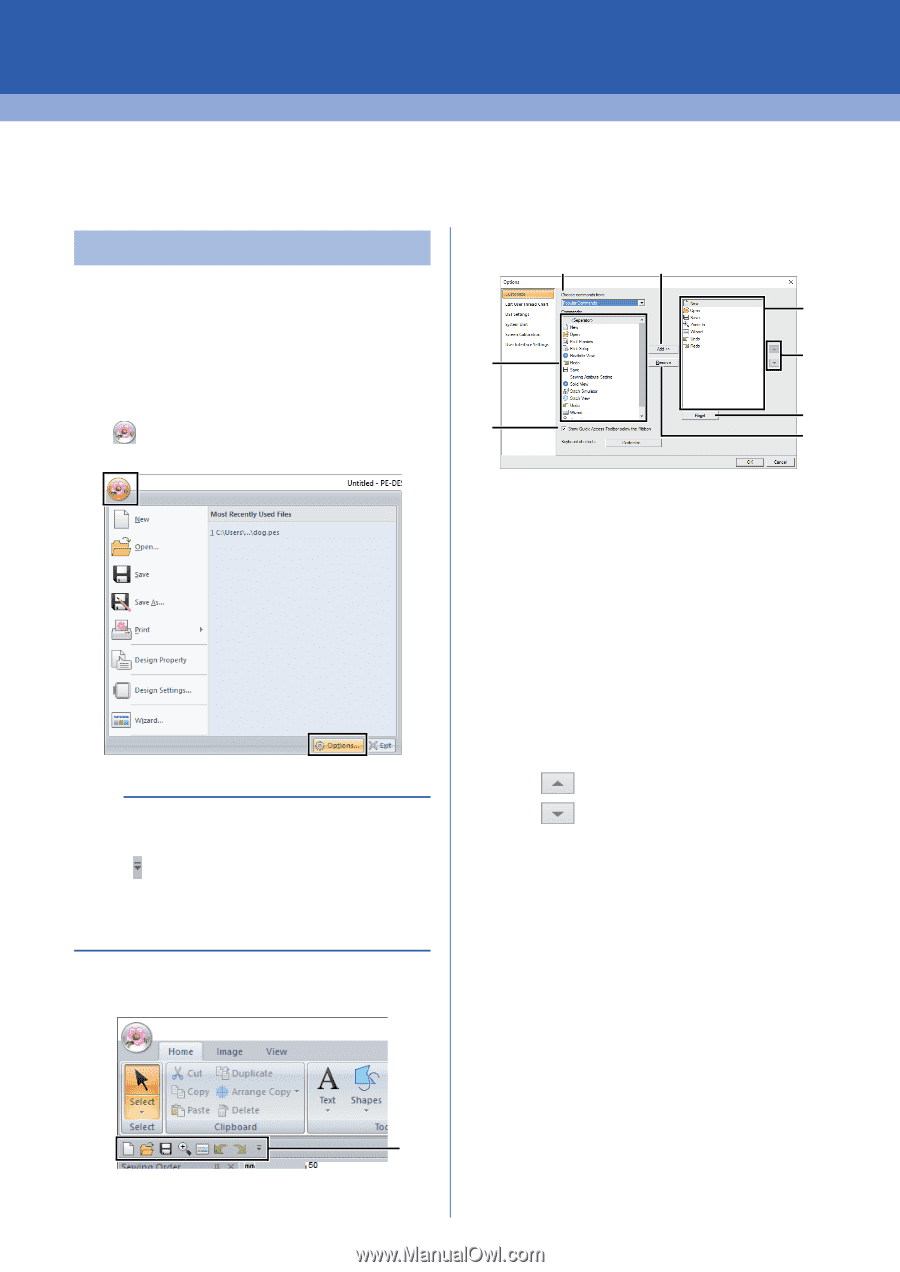
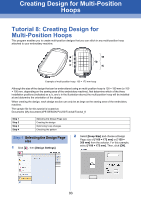
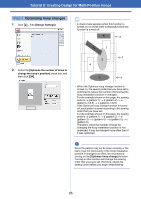
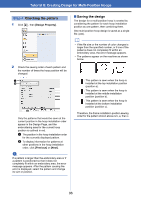
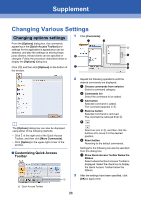
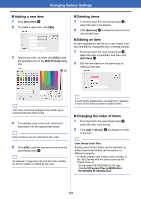
Supplement Changing Various Settings Changing options settings 1 Click [Customize]. s From the [Options] dialog box, the commands a c appearing in the [Quick Access Toolbar] and settings for the application's appearance can be A selected, and also the settings on shortcut keys, jump stitches, thread charts can be specified or e b changed. Follow the procedure described below to display the [Options] dialog box. f Click , and then click [Options] on the bottom of g d the window. b The [Options] dialog box can also be displayed using either of the following methods. • Click at the right end of the Quick Access Toolbar, and then click [More Commands]. • Click [Option] in the upper-right corner of the window. ■ Customizing Quick Access Toolbar 1 2 Repeat the following operations until the desired commands are displayed. a Choose commands from selector Select a command category. b Commands list Select the command to be added. c Add button Selected command is added. The command appears in A. d Remove button Selected command is removed. The command is removed from A. e Select an icon in A, and then click the buttons at to move it to the desired position. f Reset button Reverting to the default commands. Settings for the following can also be specified from this dialog box. g Show Quick Access Toolbar Below the Ribbon Select where the Quick Access Toolbar is displayed. Select the check box to display the Quick Access Toolbar below the Ribbon. 3 After the settings have been specified, click [OK] to apply them. 1 Quick Access Toolbar 98
-
 1
1 -
2
-
3
-
4
-
5
-
6
-
7
-
8
-
9
-
10
-
11
-
12
-
13
-
14
-
15
-
16
-
17
-
18
-
19
-
20
-
21
-
22
-
23
-
24
-
25
-
26
-
27
-
28
-
29
-
30
-
31
-
32
-
33
-
34
-
35
-
36
-
37
-
38
-
39
-
40
-
41
-
42
-
43
-
44
-
45
-
46
-
47
-
48
-
49
-
50
-
51
-
52
-
53
-
54
-
55
-
56
-
57
-
58
-
59
-
60
-
61
-
62
-
63
-
64
-
65
-
66
-
67
-
68
-
69
-
70
-
71
-
72
-
73
-
74
-
75
-
76
-
77
-
78
-
79
-
80
-
81
-
82
-
83
-
84
-
85
-
86
-
87
-
88
-
89
-
90
-
91
-
92
-
93
-
 94
94 -
 95
95 -
 96
96 -
 97
97 -
 98
98 -
 99
99 -
 100
100 -
 101
101 -
 102
102 -
 103
103 -
 104
104 -
105
-
106
-
107
-
108
-
109
-
110
-
111
-
112
-
113
-
114
-
115
-
116
-
117
-
118
-
119
-
120
 |
 |