Brother International PE-DESIGN PLUS2 Instruction Manual - Page 57
Hole sewing, Editing grouped patterns, individually, Canceling hole sewing
 |
View all Brother International PE-DESIGN PLUS2 manuals
Add to My Manuals
Save this manual to your list of manuals |
Page 57 highlights
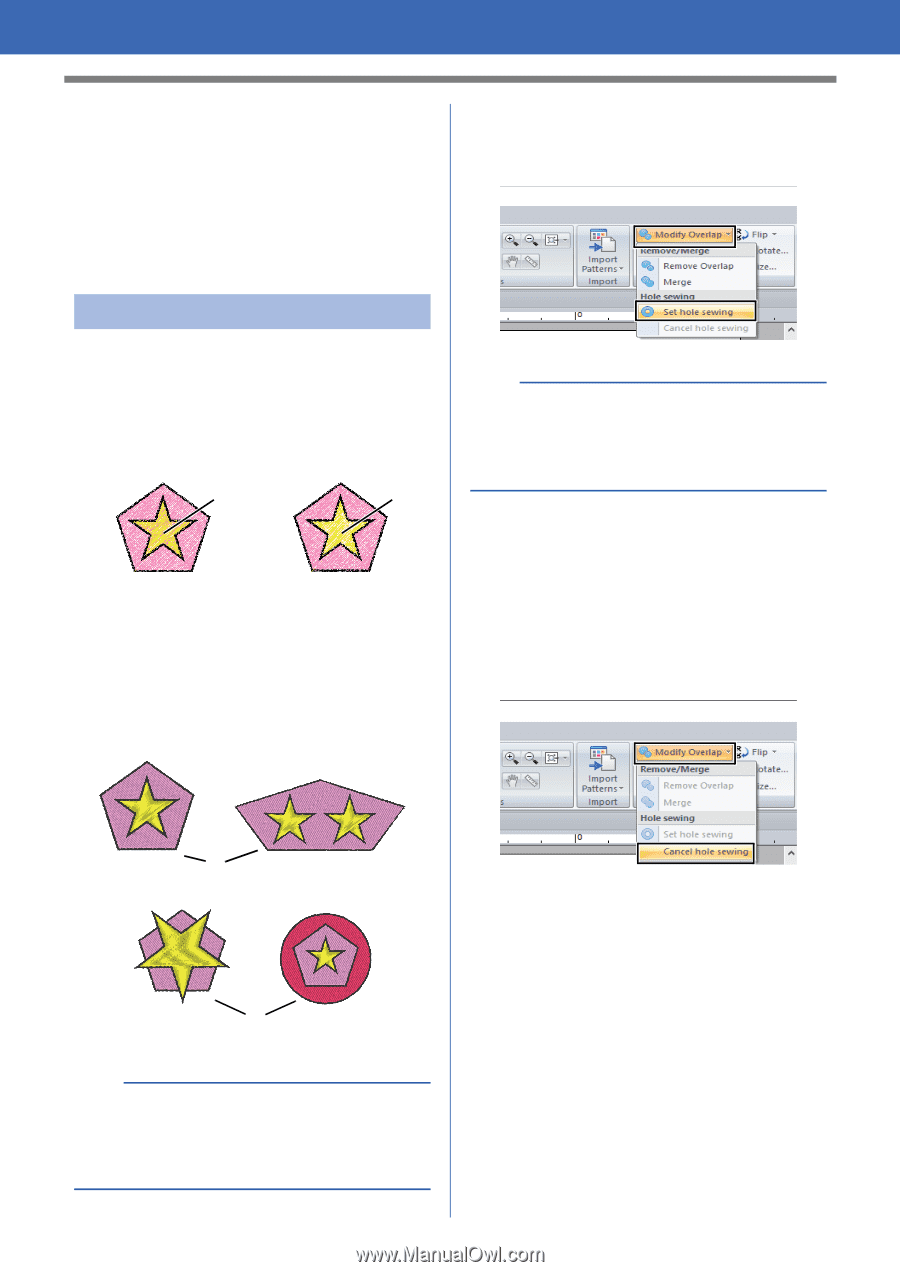
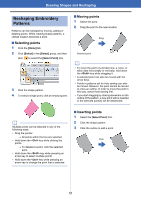
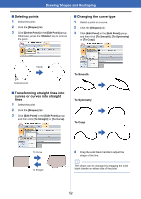
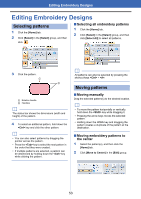
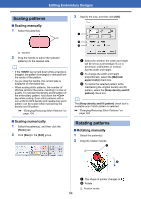
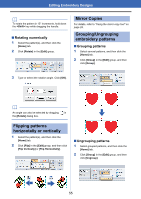
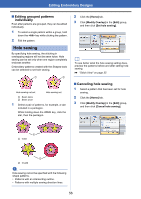
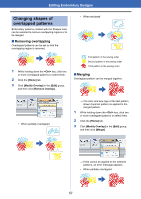
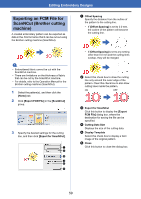
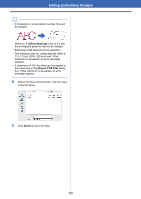
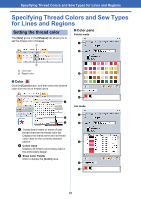
Editing Embroidery Designs ■ Editing grouped patterns individually Even after patterns are grouped, they can be edited individually. 1 To select a single pattern within a group, hold down the key while clicking the pattern. 2 Edit the pattern. Hole sewing By specifying hole sewing, the stitching in overlapping regions will not be sewn twice. Hole sewing can be set only when one region completely encloses another. Embroidery patterns created with the Shapes tools can be selected to set hole sewing. 1 2 Hole sewing not set Hole sewing set 1 Sewn twice 2 Sewn once 1 Select a pair of patterns, for example, a star included in a pentagon. While holding down the key, click the star, then the pentagon. 2 Click the [Home] tab. 3 Click [Modify Overlap] in the [Edit] group, and then click [Set hole sewing]. b To see better what the hole sewing setting does, preview the patterns before and after setting hole sewing. cc "Stitch View" on page 35 ■ Canceling hole sewing 1 Select a pattern that has been set for hole sewing. 2 Click the [Home] tab. 3 Click [Modify Overlap] in the [Edit] group, and then click [Cancel hole sewing]. 1 1 Valid 2 2 Invalid a Hole sewing cannot be specified with the following shape patterns. • Patterns with an intersecting outline. • Patterns with multiple sewing direction lines. 56
-
 1
1 -
2
-
3
-
4
-
5
-
6
-
7
-
8
-
9
-
10
-
11
-
12
-
13
-
14
-
15
-
16
-
17
-
18
-
19
-
20
-
21
-
22
-
23
-
24
-
25
-
26
-
27
-
28
-
29
-
30
-
31
-
32
-
33
-
34
-
35
-
36
-
37
-
38
-
39
-
40
-
41
-
42
-
43
-
44
-
45
-
46
-
47
-
48
-
49
-
50
-
51
-
 52
52 -
 53
53 -
 54
54 -
 55
55 -
 56
56 -
 57
57 -
 58
58 -
 59
59 -
 60
60 -
 61
61 -
 62
62 -
63
-
64
-
65
-
66
-
67
-
68
-
69
-
70
-
71
-
72
-
73
-
74
-
75
-
76
-
77
-
78
-
79
-
80
-
81
-
82
-
83
-
84
-
85
-
86
-
87
-
88
-
89
-
90
-
91
-
92
-
93
-
94
-
95
-
96
-
97
-
98
-
99
-
100
-
101
-
102
-
103
-
104
-
105
-
106
-
107
-
108
-
109
-
110
-
111
-
112
-
113
-
114
-
115
-
116
-
117
-
118
-
119
-
120
 |
 |