Brother International PE-DESIGN PLUS2 Instruction Manual - Page 42
Step 2, Displaying frames not, Decorating the outer heart, shape
 |
View all Brother International PE-DESIGN PLUS2 manuals
Add to My Manuals
Save this manual to your list of manuals |
Page 42 highlights
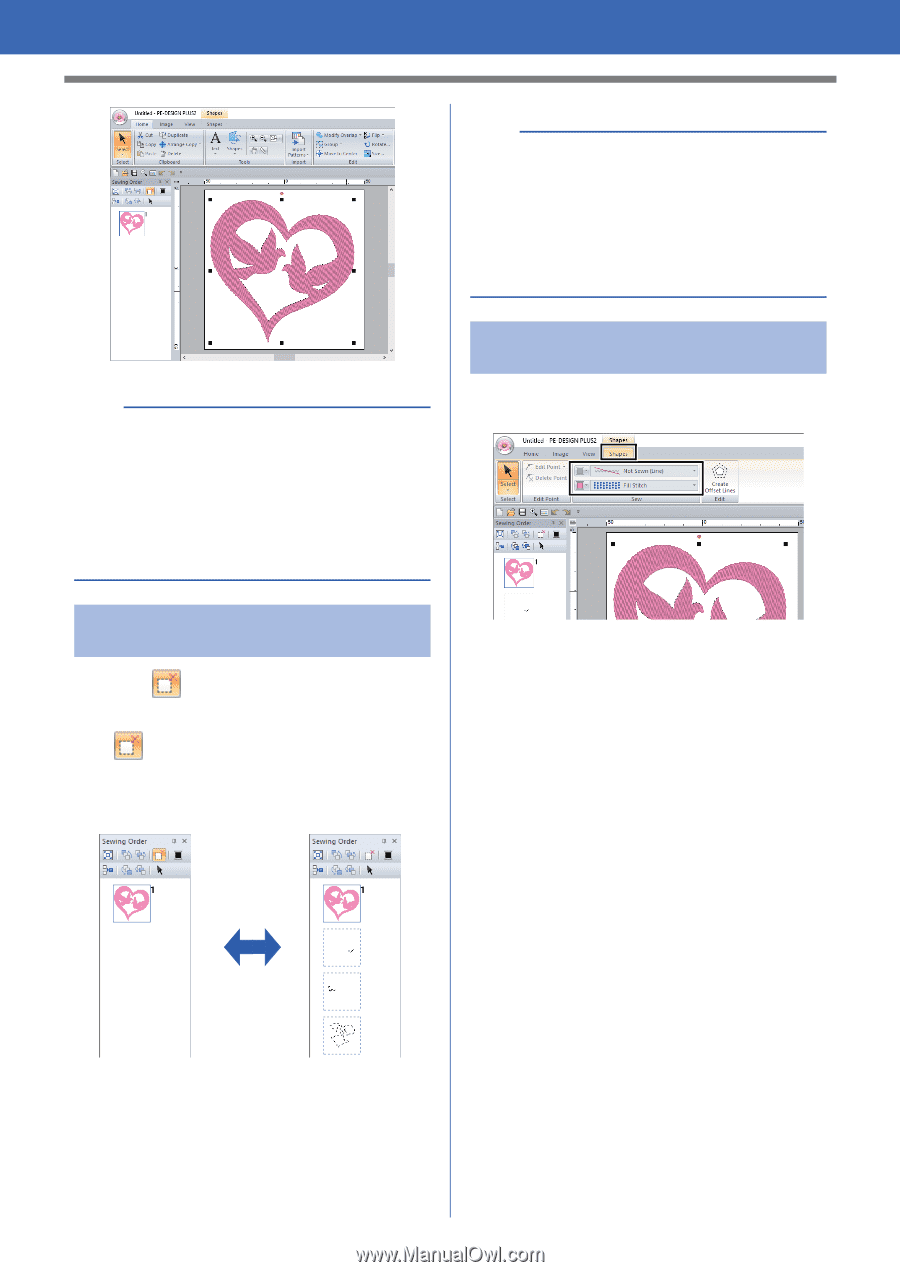
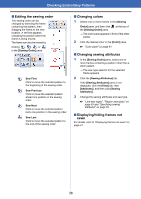
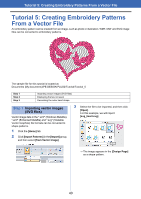
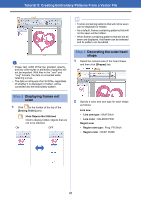
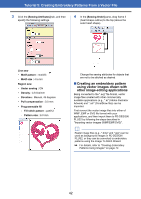
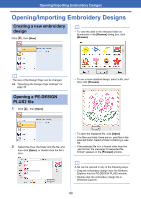
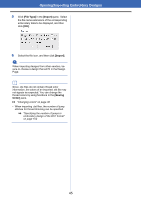
Tutorial 5: Creating Embroidery Patterns From a Vector File b • Frames containing patterns that will not be sewn can be displayed or hidden. • As a default, frames containing patterns that will not be sewn will be hidden. • When frames containing patterns that will not be sewn are displayed, that frame can be selected and its pattern can be edited. a • Image, text, width of the line, gradient, opacity, and any other styles or attributes of graphics will not be imported. With files in the ".emf" and ".svg" formats, the data is converted while retaining curves. • The data on all layers of an SVG file, regardless of whether it is displayed or hidden, will be converted into the embroidery pattern. Step 3 Decorating the outer heart shape 1 Select the colored area of the heart shape, and then click [Shapes] tab. Step 2 Displaying frames not sewn 1 Click in the toolbar at the top of the [Sewing Order] pane. Hide Objects Not Stitched Click to display hidden objects that are not to be stitched. ON OFF 2 Specify a color and sew type for each shape as follows. Line sew • Line sew type : Motif Stitch • Line color : SALMON PINK Region sew • Region sew type : Prog. Fill Stitch • Region color : DEEP ROSE 41
-
 1
1 -
2
-
3
-
4
-
5
-
6
-
7
-
8
-
9
-
10
-
11
-
12
-
13
-
14
-
15
-
16
-
17
-
18
-
19
-
20
-
21
-
22
-
23
-
24
-
25
-
26
-
27
-
28
-
29
-
30
-
31
-
32
-
33
-
34
-
35
-
36
-
 37
37 -
 38
38 -
 39
39 -
 40
40 -
 41
41 -
 42
42 -
 43
43 -
 44
44 -
 45
45 -
 46
46 -
 47
47 -
48
-
49
-
50
-
51
-
52
-
53
-
54
-
55
-
56
-
57
-
58
-
59
-
60
-
61
-
62
-
63
-
64
-
65
-
66
-
67
-
68
-
69
-
70
-
71
-
72
-
73
-
74
-
75
-
76
-
77
-
78
-
79
-
80
-
81
-
82
-
83
-
84
-
85
-
86
-
87
-
88
-
89
-
90
-
91
-
92
-
93
-
94
-
95
-
96
-
97
-
98
-
99
-
100
-
101
-
102
-
103
-
104
-
105
-
106
-
107
-
108
-
109
-
110
-
111
-
112
-
113
-
114
-
115
-
116
-
117
-
118
-
119
-
120
 |
 |