D-Link DNS-1250-04 Acronis Backup Software User Manual for DNS-1250-04 - Page 103
Setting up a display mode, Configuring iSCSI and NDAS devices, To add an iSCSI device
 |
View all D-Link DNS-1250-04 manuals
Add to My Manuals
Save this manual to your list of manuals |
Page 103 highlights
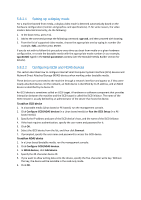
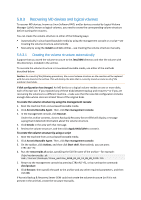
5.8.2.1 Setting up a display mode For a machine booted from media, a display video mode is detected automatically based on the hardware configuration (monitor and graphics card specifications). If, for some reason, the video mode is detected incorrectly, do the following: 1. In the boot menu, press F11. 2. Add to the command prompt the following command: vga=ask, and then proceed with booting. 3. From the list of supported video modes, choose the appropriate one by typing its number (for example, 318), and then press ENTER. If you do not wish to follow this procedure every time you boot from media on a given hardware configuration, re-create the bootable media with the appropriate mode number (in our example, vga=0x318) typed in the Kernel parameters window (see the Bootable Media Builder section for details). 5.8.2.2 Configuring iSCSI and NDAS devices This section describes how to configure Internet Small Computer System Interface (iSCSI) devices and Network Direct Attached Storage (NDAS) devices when working under bootable media. These devices are connected to the machine through a network interface and appear as if they were locally-attached devices. On the network, an iSCSI device is identified by its IP address, and an NDAS device is identified by its device ID. An iSCSI device is sometimes called an iSCSI target. A hardware or software component that provides interaction between the machine and the iSCSI target is called the iSCSI initiator. The name of the iSCSI initiator is usually defined by an administrator of the server that hosts the device. To add an iSCSI device 1. In a bootable media (Linux-based or PE-based), run the management console. 2. Click Configure iSCSI/NDAS devices (in a Linux-based media) or Run the iSCSI Setup (in a PE- based media). 3. Specify the IP address and port of the iSCSI device's host, and the name of the iSCSI initiator. 4. If the host requires authentication, specify the user name and password for it. 5. Click OK. 6. Select the iSCSI device from the list, and then click Connect. 7. If prompted, specify the user name and password to access the iSCSI device. To add an NDAS device 1. In a Linux-based bootable media, run the management console. 2. Click Configure iSCSI/NDAS devices. 3. In NDAS devices, click Add device. 4. Specify the 20-character device ID. 5. If you want to allow writing data onto the device, specify the five-character write key. Without this key, the device will be available in the read-only mode. 6. Click OK.
-
 1
1 -
2
-
3
-
4
-
5
-
6
-
7
-
8
-
9
-
10
-
11
-
12
-
13
-
14
-
15
-
16
-
17
-
18
-
19
-
20
-
21
-
22
-
23
-
24
-
25
-
26
-
27
-
28
-
29
-
30
-
31
-
32
-
33
-
34
-
35
-
36
-
37
-
38
-
39
-
40
-
41
-
42
-
43
-
44
-
45
-
46
-
47
-
48
-
49
-
50
-
51
-
52
-
53
-
54
-
55
-
56
-
57
-
58
-
59
-
60
-
61
-
62
-
63
-
64
-
65
-
66
-
67
-
68
-
69
-
70
-
71
-
72
-
73
-
74
-
75
-
76
-
77
-
78
-
79
-
80
-
81
-
82
-
83
-
84
-
85
-
86
-
87
-
88
-
89
-
90
-
91
-
92
-
93
-
94
-
95
-
96
-
97
-
 98
98 -
 99
99 -
 100
100 -
 101
101 -
 102
102 -
 103
103 -
 104
104 -
 105
105 -
 106
106 -
 107
107 -
 108
108 -
109
-
110
-
111
-
112
-
113
-
114
-
115
-
116
-
117
-
118
-
119
-
120
-
121
-
122
-
123
-
124
-
125
-
126
-
127
-
128
-
129
-
130
-
131
-
132
-
133
-
134
-
135
-
136
-
137
-
138
-
139
-
140
-
141
-
142
-
143
-
144
-
145
-
146
-
147
-
148
-
149
-
150
-
151
-
152
-
153
 |
 |
