Dell 2335dn Dell™ 2335dn MFP User's Guide - Page 13
Installing the Toner Cartridge, Load paper. See Loading Paper .
 |
UPC - 884116001898
View all Dell 2335dn manuals
Add to My Manuals
Save this manual to your list of manuals |
Page 13 highlights
2. Unpack the machine and check all the enclosed items. 3. Remove the tape holding the machine tightly. 4. Install both the print cartridge. 5. Load paper. See "Loading Paper" . 6. Make sure that all the cables are connected to the printer. 7. Turn the printer on. NOTE: When you move the printer, do not tilt or turn it upside down. Otherwise, the inside of the printer may be contaminated by toner, which can cause damage to the printer or bad printing quality. Installing the Toner Cartridge 1. Open the front cover. CAUTION: To prevent damage, do not expose the toner cartridge to light for more than a few minutes. CAUTION: Do not touch the green underside of the toner cartridge. Use the handle on the cartridge to avoid touching this area. 2.
-
 1
1 -
2
-
3
-
4
-
5
-
6
-
7
-
 8
8 -
 9
9 -
 10
10 -
 11
11 -
 12
12 -
 13
13 -
 14
14 -
 15
15 -
 16
16 -
 17
17 -
 18
18 -
19
-
20
-
21
-
22
-
23
-
24
-
25
-
26
-
27
-
28
-
29
-
30
-
31
-
32
-
33
-
34
-
35
-
36
-
37
-
38
-
39
-
40
-
41
-
42
-
43
-
44
-
45
-
46
-
47
-
48
-
49
-
50
-
51
-
52
-
53
-
54
-
55
-
56
-
57
-
58
-
59
-
60
-
61
-
62
-
63
-
64
-
65
-
66
-
67
-
68
-
69
-
70
-
71
-
72
-
73
-
74
-
75
-
76
-
77
-
78
-
79
-
80
-
81
-
82
-
83
-
84
-
85
-
86
-
87
-
88
-
89
-
90
-
91
-
92
-
93
-
94
-
95
-
96
-
97
-
98
-
99
-
100
-
101
-
102
-
103
-
104
-
105
-
106
-
107
-
108
-
109
-
110
-
111
-
112
-
113
-
114
-
115
-
116
-
117
-
118
-
119
-
120
-
121
-
122
-
123
-
124
-
125
-
126
-
127
-
128
-
129
-
130
-
131
-
132
-
133
-
134
-
135
-
136
-
137
-
138
-
139
-
140
-
141
-
142
-
143
-
144
-
145
-
146
-
147
-
148
-
149
-
150
-
151
-
152
-
153
-
154
-
155
-
156
-
157
-
158
-
159
-
160
-
161
-
162
-
163
-
164
-
165
-
166
-
167
-
168
-
169
-
170
-
171
-
172
-
173
-
174
-
175
-
176
-
177
-
178
-
179
-
180
-
181
-
182
-
183
-
184
-
185
-
186
-
187
-
188
-
189
-
190
-
191
-
192
-
193
-
194
-
195
-
196
-
197
-
198
-
199
-
200
-
201
-
202
-
203
-
204
-
205
-
206
-
207
-
208
-
209
-
210
-
211
-
212
-
213
-
214
-
215
-
216
-
217
-
218
-
219
-
220
-
221
-
222
-
223
-
224
-
225
-
226
-
227
-
228
-
229
-
230
-
231
-
232
-
233
-
234
-
235
-
236
-
237
-
238
-
239
-
240
-
241
-
242
-
243
-
244
-
245
-
246
-
247
-
248
-
249
-
250
-
251
-
252
-
253
-
254
-
255
-
256
-
257
-
258
-
259
-
260
-
261
-
262
-
263
-
264
-
265
-
266
-
267
-
268
-
269
-
270
-
271
-
272
-
273
-
274
-
275
-
276
-
277
-
278
-
279
-
280
-
281
-
282
-
283
-
284
 |
 |
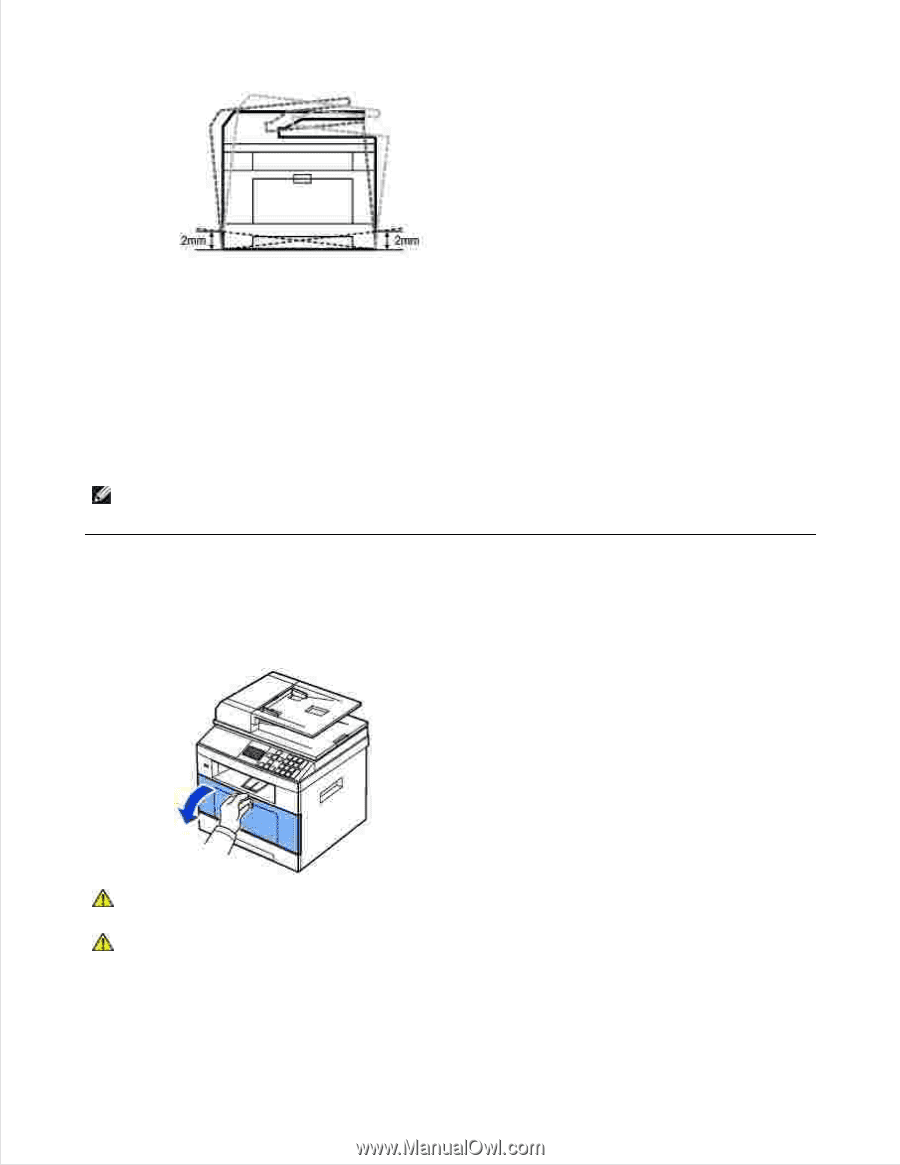
Unpack the machine and check all the enclosed items.
2.
Remove the tape holding the machine tightly.
3.
Install both the print cartridge.
4.
Load paper. See "Loading Paper" .
5.
Make sure that all the cables are connected to the printer.
6.
Turn the printer on.
7.
NOTE:
When you move the printer, do not tilt or turn it upside down. Otherwise, the inside of the
printer may be contaminated by toner, which can cause damage to the printer or bad printing quality.
Installing the Toner Cartridge
Open the front cover.
1.
CAUTION:
To prevent damage, do not expose the toner cartridge to light for more than a
few minutes.
CAUTION:
Do not touch the green underside of the toner cartridge. Use the handle on the
cartridge to avoid touching this area.