Dell 2335dn Dell™ 2335dn MFP User's Guide - Page 133
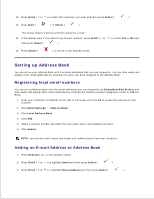
Setting up Address Book, Registering local email numbers, Adding an E-mail Address to Address Book
 |
UPC - 884116001898
View all Dell 2335dn manuals
Add to My Manuals
Save this manual to your list of manuals |
Page 133 highlights
12. 13. Press Scroll ( or ) to select the resolution you want and then press Select ( ). 14. Press Start ( ) or Select ( ). The printer begins scanning and then sends the e-mail. 15. If the display asks if you want to log off your account, press Scroll ( or ) to select Yes or No and then press Select ( ). 16. Press Cancel ( ) to return to the Standby mode. Setting up Address Book You can set up your Address Book with the email addresses that you use frequently. You can then easily and quickly enter email addresses by entering the name you have assigned in the Address Book. Registering local email numbers You can set up Address Book with the email addresses you use frequently via Embedded Web Service and then easily and quickly enter email addresses by entering the location numbers assigned to them in Address Book. 1. Enter your machine's IP address as the URL in a browser and click Go to access the web site of your machine. 2. Click Email Settings Address Book . 3. Click Local Address Book . 4. Click Add . 5. Select a location number and enter the user name and e-mail address you want. 6. Click Submit . NOTE: You can also click Import and obtain your address book from your computer. Adding an E-mail Address to Address Book 1. Press Directory ( ) in the operator panel. 2. Press Scroll ( or ) to highlight Email and then press Select ( ). 3. Press Scroll ( or ) to highlight Email Address and then press Select ( ). 4.
-
 1
1 -
2
-
3
-
4
-
5
-
6
-
7
-
8
-
9
-
10
-
11
-
12
-
13
-
14
-
15
-
16
-
17
-
18
-
19
-
20
-
21
-
22
-
23
-
24
-
25
-
26
-
27
-
28
-
29
-
30
-
31
-
32
-
33
-
34
-
35
-
36
-
37
-
38
-
39
-
40
-
41
-
42
-
43
-
44
-
45
-
46
-
47
-
48
-
49
-
50
-
51
-
52
-
53
-
54
-
55
-
56
-
57
-
58
-
59
-
60
-
61
-
62
-
63
-
64
-
65
-
66
-
67
-
68
-
69
-
70
-
71
-
72
-
73
-
74
-
75
-
76
-
77
-
78
-
79
-
80
-
81
-
82
-
83
-
84
-
85
-
86
-
87
-
88
-
89
-
90
-
91
-
92
-
93
-
94
-
95
-
96
-
97
-
98
-
99
-
100
-
101
-
102
-
103
-
104
-
105
-
106
-
107
-
108
-
109
-
110
-
111
-
112
-
113
-
114
-
115
-
116
-
117
-
118
-
119
-
120
-
121
-
122
-
123
-
124
-
125
-
126
-
127
-
 128
128 -
 129
129 -
 130
130 -
 131
131 -
 132
132 -
 133
133 -
 134
134 -
 135
135 -
 136
136 -
 137
137 -
 138
138 -
139
-
140
-
141
-
142
-
143
-
144
-
145
-
146
-
147
-
148
-
149
-
150
-
151
-
152
-
153
-
154
-
155
-
156
-
157
-
158
-
159
-
160
-
161
-
162
-
163
-
164
-
165
-
166
-
167
-
168
-
169
-
170
-
171
-
172
-
173
-
174
-
175
-
176
-
177
-
178
-
179
-
180
-
181
-
182
-
183
-
184
-
185
-
186
-
187
-
188
-
189
-
190
-
191
-
192
-
193
-
194
-
195
-
196
-
197
-
198
-
199
-
200
-
201
-
202
-
203
-
204
-
205
-
206
-
207
-
208
-
209
-
210
-
211
-
212
-
213
-
214
-
215
-
216
-
217
-
218
-
219
-
220
-
221
-
222
-
223
-
224
-
225
-
226
-
227
-
228
-
229
-
230
-
231
-
232
-
233
-
234
-
235
-
236
-
237
-
238
-
239
-
240
-
241
-
242
-
243
-
244
-
245
-
246
-
247
-
248
-
249
-
250
-
251
-
252
-
253
-
254
-
255
-
256
-
257
-
258
-
259
-
260
-
261
-
262
-
263
-
264
-
265
-
266
-
267
-
268
-
269
-
270
-
271
-
272
-
273
-
274
-
275
-
276
-
277
-
278
-
279
-
280
-
281
-
282
-
283
-
284
 |
 |