Dell 2335dn Dell™ 2335dn MFP User's Guide - Page 180
Canceling a Scheduled Fax, Fax Forward to E-mail addresses, For details
 |
UPC - 884116001898
View all Dell 2335dn manuals
Add to My Manuals
Save this manual to your list of manuals |
Page 180 highlights
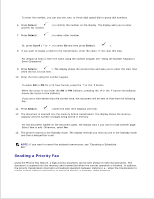
For details about loading a document, see "Adjusting the Document Contrast" . 2. Press Scroll ( or ) to highlight Fax and then press Select ( ). 3. Adjust the document contrast and resolution to suit your fax needs. For details, see "Adjusting the Document Contrast" and "Adjusting the Document Resolution" . 4. Press Scroll ( or ) to highlight Add Pages and then press Select ( ). The display shows the jobs reserved in memory. 5. Press Scroll ( or ) until you see the fax job to which you want to add documents to and then press Select ( ). The printer automatically stores the documents in the memory, and the display shows the memory capacity and the number of pages. For the document loaded on the document glass, the display asks if you want to load another page. Select Yes to add. Otherwise, select No . 6. After storing, the printer displays the numbers of total pages and added pages and then returns to the Standby mode. Canceling a Scheduled Fax 1. Press Scroll ( or ) to highlight Fax and then press Select ( ). 2. Press Scroll ( or ) to highlight Cancel Job and then press Select ( ). The display shows the jobs reserved in memory. 3. Press Scroll ( or ) until you see the fax job you want to cancel, and then press Select ( ). 4. When the confirming message displays, press Select ( ). The selected job is canceled. Fax Forward to E-mail addresses You can set the printer to forward all outgoing or incoming faxes to the e-mail addresses. 1. 2.
-
 1
1 -
2
-
3
-
4
-
5
-
6
-
7
-
8
-
9
-
10
-
11
-
12
-
13
-
14
-
15
-
16
-
17
-
18
-
19
-
20
-
21
-
22
-
23
-
24
-
25
-
26
-
27
-
28
-
29
-
30
-
31
-
32
-
33
-
34
-
35
-
36
-
37
-
38
-
39
-
40
-
41
-
42
-
43
-
44
-
45
-
46
-
47
-
48
-
49
-
50
-
51
-
52
-
53
-
54
-
55
-
56
-
57
-
58
-
59
-
60
-
61
-
62
-
63
-
64
-
65
-
66
-
67
-
68
-
69
-
70
-
71
-
72
-
73
-
74
-
75
-
76
-
77
-
78
-
79
-
80
-
81
-
82
-
83
-
84
-
85
-
86
-
87
-
88
-
89
-
90
-
91
-
92
-
93
-
94
-
95
-
96
-
97
-
98
-
99
-
100
-
101
-
102
-
103
-
104
-
105
-
106
-
107
-
108
-
109
-
110
-
111
-
112
-
113
-
114
-
115
-
116
-
117
-
118
-
119
-
120
-
121
-
122
-
123
-
124
-
125
-
126
-
127
-
128
-
129
-
130
-
131
-
132
-
133
-
134
-
135
-
136
-
137
-
138
-
139
-
140
-
141
-
142
-
143
-
144
-
145
-
146
-
147
-
148
-
149
-
150
-
151
-
152
-
153
-
154
-
155
-
156
-
157
-
158
-
159
-
160
-
161
-
162
-
163
-
164
-
165
-
166
-
167
-
168
-
169
-
170
-
171
-
172
-
173
-
174
-
 175
175 -
 176
176 -
 177
177 -
 178
178 -
 179
179 -
 180
180 -
 181
181 -
 182
182 -
 183
183 -
 184
184 -
 185
185 -
186
-
187
-
188
-
189
-
190
-
191
-
192
-
193
-
194
-
195
-
196
-
197
-
198
-
199
-
200
-
201
-
202
-
203
-
204
-
205
-
206
-
207
-
208
-
209
-
210
-
211
-
212
-
213
-
214
-
215
-
216
-
217
-
218
-
219
-
220
-
221
-
222
-
223
-
224
-
225
-
226
-
227
-
228
-
229
-
230
-
231
-
232
-
233
-
234
-
235
-
236
-
237
-
238
-
239
-
240
-
241
-
242
-
243
-
244
-
245
-
246
-
247
-
248
-
249
-
250
-
251
-
252
-
253
-
254
-
255
-
256
-
257
-
258
-
259
-
260
-
261
-
262
-
263
-
264
-
265
-
266
-
267
-
268
-
269
-
270
-
271
-
272
-
273
-
274
-
275
-
276
-
277
-
278
-
279
-
280
-
281
-
282
-
283
-
284
 |
 |