Dell PowerEdge T100 Hardware Owner's Manual - Page 109
Troubleshooting a NIC
 |
View all Dell PowerEdge T100 manuals
Add to My Manuals
Save this manual to your list of manuals |
Page 109 highlights
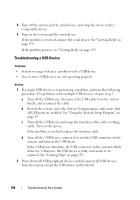
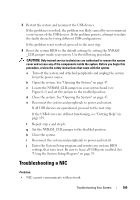
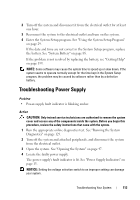
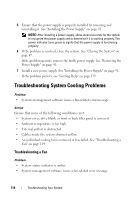
3 Restart the system and reconnect the USB devices. If the problem is resolved, the problem was likely caused by an overcurrent event on one of the USB devices. If the problem persists, attempt to isolate the faulty device by trying different USB configurations. If the problem is not resolved, proceed to the next step. 4 Reset the system BIOS to the default settings by setting the NVRAM _CLR jumper inside your system. Use the following procedure. CAUTION: Only trained service technicians are authorized to remove the system cover and access any of the components inside the system. Before you begin this procedure, review the safety instructions that came with the system. a Turn off the system and attached peripherals and unplug the system from the power source. b Open the system. See "Opening the System" on page 47. c Locate the NVRAM_CLR jumper on your system board (see Figure 6-1) and set the jumper to the enabled position. d Close the system. See "Opening the System" on page 47. e Reconnect the system and peripherals to power and restart. If all USB devices are operational, proceed to the next step. If the USB devices are still not functioning, see "Getting Help" on page 139. f Repeat step a and step b. g Set the NVRAM_CLR jumper to the disabled position. h Close the system. i Reconnect the system and peripherals to power and restart. j Enter the System Setup program and reenter any custom BIOS settings that were reset. Be sure to leave all USB ports enabled. See "Using the System Setup Program" on page 29. Troubleshooting a NIC Problem • NIC cannot communicate with network. Troubleshooting Your System 109
-
 1
1 -
2
-
3
-
4
-
5
-
6
-
7
-
8
-
9
-
10
-
11
-
12
-
13
-
14
-
15
-
16
-
17
-
18
-
19
-
20
-
21
-
22
-
23
-
24
-
25
-
26
-
27
-
28
-
29
-
30
-
31
-
32
-
33
-
34
-
35
-
36
-
37
-
38
-
39
-
40
-
41
-
42
-
43
-
44
-
45
-
46
-
47
-
48
-
49
-
50
-
51
-
52
-
53
-
54
-
55
-
56
-
57
-
58
-
59
-
60
-
61
-
62
-
63
-
64
-
65
-
66
-
67
-
68
-
69
-
70
-
71
-
72
-
73
-
74
-
75
-
76
-
77
-
78
-
79
-
80
-
81
-
82
-
83
-
84
-
85
-
86
-
87
-
88
-
89
-
90
-
91
-
92
-
93
-
94
-
95
-
96
-
97
-
98
-
99
-
100
-
101
-
102
-
103
-
 104
104 -
 105
105 -
 106
106 -
 107
107 -
 108
108 -
 109
109 -
 110
110 -
 111
111 -
 112
112 -
 113
113 -
 114
114 -
115
-
116
-
117
-
118
-
119
-
120
-
121
-
122
-
123
-
124
-
125
-
126
-
127
-
128
-
129
-
130
-
131
-
132
-
133
-
134
-
135
-
136
-
137
-
138
-
139
-
140
-
141
-
142
-
143
-
144
-
145
-
146
-
147
-
148
-
149
-
150
-
151
-
152
-
153
-
154
-
155
-
156
-
157
-
158
 |
 |
